Troubleshooting, Adjustment, & Service
MOWER ADJUSTMENTS
![]() WARNING
WARNING
Before checking mower, shut off PTO and engine, remove the key, and allow all moving parts to stop.
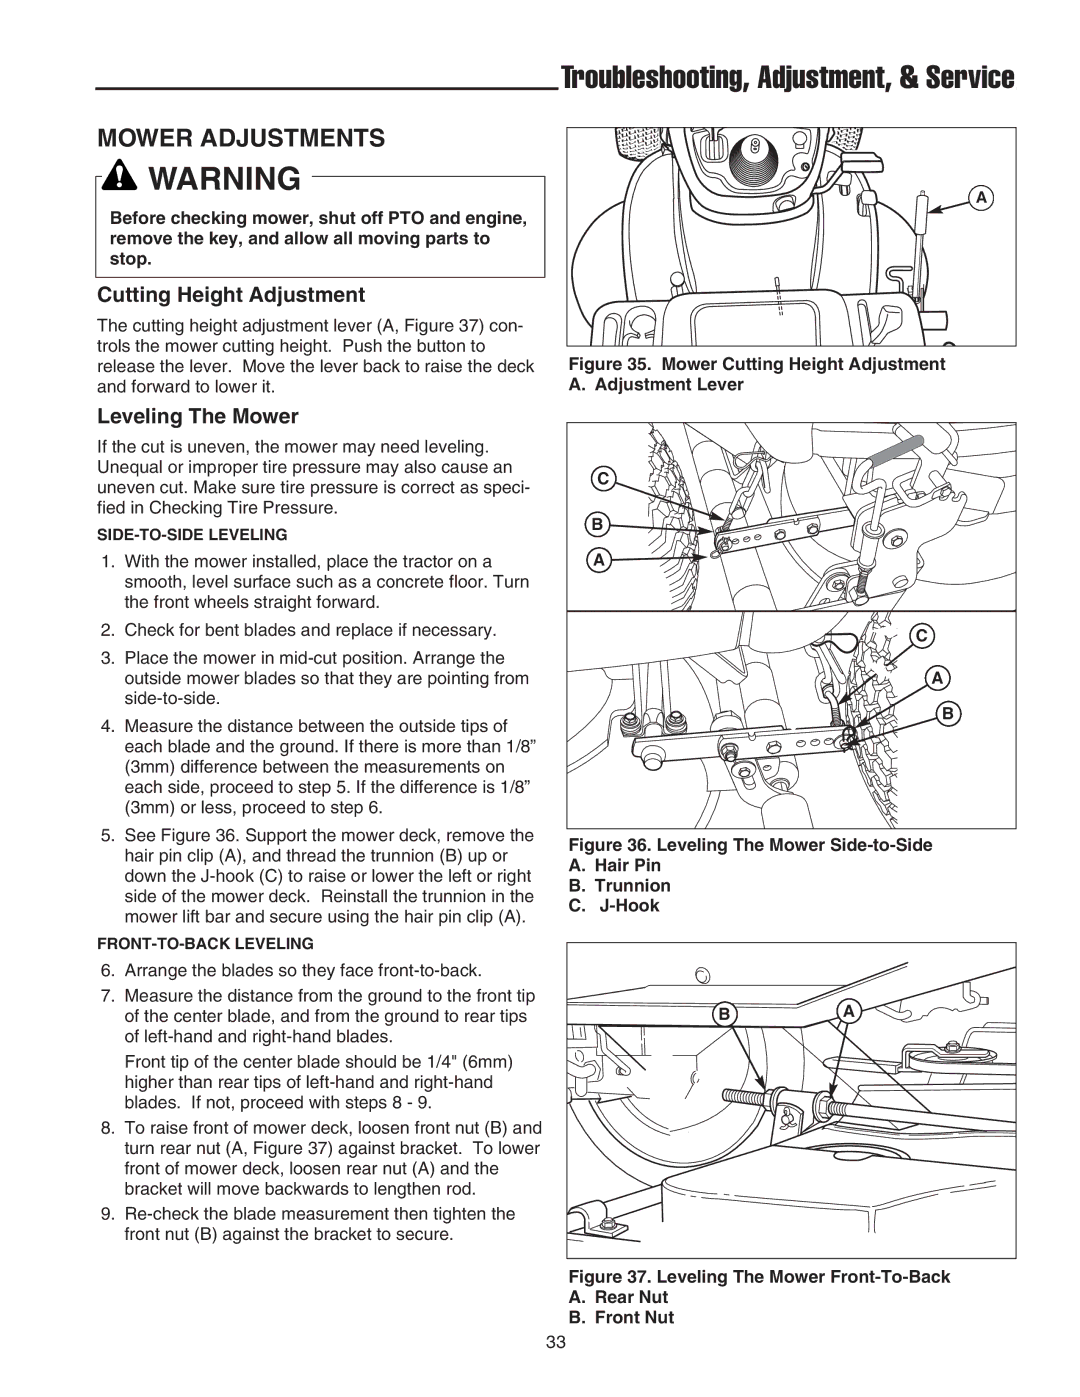
Cutting Height Adjustment
The cutting height adjustment lever (A, Figure 37) con- trols the mower cutting height. Push the button to release the lever. Move the lever back to raise the deck and forward to lower it.
Leveling The Mower
If the cut is uneven, the mower may need leveling. Unequal or improper tire pressure may also cause an uneven cut. Make sure tire pressure is correct as speci- fied in Checking Tire Pressure.
1.With the mower installed, place the tractor on a smooth, level surface such as a concrete floor. Turn the front wheels straight forward.
2.Check for bent blades and replace if necessary.
3.Place the mower in
4.Measure the distance between the outside tips of each blade and the ground. If there is more than 1/8” (3mm) difference between the measurements on each side, proceed to step 5. If the difference is 1/8” (3mm) or less, proceed to step 6.
5.See Figure 36. Support the mower deck, remove the hair pin clip (A), and thread the trunnion (B) up or down the
6.Arrange the blades so they face
7.Measure the distance from the ground to the front tip of the center blade, and from the ground to rear tips of
Front tip of the center blade should be 1/4" (6mm) higher than rear tips of
8.To raise front of mower deck, loosen front nut (B) and turn rear nut (A, Figure 37) against bracket. To lower front of mower deck, loosen rear nut (A) and the bracket will move backwards to lengthen rod.
9.
A |
Figure 35. Mower Cutting Height Adjustment A. Adjustment Lever
C |
B |
A |
C |
A |
B |
Figure 36. Leveling The Mower Side-to-Side
A.Hair Pin
B.Trunnion
C.J-Hook
BA
Figure 37. Leveling The Mower Front-To-Back
A.Rear Nut
B.Front Nut
33