
3119233, KFTHP-24-ID, KFTHP-24-OD, KFTHP-18-ID, KFTHP-12-ID specifications
Soleus Air, a recognized leader in the home heating and cooling industry, has introduced a series of advanced heat pump models designed to provide efficient and versatile climate control solutions. The KFTHP-24-OD, KFTHP-18-OD, KFTHP-24-ID, 3119233, and KFTHP-18-ID are some of the standout products in this range. Each model boasts unique features and technologies catering to various heating and cooling needs.One of the key highlights of these models is their high energy efficiency ratings. With SEER ratings that meet or exceed established standards, the Soleus Air heat pumps are designed to lower energy bills while providing optimal performance. The inverter technology integrated into these units ensures that they adjust their operation according to the changes in temperature, allowing for precise climate control and further energy savings.
Soleus Air has prioritized user convenience in the design of these heat pumps. Many models include a user-friendly remote control that allows homeowners to adjust settings from anywhere in the room. Additionally, some units feature a programmable timer and various fan speed options, making it easy to customize comfort levels according to individual preferences.
Another impressive feature is the quiet operation of these heat pumps. Designed with sound-dampening technology, the units minimize noise levels, allowing for peaceful indoor environments. This makes them an ideal choice for bedrooms, offices, or any personal space where quiet is essential.
The versatility of the KFTHP series is evident in their ability to provide both heating and cooling functions, making them suitable for year-round climate control. The units can efficiently reverse the refrigeration cycle to provide warmth during winter while effectively cooling down spaces in the summer months.
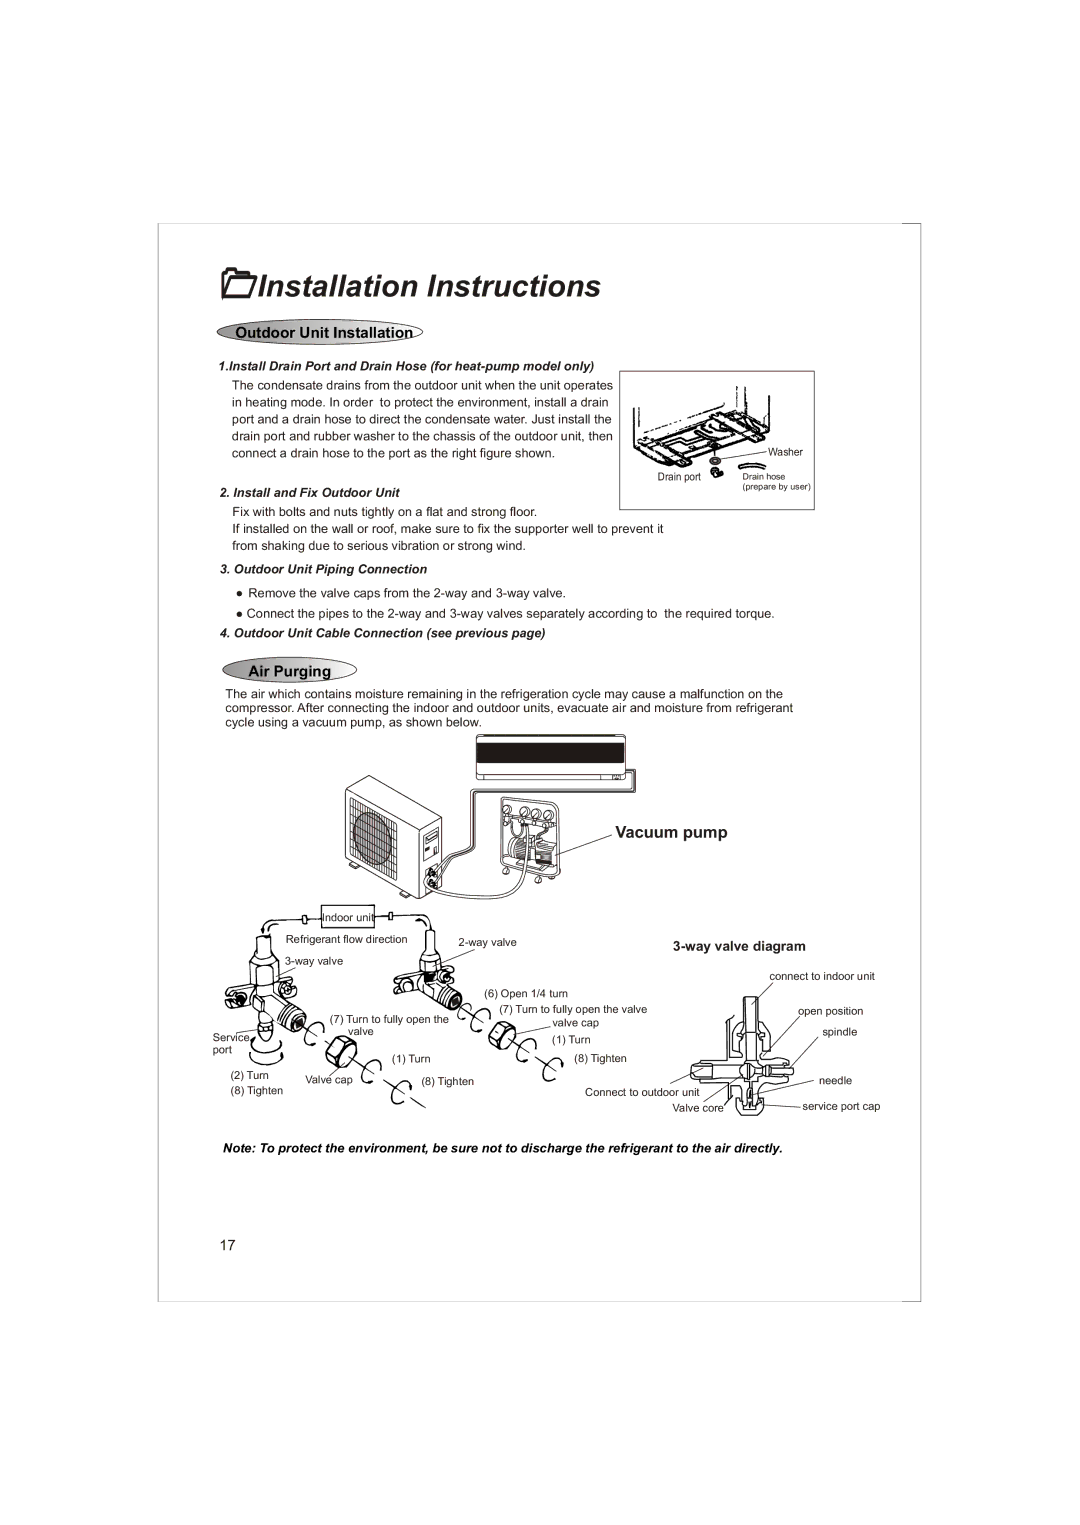
Installation is straightforward with the KFTHP models, as they come with comprehensive user manuals and support. The compact design of these units makes them adaptable for various room sizes, ensuring that efficient climate control is accessible in both residential and commercial settings.
In summary, the Soleus Air KFTHP-24-OD, KFTHP-18-OD, KFTHP-24-ID, 3119233, and KFTHP-18-ID heat pumps are excellent investments for those seeking efficient heating and cooling solutions. Their energy efficiency, user-friendly features, quiet operation, and versatility make them standout choices for consumers looking to enhance their indoor comfort.