
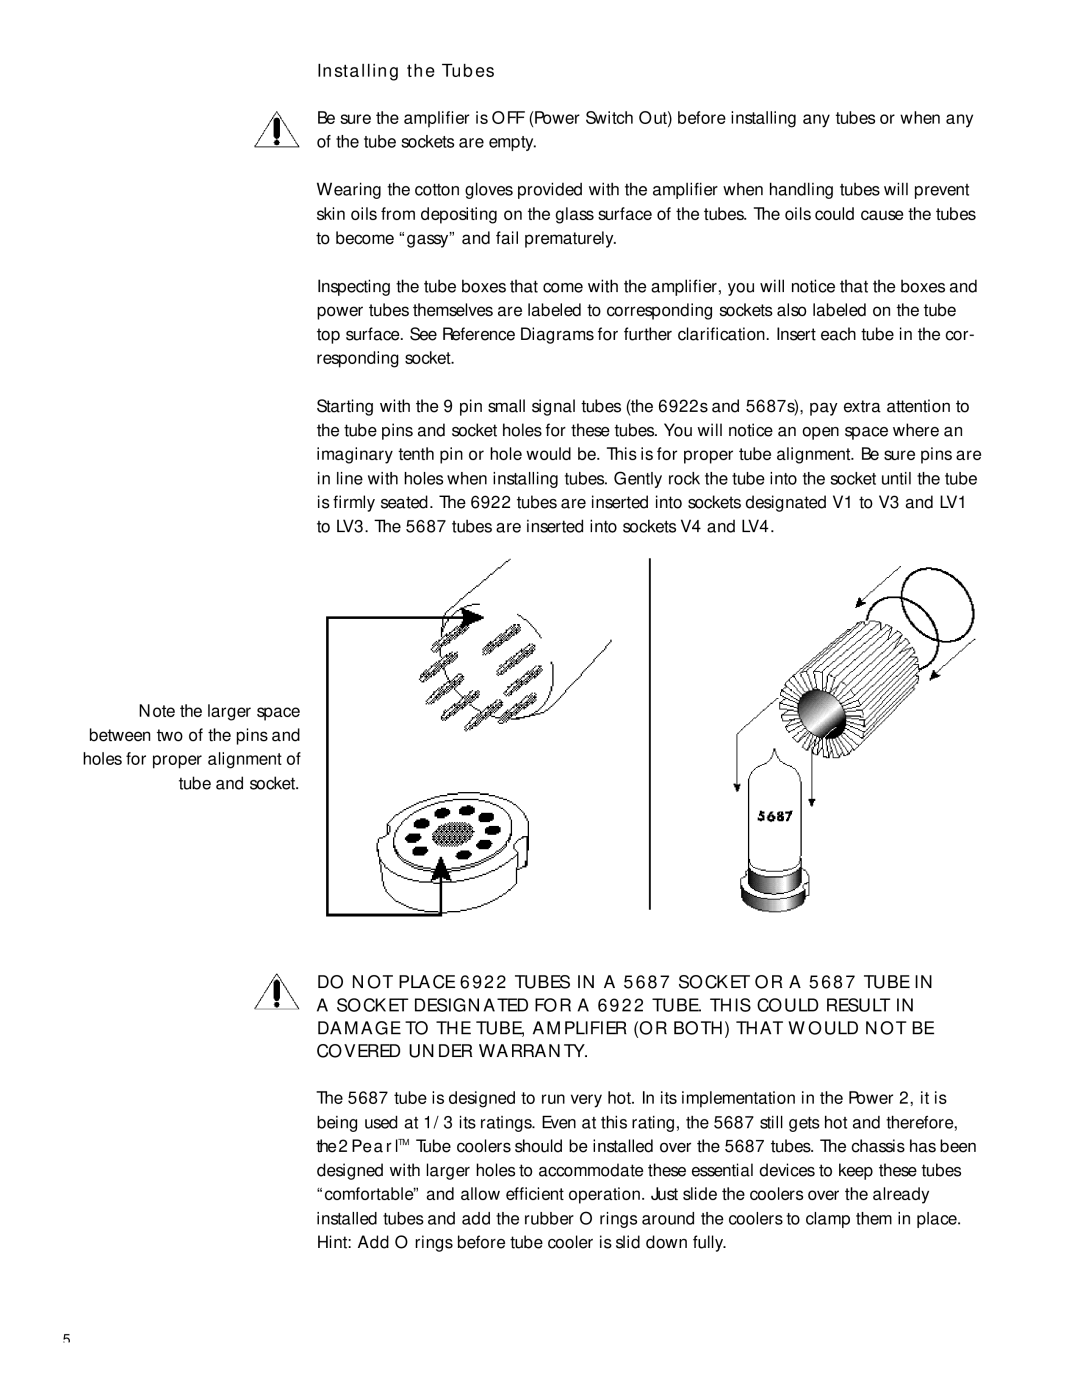
Power 2 specifications
Sonic Impact Technologies Power 2 is an innovative audio solution designed for a wide range of applications, from personal entertainment to professional sound reinforcement. This advanced product combines cutting-edge technologies with user-friendly features, delivering exceptional sound quality that meets the demands of modern audio environments.One of the standout characteristics of the Power 2 is its compact, lightweight design, which allows for easy portability and installation. Weighing in at a mere few pounds, it can effortlessly be transported to various locations, making it an ideal choice for musicians, DJs, and presenters on the move. Its sleek exterior not only looks modern but is also engineered for durability, ensuring it can withstand the rigors of frequent use.
At the heart of the Power 2's performance is its advanced Class-D amplification technology. This efficient amplifier delivers a powerful output while maintaining low power consumption. The result is a crystal-clear audio experience with low distortion, even at higher volume levels. Users can expect rich bass tones combined with clear highs, providing an immersive listening experience.
The Power 2 also features integrated Bluetooth connectivity, allowing users to stream music wirelessly from smartphones, tablets, or laptops. This is a significant advantage for those who prefer to forgo traditional wired connections, offering flexibility and convenience for today's digital age. Additionally, it supports a range of audio formats, ensuring compatibility with various devices and platforms.
Another remarkable aspect of the Sonic Impact Technologies Power 2 is its user-friendly interface, equipped with intuitive controls for volume, bass, and treble adjustments. This allows users to customize their audio experience to their unique preferences, ensuring optimal sound quality in any environment. Furthermore, the unit includes multiple input options, such as USB and AUX, enabling seamless integration with various audio sources.
Power 2's robust battery life is another noteworthy feature. Ideal for outdoor events or locations with limited power access, the device can operate for extended periods without requiring a recharge. This makes it an excellent choice for festivals, parties, or any gathering where power availability is uncertain.
Overall, Sonic Impact Technologies Power 2 is a versatile audio solution that stands out in its category. Its combination of portability, advanced amplification technology, Bluetooth connectivity, and extended battery life makes it a top-tier choice for audio enthusiasts and professionals alike. Whether you're looking to enhance your listening experience or need reliable sound output for an event, the Power 2 offers a complete package of features designed to meet the diverse needs of users.