Preparations
Attaching the CA-755/755P to a BETACAM SX Camcorder or a Digital BETACAM Camcorder
When the CA-755/755P is attached to the BETACAM SX Camcorder or the Digital BETACAM Camcorder, the 40-pin connector and battery connector on the CA- 755/755P are connected to identical connectors on the BETACAM SX Camcorder or the Digital BETACAM Camcorder. Electrical power and signals are transmitted through these connectors.
Note
Before attaching the CA-755/755P to the BETACAM SX Camcorder, or the Digital BETACAM Camcorder, make sure that the Camcorder is on a flat and stable surface.
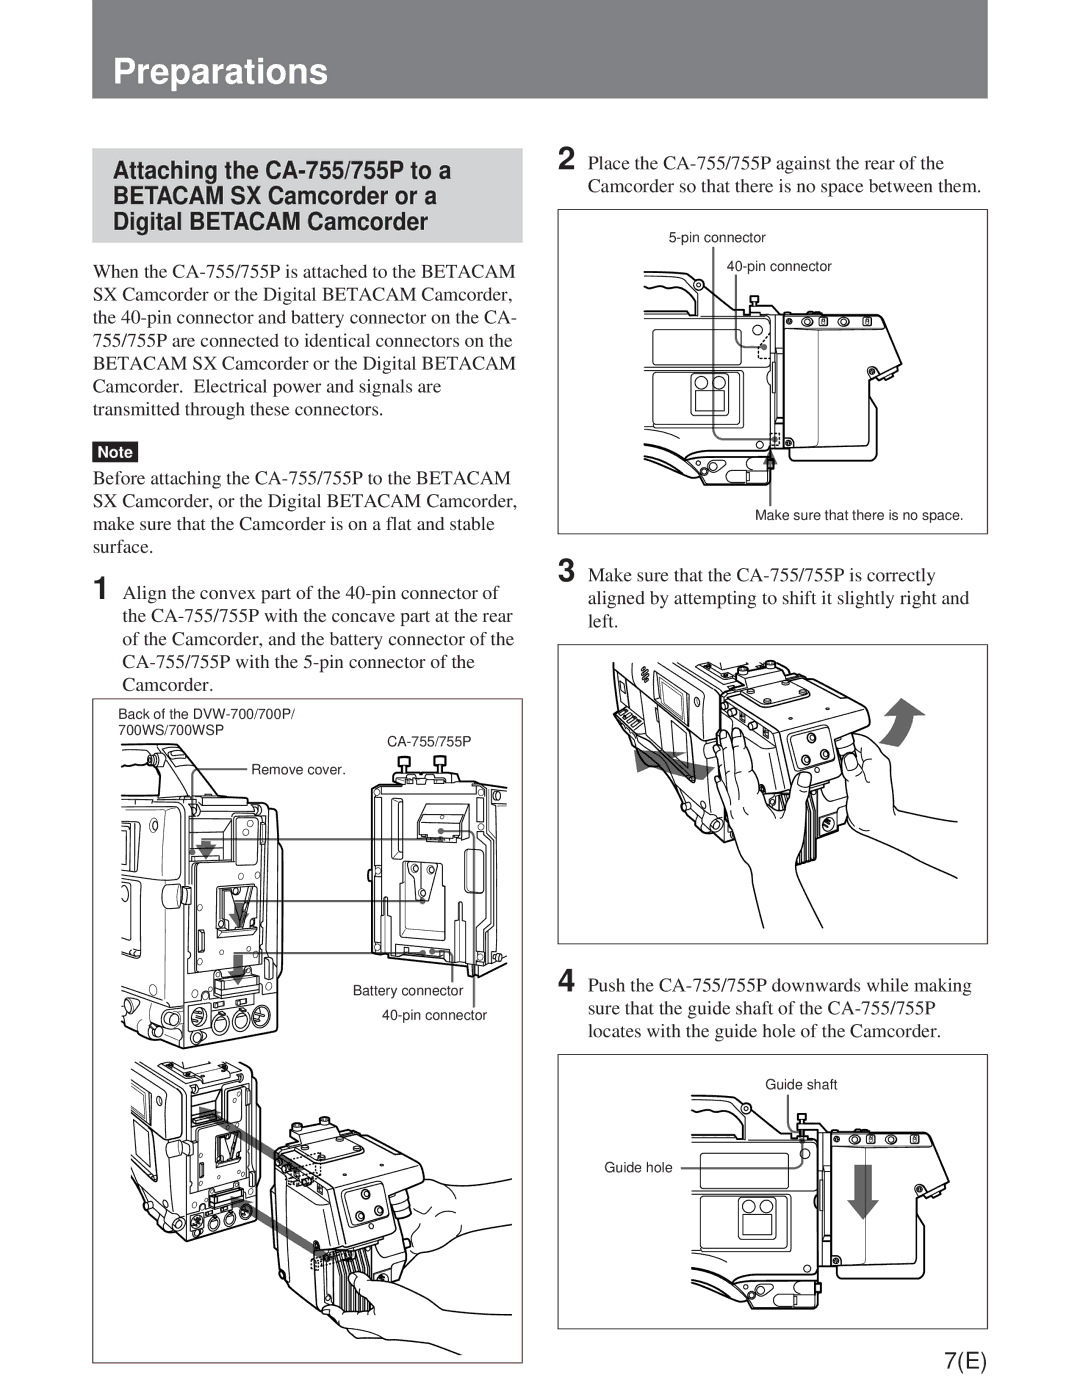
1 Align the convex part of the 40-pin connector of the CA-755/755P with the concave part at the rear of the Camcorder, and the battery connector of the CA-755/755P with the 5-pin connector of the Camcorder.
Back of the DVW-700/700P/ |
700WS/700WSP |
CA-755/755P |
Remove cover. |
Battery connector |
40-pin connector |
2 Place the CA-755/755P against the rear of the Camcorder so that there is no space between them.
5-pin connector
40-pin connector
Make sure that there is no space.
3 Make sure that the CA-755/755P is correctly aligned by attempting to shift it slightly right and left.
4 Push the CA-755/755P downwards while making sure that the guide shaft of the CA-755/755P locates with the guide hole of the Camcorder.
Guide shaft
Guide hole
7(E)