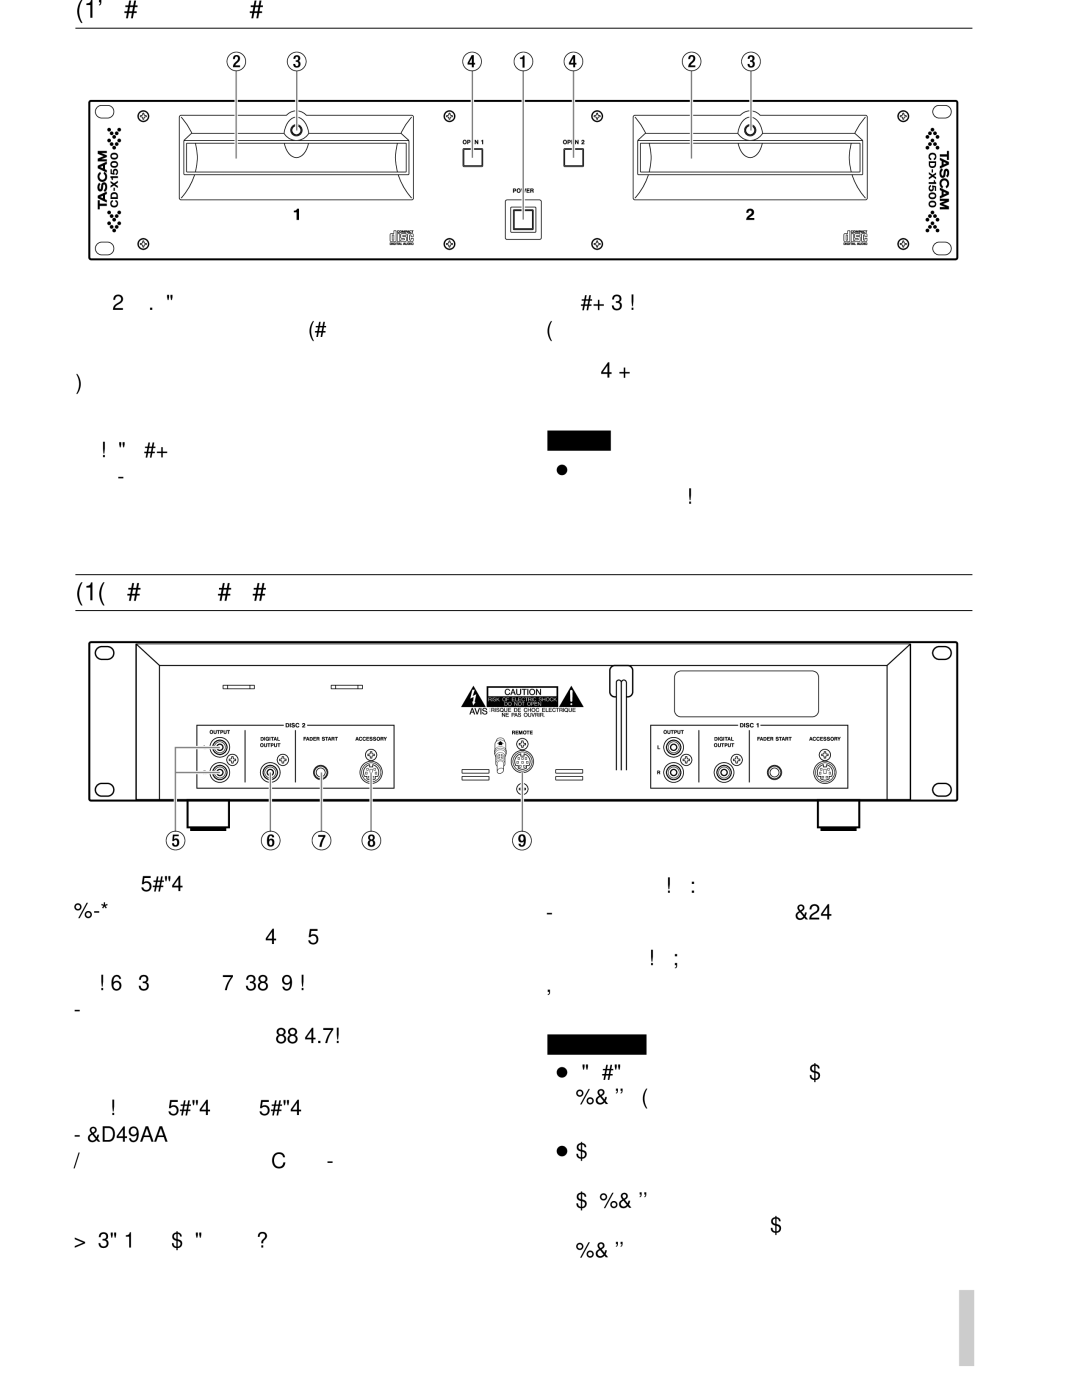
2-1. Main Unit (Front Panel)
1POWER switch
Turns the power on and off. The tray LEDs light when power is supplied.
When Timer start function is on, playback begins when power is supplied.
2Disc trays
Insert CD into these trays, label side upwards.
3Tray LEDs
Lights when power is supplied.
4OPEN keys
Open and close the appropriate tray.
NOTE
…These keys cannot be used when direct mode (Preset menu) is off and disc is being played back.
2-2. Main Unit (Rear Panel)
5OUTPUT jacks (RCA) | 8ACCESSORY (MINI DIN 6P) |
RCA connectors providing line level output | Connect the optional scratch controller |
signals, one set each for discs 1 and 2. | 9REMOTE (MINI DIN 8P) |
|
6DIGITAL OUTPUT (COAXIAL, S/PDIF)
Coaxial connectors provide digital output signals. These connectors can output the 44.1KHz digital signals constantly even if pitch control is activated.
7FADER START jacks (MINI jack)
the mixer which supports the fader start function with appropriate cable as well as audio signal. (TIP: Start, GND: back cue)
Use this connector to connect the remote control unit.
WARNING
…DO NOT use any cable with the CD- X1500 except the cable supplied with the unit.
…Connect the cable in the way shown on the illustration on the rear panel of the
TASCAM