Removing, Installing, and Replacing Components
31
8 If necessary, remove any
!Touch any exposed metal part of chassis to discharge static electricity in your body before handling an
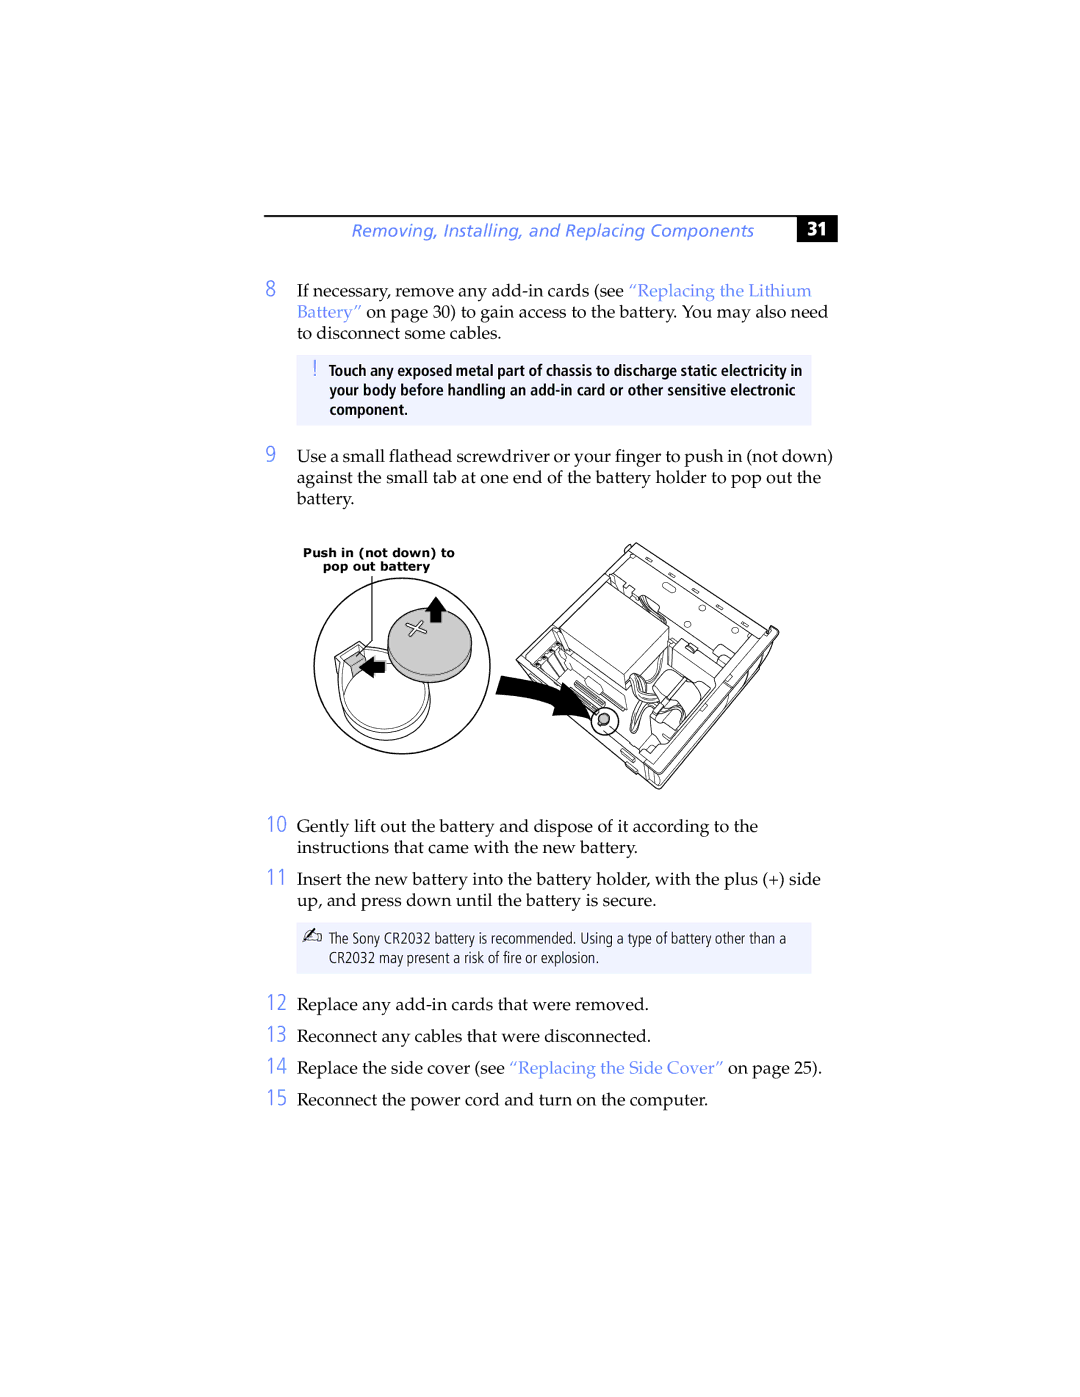
9 Use a small flathead screwdriver or your finger to push in (not down) against the small tab at one end of the battery holder to pop out the battery.
Push in (not down) to pop out battery
10 Gently lift out the battery and dispose of it according to the instructions that came with the new battery.
11 Insert the new battery into the battery holder, with the plus (+) side up, and press down until the battery is secure.
✍The Sony CR2032 battery is recommended. Using a type of battery other than a CR2032 may present a risk of fire or explosion.
12 Replace any
13 Reconnect any cables that were disconnected.
14 Replace the side cover (see “Replacing the Side Cover” on page 25).
15