Basic recording
Use only type I (normal) tapes. Deck B is the recording deck.
1Insert the recordable tape in deck B.
Press zPUSH EJECT/CLOSE to open the outer cassette holder, and insert with the exposed side down and the side to be recorded on facing out from the unit.
Wind up the tape to the desired point if needed.
2Press MODE repeatedly to display “REV MODE”, and press ENTER within 6 seconds. Then turn MULTI JOG within 6 seconds to select a reverse mode.
3Prepare the source.
To record CD(s), select the CD function and load disc(s). To record a radio broadcast, tune in to the desired station. To record a tape, insert the source tape in deck A and select the TAPE function (deck A).
To record from connected external equipment, select the VIDEO (MD) function and prepare the equipment.
4Press REC PAUSE/START. Recording is paused and ready to start.
5Press REC PAUSE/START again to begin recording.
If your source is CD, press d.
If your source is connected equipment, manually start playback of the source.
•Volume or tone adjustment does not affect recording.
•“NO TAB” is displayed if you attempt to record a tape with the tab broken off.
To stop recording
Press s.
To pause recording
Press REC PAUSE/START. Press again to resume.
To record a selected set of tracks from a CD Program the desired tracks (see “Programmed playback”) and then press REC PAUSE/START twice and then press d.
To erase a tape
1Insert the tape in deck B. Set the tape to the desired point if needed.
2Press MODE repeatedly to display “REV MODE”, and press ENTER within 6 seconds. Then turn MULTI JOG within 6 seconds to select a reverse mode.
3Press TAPE A/B to select “TAPE B”.
4Press REC PAUSE/START.
CD SYNC
You can automatically switch to recording tape from a CD.
1Insert the recordable tape in deck B.
2Load disc(s).
3Select playback mode with MODE, MULTI JOG and ENTER (see “Selecting playback mode”). •You cannot select Repeat playback or Shuffle playback.
4Press CD SYNC.
CD function is automatically selected.
5Press REC PAUSE/START to start recording.
Automatic CD dubbing
You can use your unit to automatically determine the best tape length and rearrange track order for recording from a CD. The order of tracks is changed so that no music is split from one side to the other side of the tape.
1Load a disc and select it to play by pressing a
DISC CHANGE/DISK SKIP.
2Press SHIFT+EDIT on the remote.
The unit will read the CD then display what tape length is |
|
necessary. |
|
•Tape lengths displayed, in minutes, are: 10, 20, 30, 40, |
|
46, 50, 54, 60, 64, 70, 80 and 90. If a tape longer than | En |
90 minutes is needed “OVER 90” is displayed. |
3Insert the recordable tape in deck B.
4Press CD SYNC.
5Press REC PAUSE/START to begin recording.
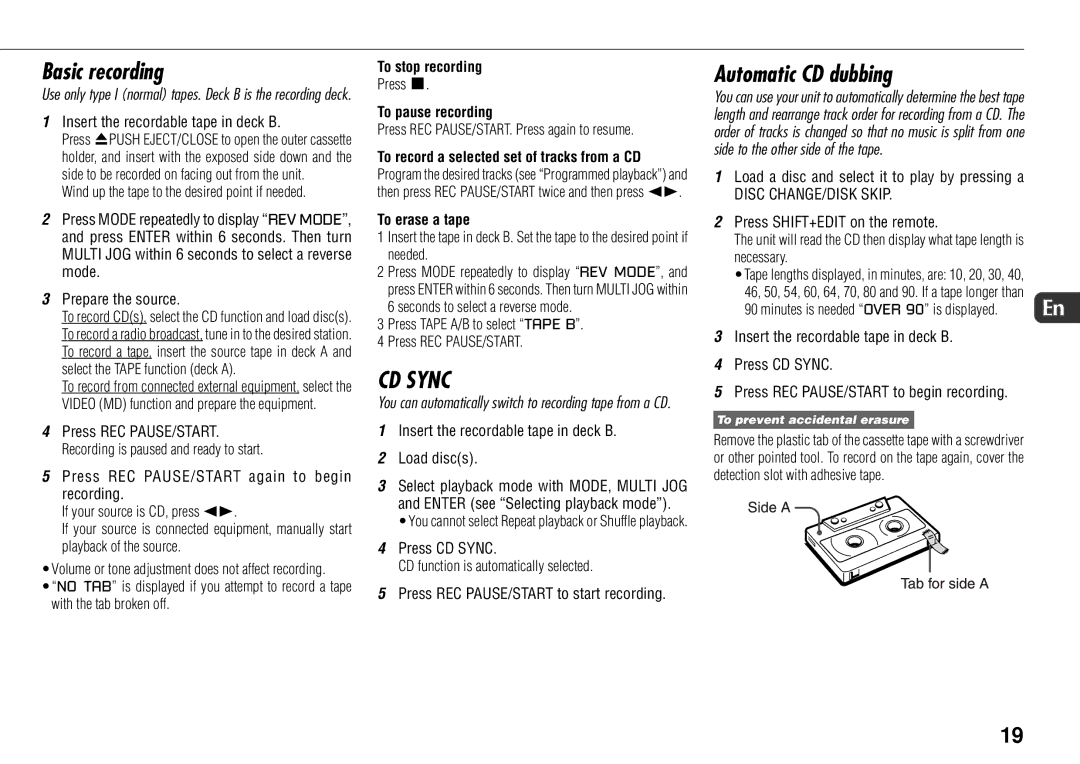
To prevent accidental erasure
Remove the plastic tab of the cassette tape with a screwdriver or other pointed tool. To record on the tape again, cover the detection slot with adhesive tape.
19