MZ-E300
|
|
|
|
| SECTION 3 | |
|
|
|
| DISASSEMBLY | ||
• The equipment can be removed using the following procedure. | ||||||
|
| “Lid ASSY, Upper”, |
|
|
| Main board |
Set |
|
| Mechanism deck |
|
| |
|
|
|
|
| ||
Holder ASSY | Optical |
|
Note : Follow the disassembly procedure in the numerical order given.
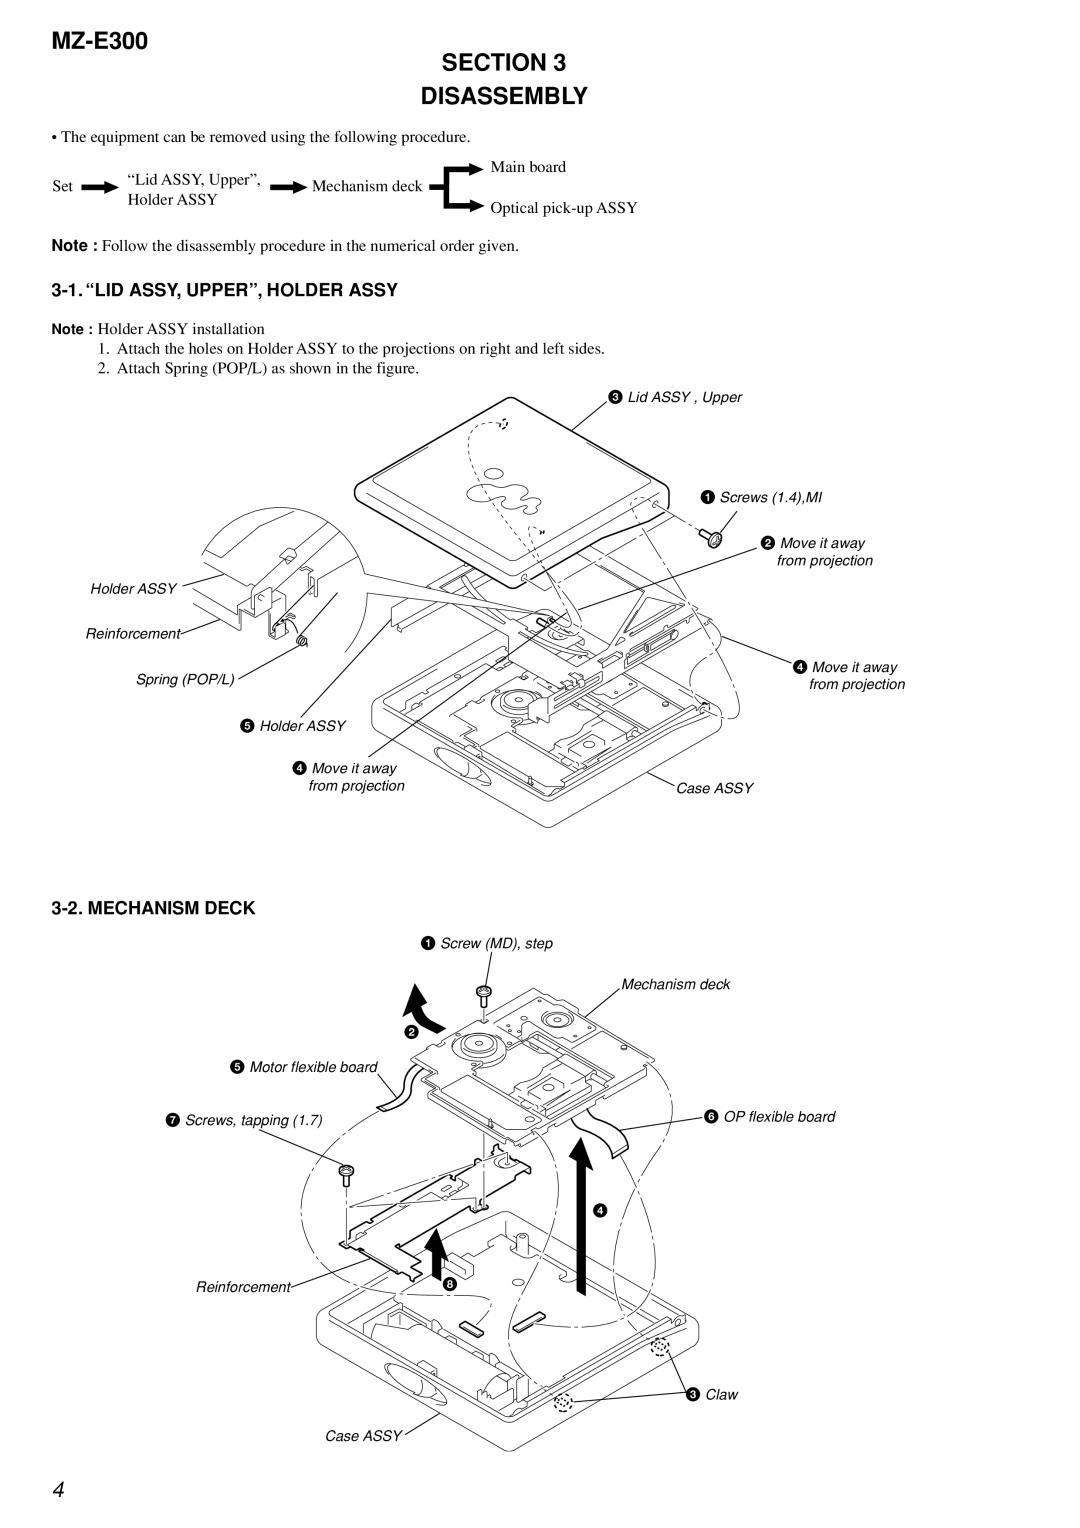
3-1. “LID ASSY, UPPER”, HOLDER ASSY
Note : Holder ASSY installation
1.Attach the holes on Holder ASSY to the projections on right and left sides.
2.Attach Spring (POP/L) as shown in the figure.
3 Lid ASSY , Upper
1 Screws (1.4),MI
2 Move it away from projection
Holder ASSY
Reinforcement
Spring (POP/L) | 4 Move it away | |
from projection | ||
|
5Holder ASSY
4Move it away
from projection | Case ASSY |
3-2. MECHANISM DECK
1Screw (MD), step
Mechanism deck
2
5Motor flexible board
7 Screws, tapping (1.7) | 6 OP flexible board |
4
Reinforcement![]() 8
8
3 Claw
Case ASSY
4