Handbook for SXV-M5C Issue 1 August 2004
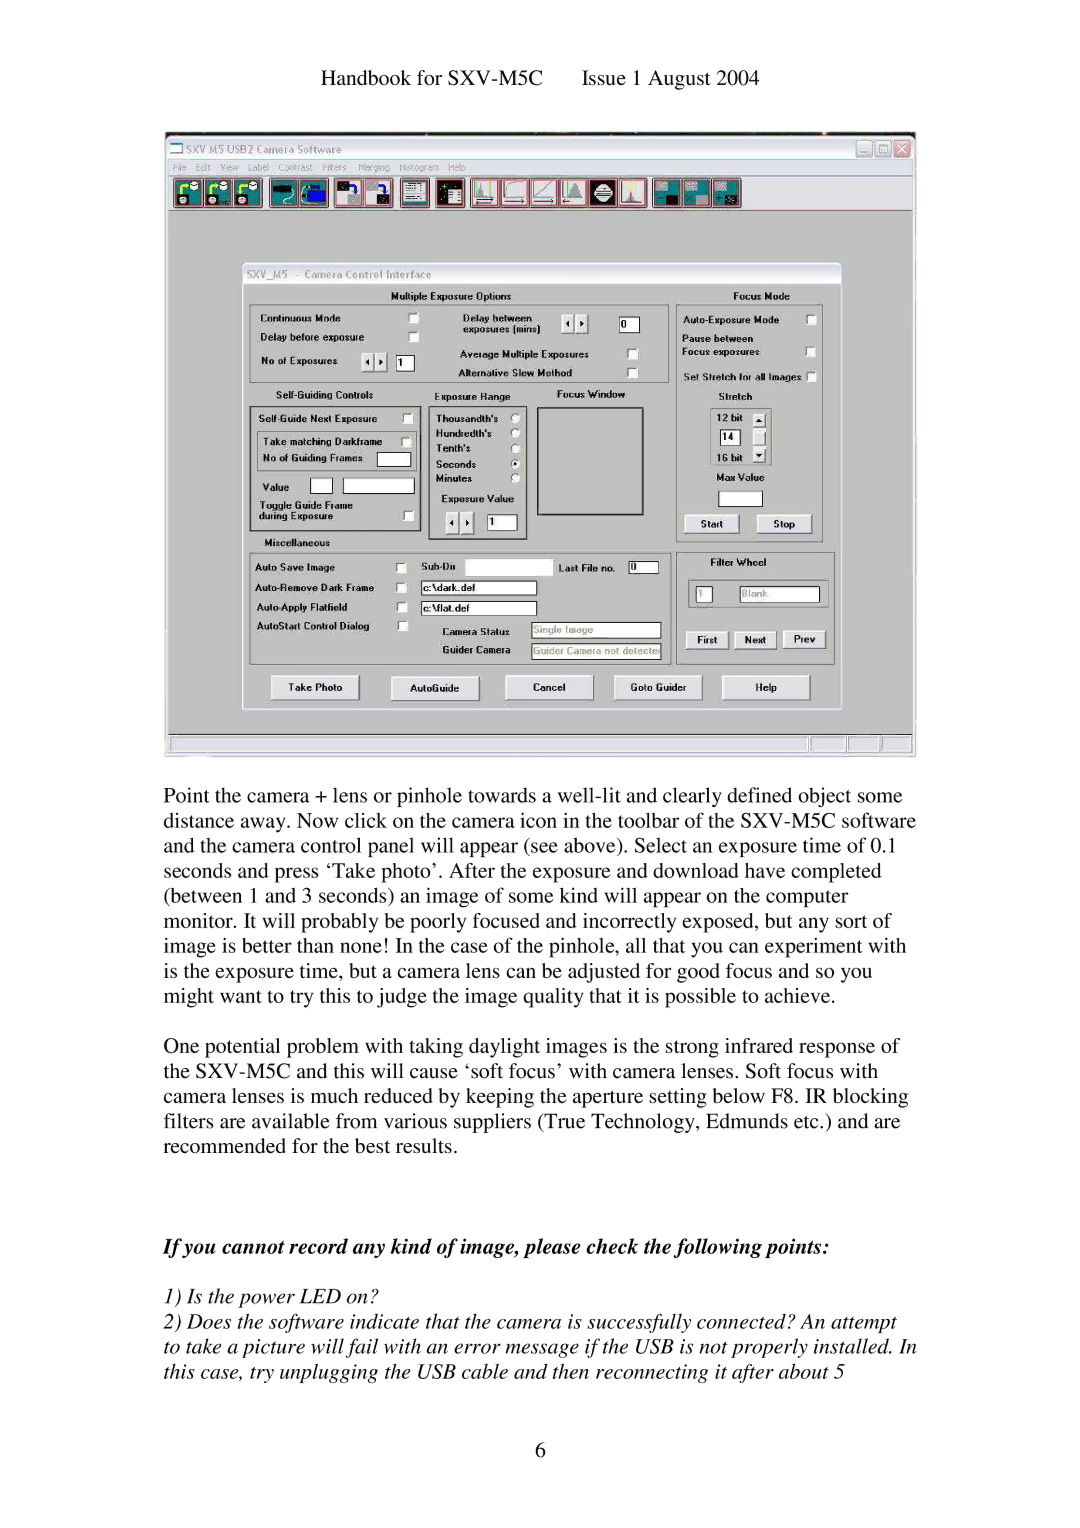
Point the camera + lens or pinhole towards a well-lit and clearly defined object some distance away. Now click on the camera icon in the toolbar of the SXV-M5C software and the camera control panel will appear (see above). Select an exposure time of 0.1 seconds and press ‘Take photo’. After the exposure and download have completed (between 1 and 3 seconds) an image of some kind will appear on the computer monitor. It will probably be poorly focused and incorrectly exposed, but any sort of image is better than none! In the case of the pinhole, all that you can experiment with is the exposure time, but a camera lens can be adjusted for good focus and so you might want to try this to judge the image quality that it is possible to achieve.
One potential problem with taking daylight images is the strong infrared response of the SXV-M5C and this will cause ‘soft focus’ with c amera lenses. Soft focus with camera lenses is much reduced by keeping the aperture setting below F8. IR blocking filters are available from various suppliers (True Technology, Edmunds etc.) and are recommended for the best results.
If you cannot record any kind of image, please check the following points:
1)Is the power LED on?
2)Does the software indicate that the camera is successfully connected? An attempt to take a picture will fail with an error message if the USB is not properly installed. In this case, try unplugging the USB cable and then reconnecting it after about 5