Getting Started

Unpacking

Check that you received the following items with the amplifier:

Remote controller (remote) (1)

Size AA (R6) batteries (2)

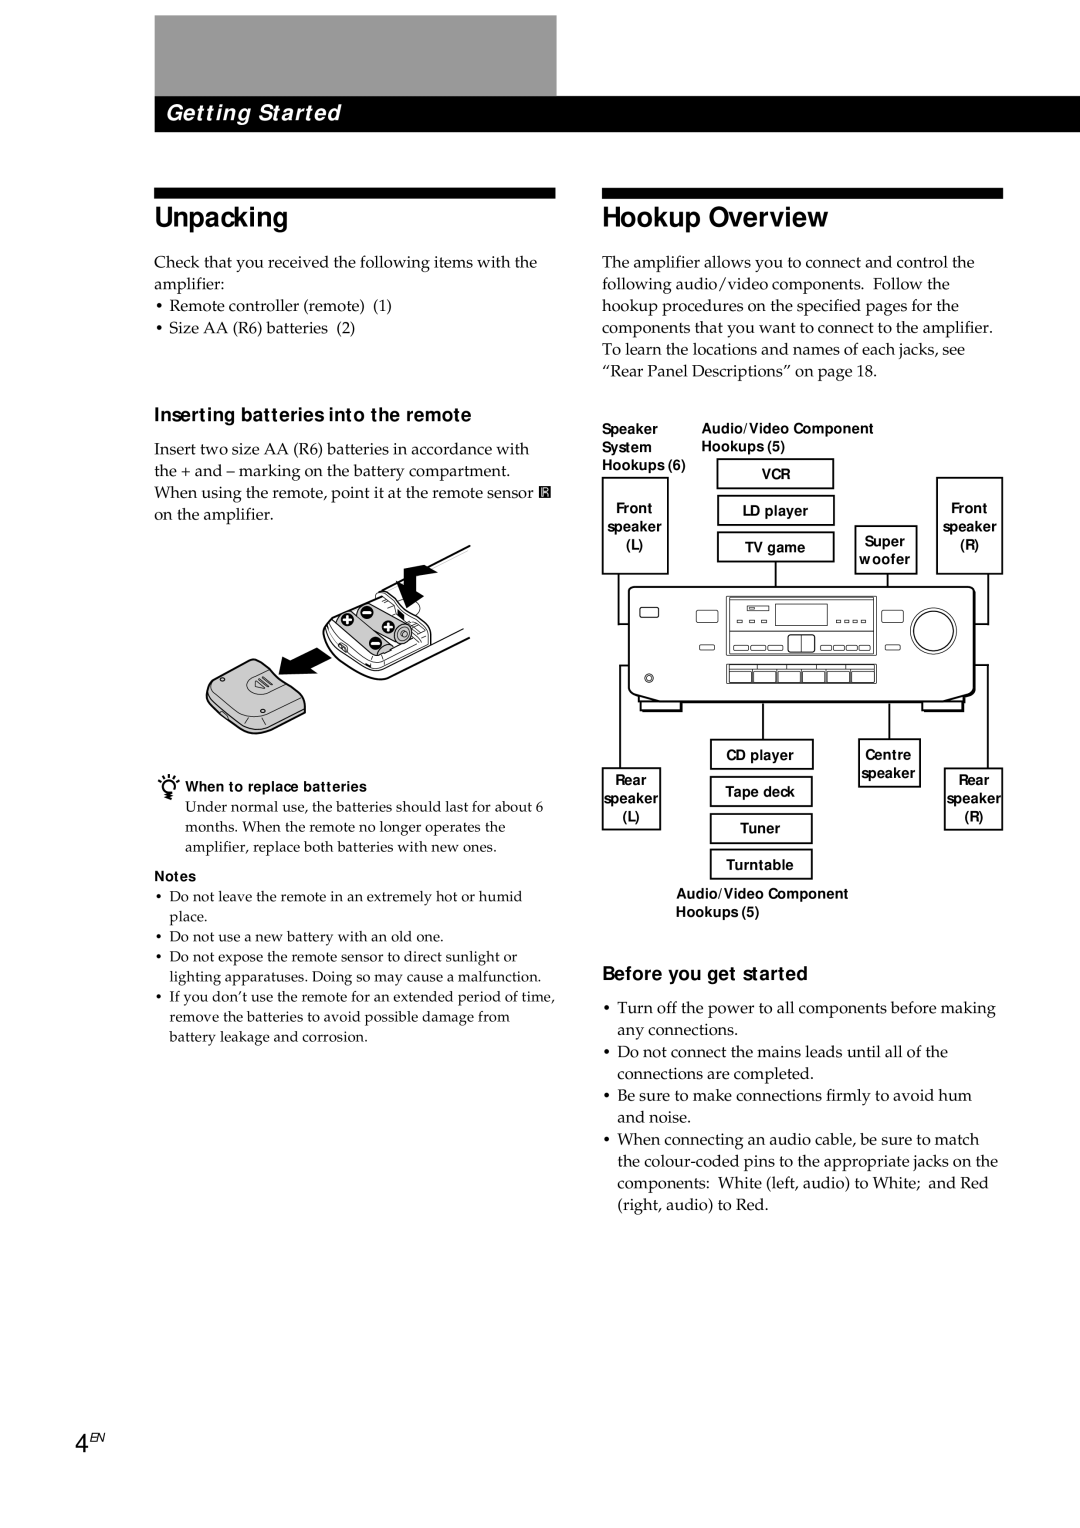
Inserting batteries into the remote

Insert two size AA (R6) batteries in accordance with the + and – marking on the battery compartment. When using the remote, point it at the remote sensor g on the amplifier.

Hookup Overview

The amplifier allows you to connect and control the following audio/video components. Follow the hookup procedures on the specified pages for the components that you want to connect to the amplifier. To learn the locations and names of each jacks, see “Rear Panel Descriptions” on page 18.

Speaker

Audio/Video Component


System

Hookups (5)


Hookups (6)


VCR


Front


Front


LD player


speaker


speaker


(L)


TV game


Super


(R)


woofer


When to replace batteries

Under normal use, the batteries should last for about 6 months. When the remote no longer operates the amplifier, replace both batteries with new ones.

Notes

• Do not leave the remote in an extremely hot or humid

place.

• Do not use a new battery with an old one.

• Do not expose the remote sensor to direct sunlight or

Rear

speaker

(L)

CD player

Tape deck

Tuner

Turntable

Audio/Video Component Hookups (5)

Centre

speaker

Rear

speaker

(R)

lighting apparatuses. Doing so may cause a malfunction.

• If you don’t use the remote for an extended period of time,

remove the batteries to avoid possible damage from

battery leakage and corrosion.

Before you get started

Turn off the power to all components before making any connections.

Do not connect the mains leads until all of the connections are completed.

Be sure to make connections firmly to avoid hum and noise.

When connecting an audio cable, be sure to match the colour-coded pins to the appropriate jacks on the components: White (left, audio) to White; and Red (right, audio) to Red.

4EN

Page 4
Image 4
Sony TA-AV561A manual Unpacking, Hookup Overview, Inserting batteries into the remote, Before you get started

TA-AV561A specifications

The Sony TA-AV561A is a remarkable audio amplifier that has captured the attention of audiophiles and casual listeners alike since its inception. This device is known for its powerful performance, versatile connectivity, and user-friendly features, making it an attractive choice for those looking to elevate their home audio experience.

At the heart of the TA-AV561A is its robust amplification system. Featuring a total output of 100 watts per channel, this amplifier is designed to drive a variety of speakers with ease, providing a rich and immersive soundstage. The amplifier employs a high-efficiency Class A/B design, which allows it to deliver crisp highs and deep bass without sacrificing clarity. This makes the TA-AV561A suitable for various music genres, from classical to rock, ensuring that every note is rendered with precision.

One of the standout features of the TA-AV561A is its extensive range of connectivity options. The amplifier provides multiple input sources, including phono, CD, and tape inputs, making it easy to connect to a wide array of audio components. Additionally, it includes both analog and digital outputs, allowing users to integrate modern devices seamlessly. This versatility makes the TA-AV561A an excellent choice for users looking to build a comprehensive home audio setup.

In terms of sound customization, the TA-AV561A is equipped with a range of tone controls, including bass and treble adjustments. Users can tailor their listening experience to fit their personal preferences or the acoustics of their environment. The built-in loudness control also enhances low-level listening by boosting bass frequencies, making it ideal for late-night sessions when lower volume levels are preferred.

Another notable characteristic of the TA-AV561A is its thoughtful design. The amplifier features a sleek and stylish chassis that fits well in any living room or entertainment setup. Its user-friendly layout ensures that users can easily access controls and inputs.

In summary, the Sony TA-AV561A stands out as a top-tier audio amplifier with a powerful output, extensive connectivity, and customizable sound options. Its blend of technology and design makes it an enduring choice for anyone who prioritizes high-quality home audio.