
TA-AV561A specifications
The Sony TA-AV561A is a remarkable audio amplifier that has captured the attention of audiophiles and casual listeners alike since its inception. This device is known for its powerful performance, versatile connectivity, and user-friendly features, making it an attractive choice for those looking to elevate their home audio experience.At the heart of the TA-AV561A is its robust amplification system. Featuring a total output of 100 watts per channel, this amplifier is designed to drive a variety of speakers with ease, providing a rich and immersive soundstage. The amplifier employs a high-efficiency Class A/B design, which allows it to deliver crisp highs and deep bass without sacrificing clarity. This makes the TA-AV561A suitable for various music genres, from classical to rock, ensuring that every note is rendered with precision.
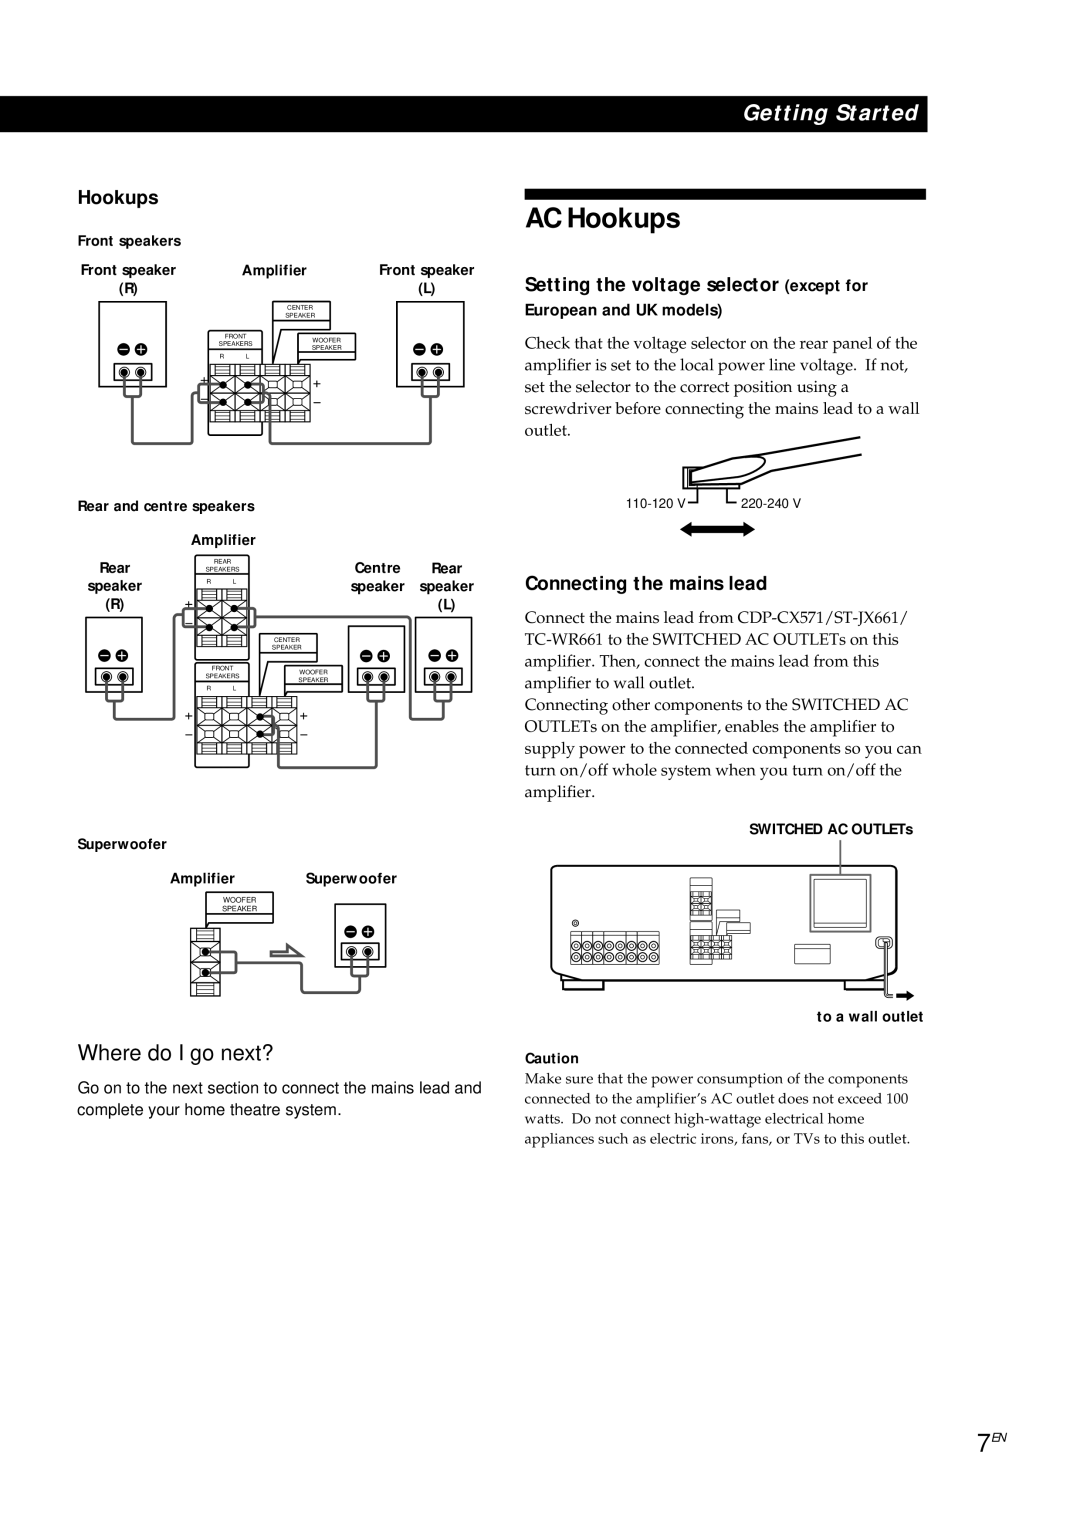
One of the standout features of the TA-AV561A is its extensive range of connectivity options. The amplifier provides multiple input sources, including phono, CD, and tape inputs, making it easy to connect to a wide array of audio components. Additionally, it includes both analog and digital outputs, allowing users to integrate modern devices seamlessly. This versatility makes the TA-AV561A an excellent choice for users looking to build a comprehensive home audio setup.
In terms of sound customization, the TA-AV561A is equipped with a range of tone controls, including bass and treble adjustments. Users can tailor their listening experience to fit their personal preferences or the acoustics of their environment. The built-in loudness control also enhances low-level listening by boosting bass frequencies, making it ideal for late-night sessions when lower volume levels are preferred.
Another notable characteristic of the TA-AV561A is its thoughtful design. The amplifier features a sleek and stylish chassis that fits well in any living room or entertainment setup. Its user-friendly layout ensures that users can easily access controls and inputs.
In summary, the Sony TA-AV561A stands out as a top-tier audio amplifier with a powerful output, extensive connectivity, and customizable sound options. Its blend of technology and design makes it an enduring choice for anyone who prioritizes high-quality home audio.