Installation/Connections
First complete the electrical connections, and then check them for correctness. If you are not confident working with electrical wiring, removing and reinstalling interior panels, carpeting, dashboards or other components of your vehicle, please call your dealer in order to have the unit professionally installed.
Before the installation
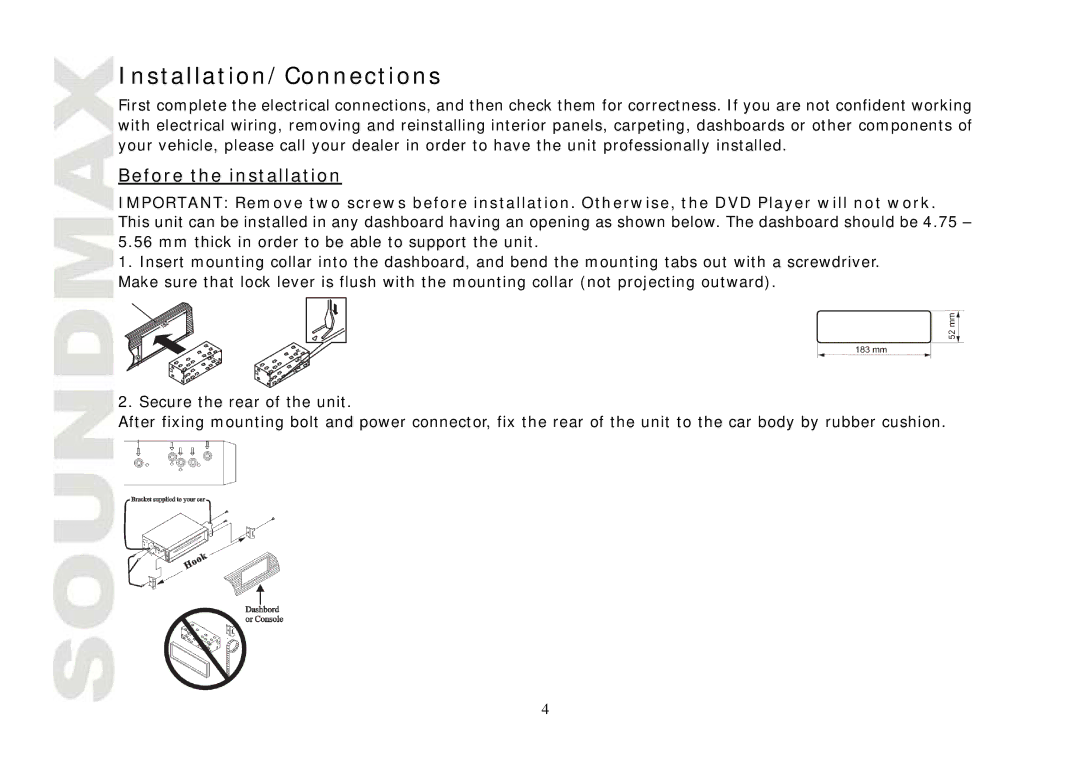
IMPORTANT: Remove two screws before installation. Otherwise, the DVD Player will not work. This unit can be installed in any dashboard having an opening as shown below. The dashboard should be 4.75 – 5.56 mm thick in order to be able to support the unit.
1.Insert mounting collar into the dashboard, and bend the mounting tabs out with a screwdriver. Make sure that lock lever is flush with the mounting collar (not projecting outward).
2.Secure the rear of the unit.
After fixing mounting bolt and power connector, fix the rear of the unit to the car body by rubber cushion.
4