BIOS Setup Utility |
|
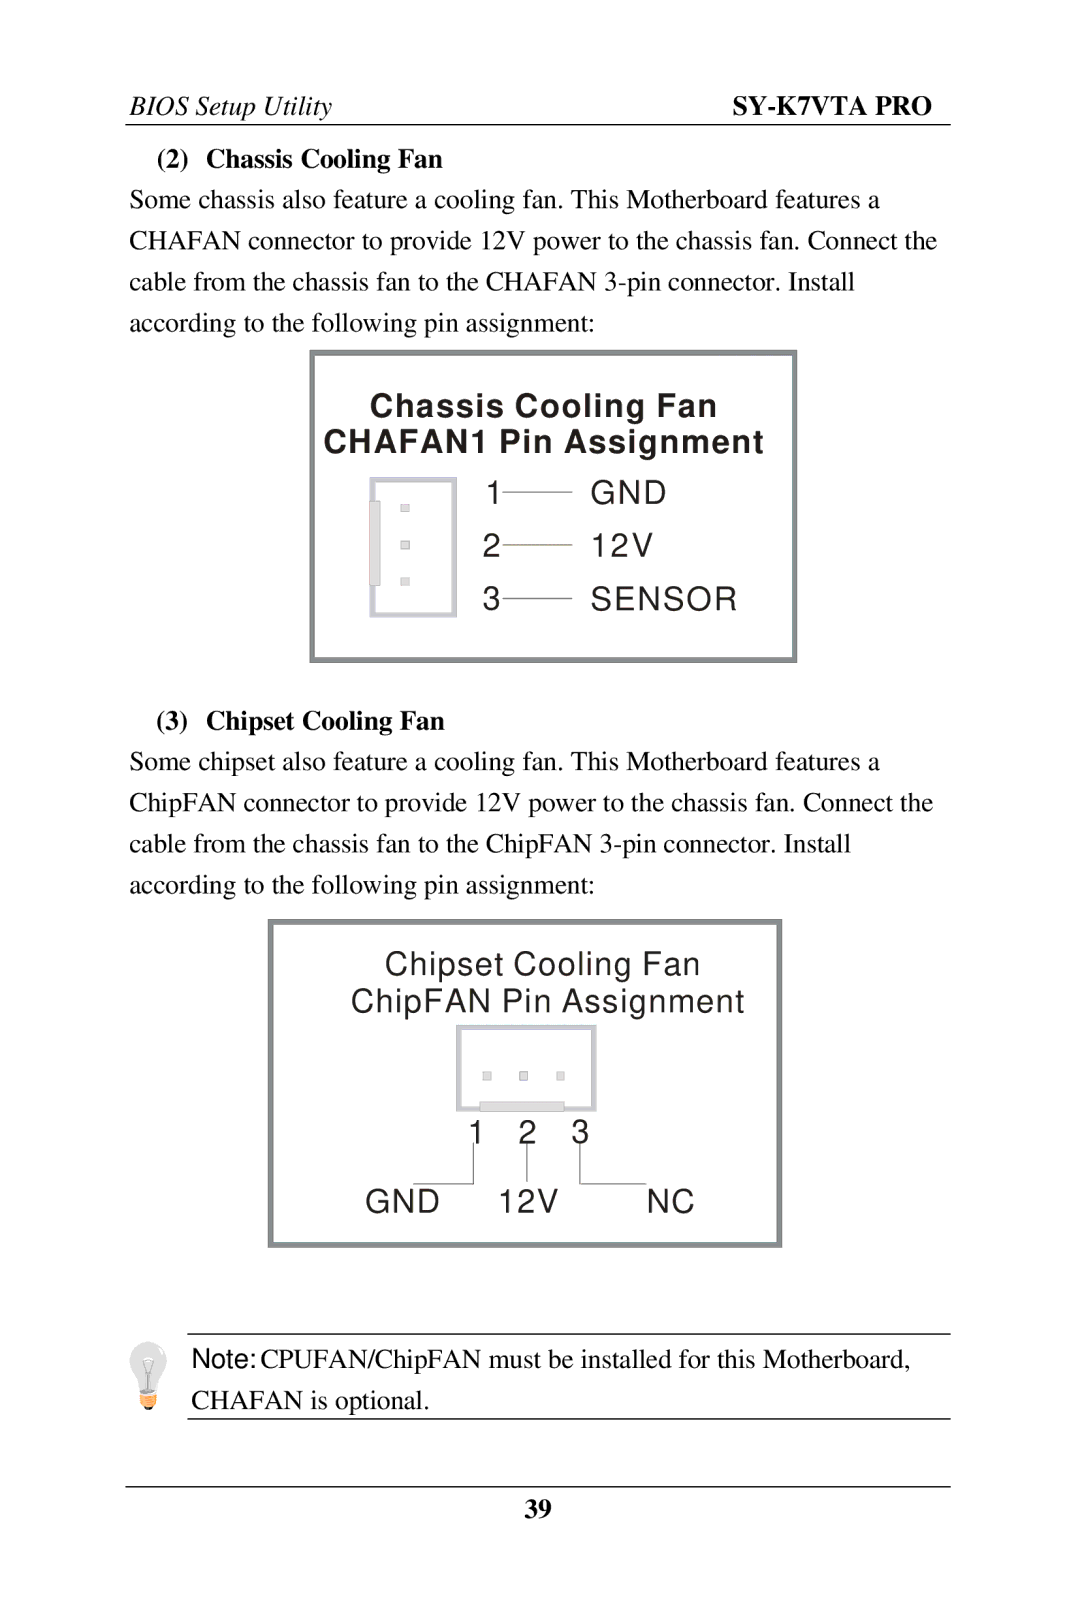
(2) Chassis Cooling Fan
Some chassis also feature a cooling fan. This Motherboard features a CHAFAN connector to provide 12V power to the chassis fan. Connect the cable from the chassis fan to the CHAFAN
Chassis Cooling Fan
CHAFAN1 Pin Assignment
1 GND
2 12V
3SENSOR
(3) Chipset Cooling Fan
Some chipset also feature a cooling fan. This Motherboard features a ChipFAN connector to provide 12V power to the chassis fan. Connect the cable from the chassis fan to the ChipFAN
Chipset Cooling Fan
ChipFAN Pin Assignment
1 2 3
GND 12V NC
Note: CPUFAN/ChipFAN must be installed for this Motherboard, CHAFAN is optional.
39