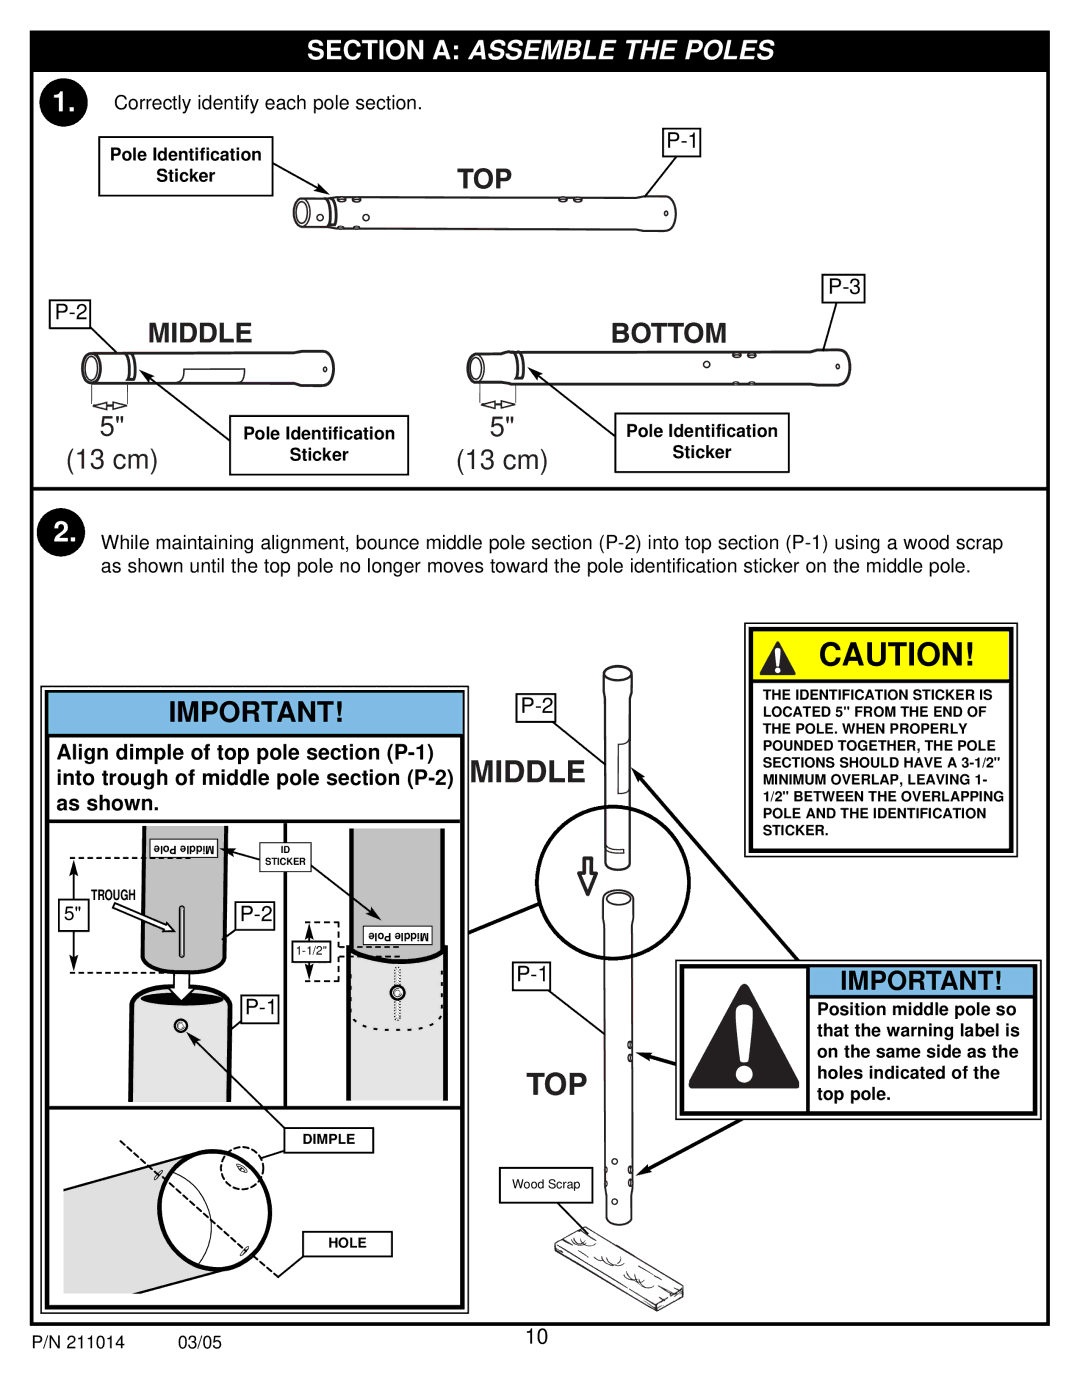
SECTION A: ASSEMBLE THE POLES
1. | Correctly identify each pole section. |
Pole Identification
Sticker
5"
(13 cm)
Pole Identification
Sticker
5"
(13 cm)
Pole Identification
Sticker
2. While maintaining alignment, bounce middle pole section
|
|
|
|
|
|
|
|
|
|
|
| CAUTION! |
|
|
|
|
|
|
|
|
|
|
|
|
|
|
|
|
|
|
|
|
|
|
|
|
|
|
| THE IDENTIFICATION STICKER IS |
|
|
|
|
|
|
|
|
|
|
|
|
|
| |
|
|
| IMPORTANT! |
|
|
|
|
|
|
| |||
|
|
|
|
|
|
| LOCATED 5" FROM THE END OF |
| |||||
|
|
|
|
|
|
|
|
|
|
|
| THE POLE. WHEN PROPERLY |
|
|
|
|
|
|
|
|
|
|
|
|
| POUNDED TOGETHER, THE POLE |
|
|
|
| Align dimple of top pole section |
|
|
|
|
|
|
|
|
| |
|
|
|
|
|
|
|
|
| SECTIONS SHOULD HAVE A |
| |||
|
|
| into trough of middle pole section |
|
|
|
|
|
|
|
|
| |
|
|
|
|
|
|
|
|
| MINIMUM OVERLAP, LEAVING 1- |
| |||
|
|
| |||||||||||
|
|
| as shown. |
|
|
|
|
|
|
|
| 1/2" BETWEEN THE OVERLAPPING |
|
|
|
|
|
|
|
|
|
| POLE AND THE IDENTIFICATION |
| |||
|
|
|
|
|
|
|
|
|
|
|
|
| |
|
|
|
|
|
|
|
|
|
|
|
| STICKER. |
|
| Pole Me | ID |
|
|
| STICKER |
|
TROUGH |
|
| |
5" |
|
| |
|
| Pole Middle |
|
|
|
| |
|
| IMPORTANT! | |
|
| Position middle pole so | |
|
|
| that the warning label is |
|
|
| on the same side as the |
|
|
| holes indicated of the |
|
|
| top pole. |
|
| DIMPLE |
|
|
| Wood Scrap |
|
|
| HOLE |
|
P/N 211014 | 03/05 | 10 |
|