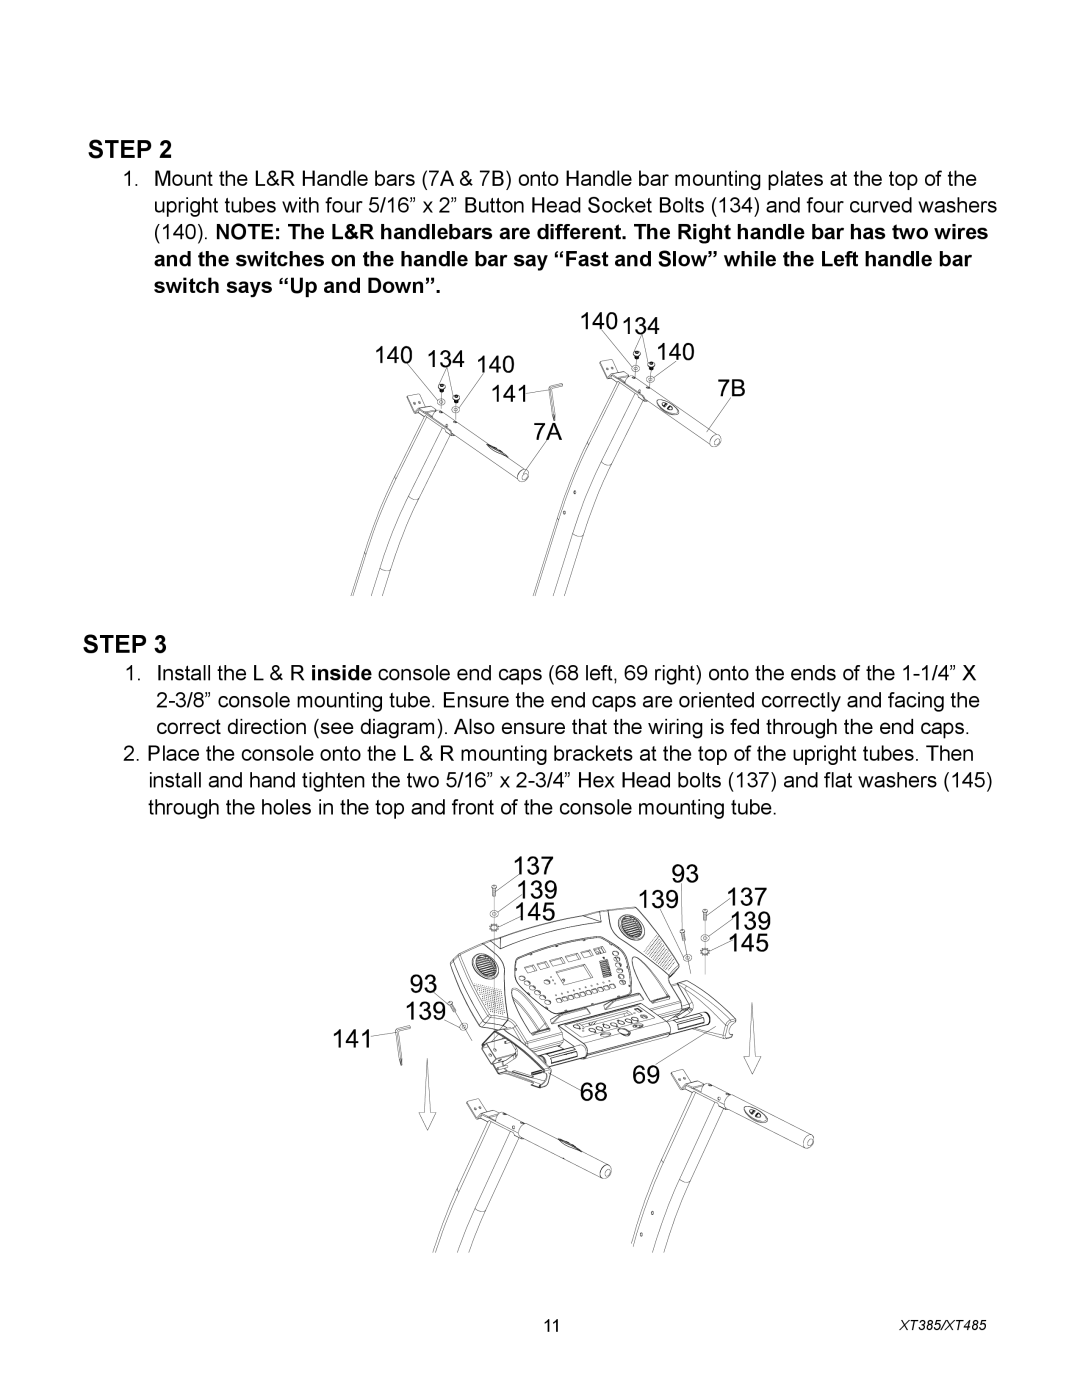
STEP 2
1.Mount the L&R Handle bars (7A & 7B) onto Handle bar mounting plates at the top of the upright tubes with four 5/16” x 2” Button Head Socket Bolts (134) and four curved washers (140). NOTE: The L&R handlebars are different. The Right handle bar has two wires and the switches on the handle bar say “Fast and Slow” while the Left handle bar switch says “Up and Down”.
STEP 3
1.Install the L & R inside console end caps (68 left, 69 right) onto the ends of the
2.Place the console onto the L & R mounting brackets at the top of the upright tubes. Then install and hand tighten the two 5/16” x
11 | XT385/XT485 |