17
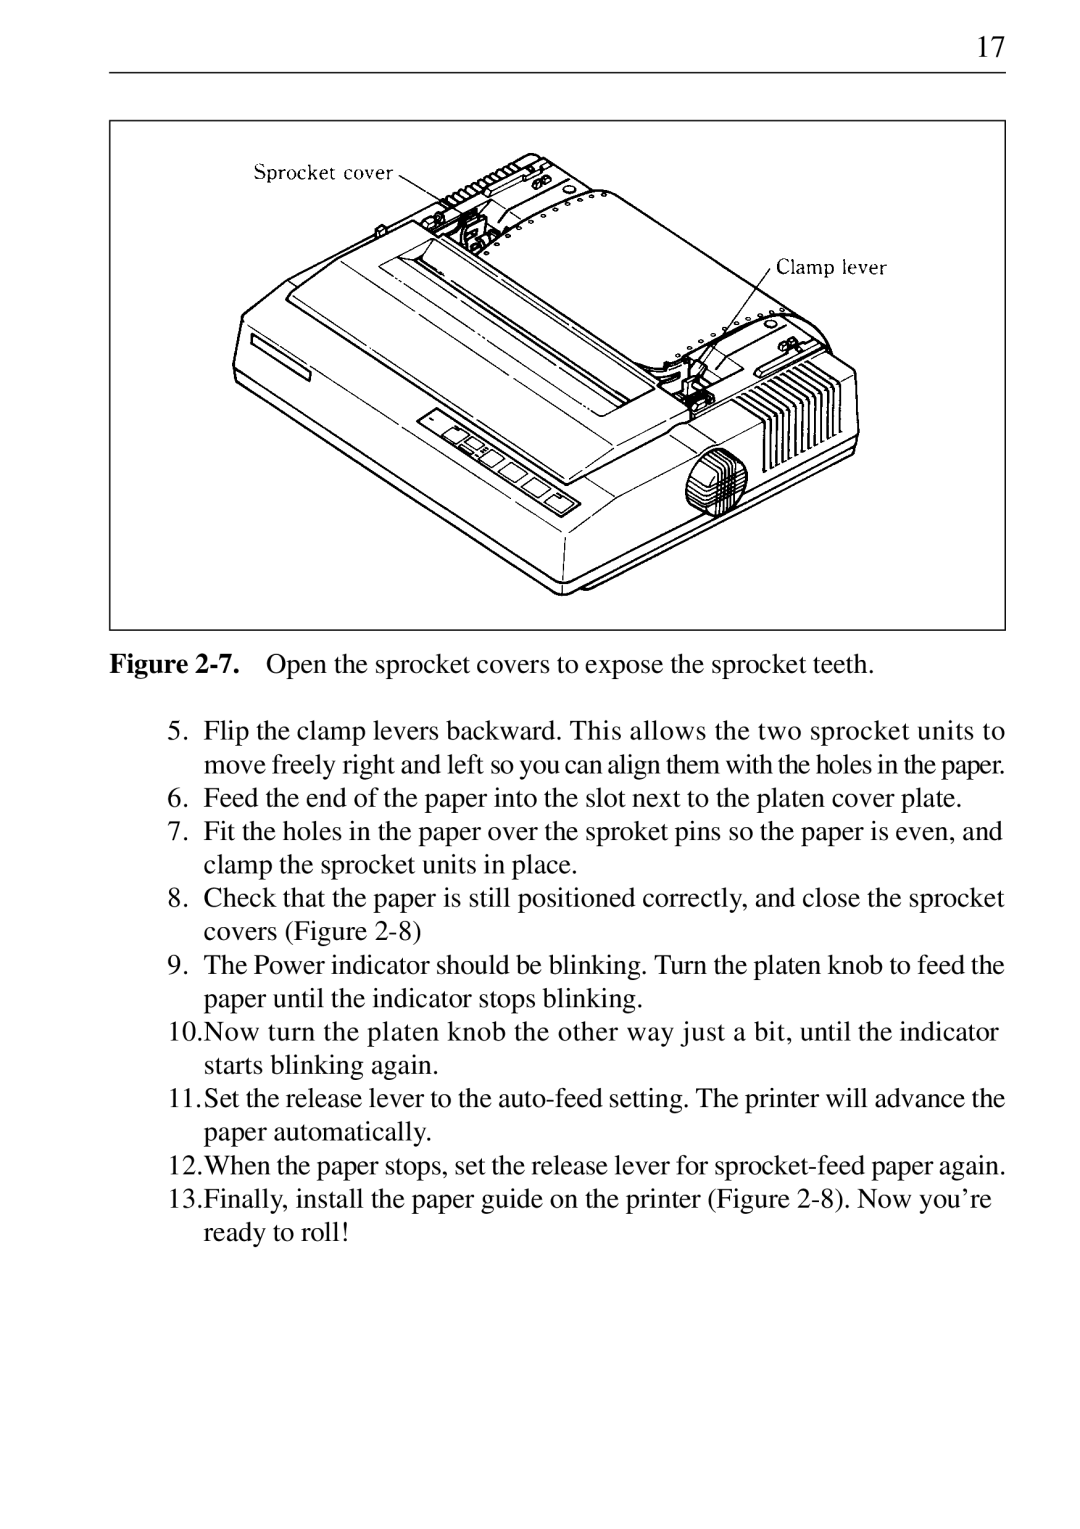
Figure 2-7. Open the sprocket covers to expose the sprocket teeth.
5.Flip the clamp levers backward. This allows the two sprocket units to move freely right and left so you can align them with the holes in the paper.
6.Feed the end of the paper into the slot next to the platen cover plate.
7.Fit the holes in the paper over the sproket pins so the paper is even, and clamp the sprocket units in place.
8.Check that the paper is still positioned correctly, and close the sprocket covers (Figure
9.The Power indicator should be blinking. Turn the platen knob to feed the
paper until the indicator stops blinking.
10.Now turn the platen knob the other way just a bit, until the indicator starts blinking again.
11.Set the release lever to the
12.When the paper stops, set the release lever for
ready to roll!