ENGLISH
1. LOADING THE RIBBON CARTRIDGE
1-1. SP317
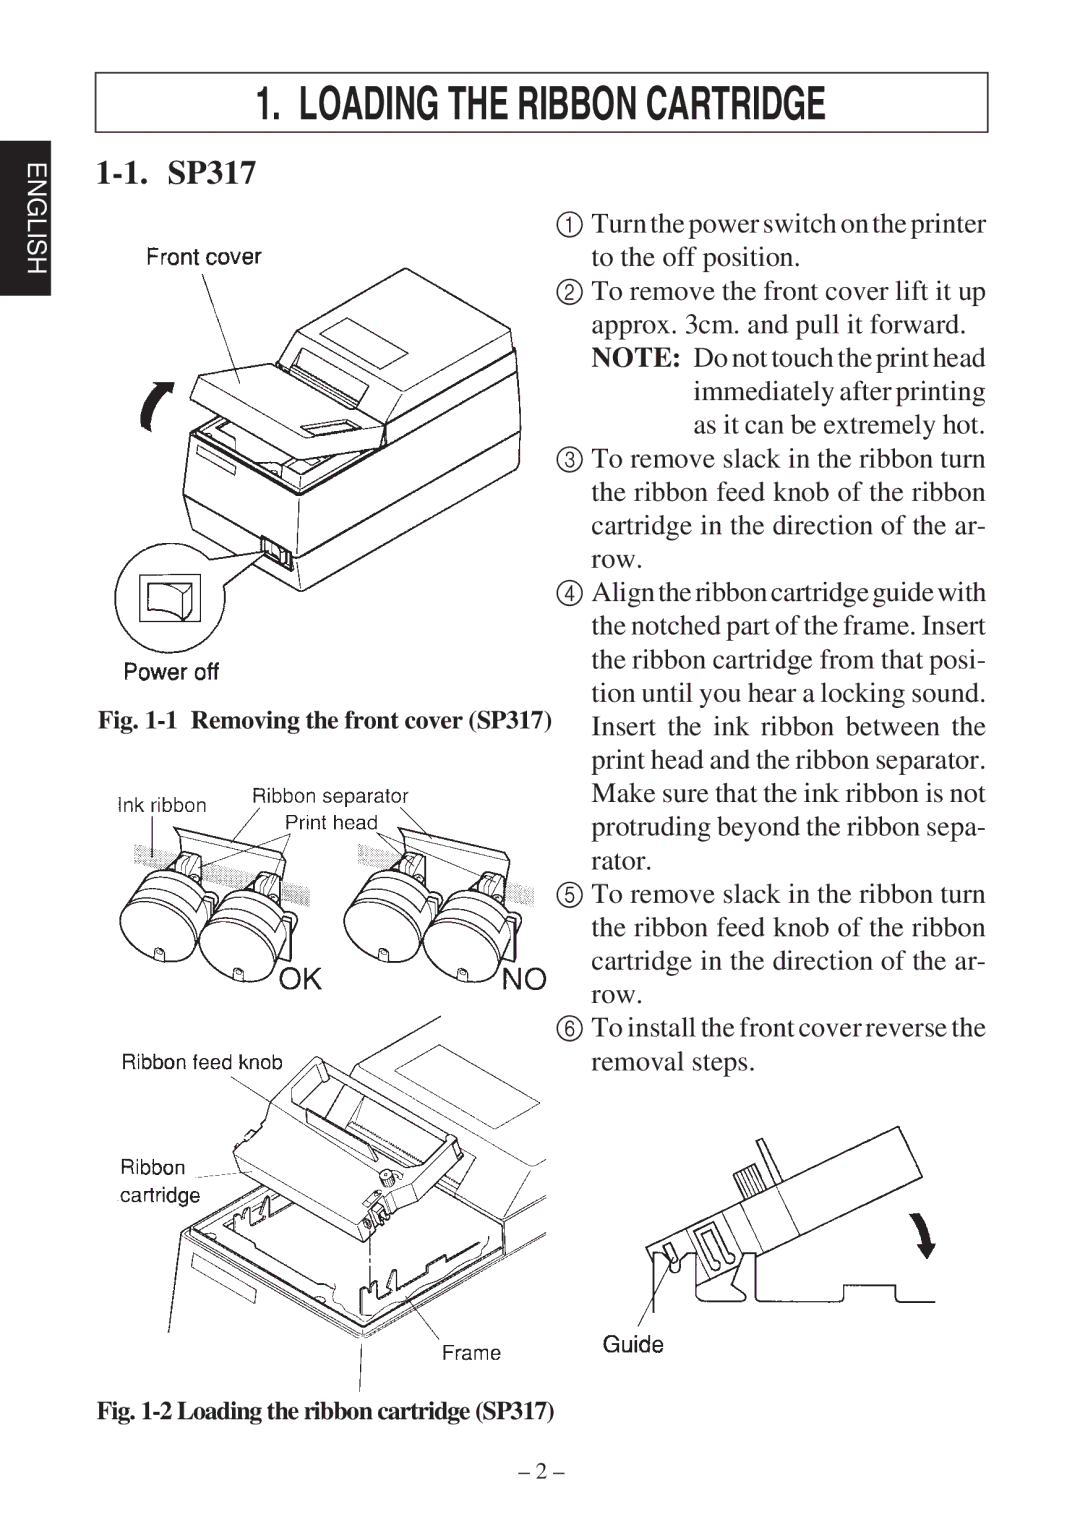
1 Turn the power switch on the printer to the off position.
2 To remove the front cover lift it up approx. 3cm. and pull it forward. NOTE: Do not touch the print head
immediately after printing as it can be extremely hot.
3 To remove slack in the ribbon turn the ribbon feed knob of the ribbon cartridge in the direction of the ar- row.
4 Align the ribbon cartridge guide with the notched part of the frame. Insert the ribbon cartridge from that posi-
tion until you hear a locking sound. Fig.
print head and the ribbon separator. Make sure that the ink ribbon is not protruding beyond the ribbon sepa- rator.
5 To remove slack in the ribbon turn the ribbon feed knob of the ribbon cartridge in the direction of the ar- row.
6 To install the front cover reverse the removal steps.
Fig. 1-2 Loading the ribbon cartridge (SP317)
– 2 –