2-2. SP347
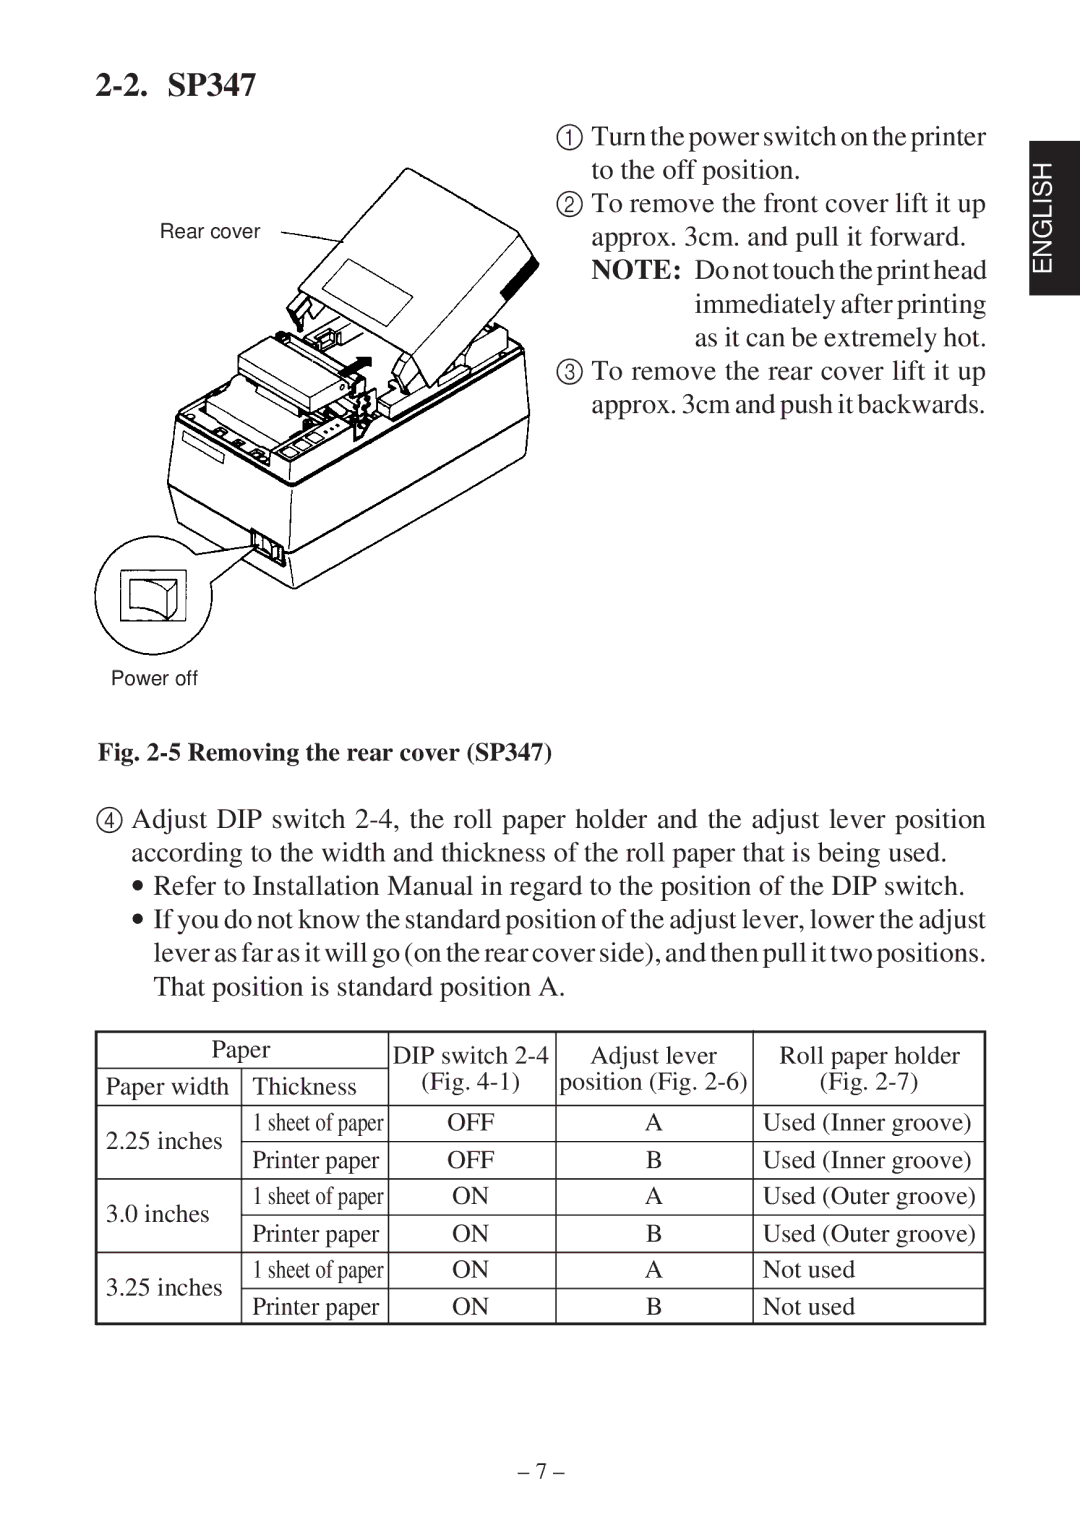
Rear cover
Power off
1Turn the power switch on the printer to the off position.
2To remove the front cover lift it up approx. 3cm. and pull it forward.
NOTE: Do not touch the print head immediately after printing as it can be extremely hot.
3To remove the rear cover lift it up approx. 3cm and push it backwards.
ENGLISH
Fig. 2-5 Removing the rear cover (SP347)
4Adjust DIP switch
∙Refer to Installation Manual in regard to the position of the DIP switch.
∙If you do not know the standard position of the adjust lever, lower the adjust lever as far as it will go (on the rear cover side), and then pull it two positions. That position is standard position A.
Paper | DIP switch | Adjust lever | Roll paper holder | ||
Paper width | Thickness | (Fig. | position (Fig. | (Fig. | |
|
|
|
|
| |
2.25 inches | 1 sheet of paper | OFF | A | Used (Inner groove) | |
|
|
|
| ||
Printer paper | OFF | B | Used (Inner groove) | ||
| |||||
|
|
|
|
| |
3.0 inches | 1 sheet of paper | ON | A | Used (Outer groove) | |
|
|
|
| ||
Printer paper | ON | B | Used (Outer groove) | ||
| |||||
|
|
|
|
| |
3.25 inches | 1 sheet of paper | ON | A | Not used | |
|
|
|
| ||
Printer paper | ON | B | Not used | ||
| |||||
– 7 –