ENGLISH
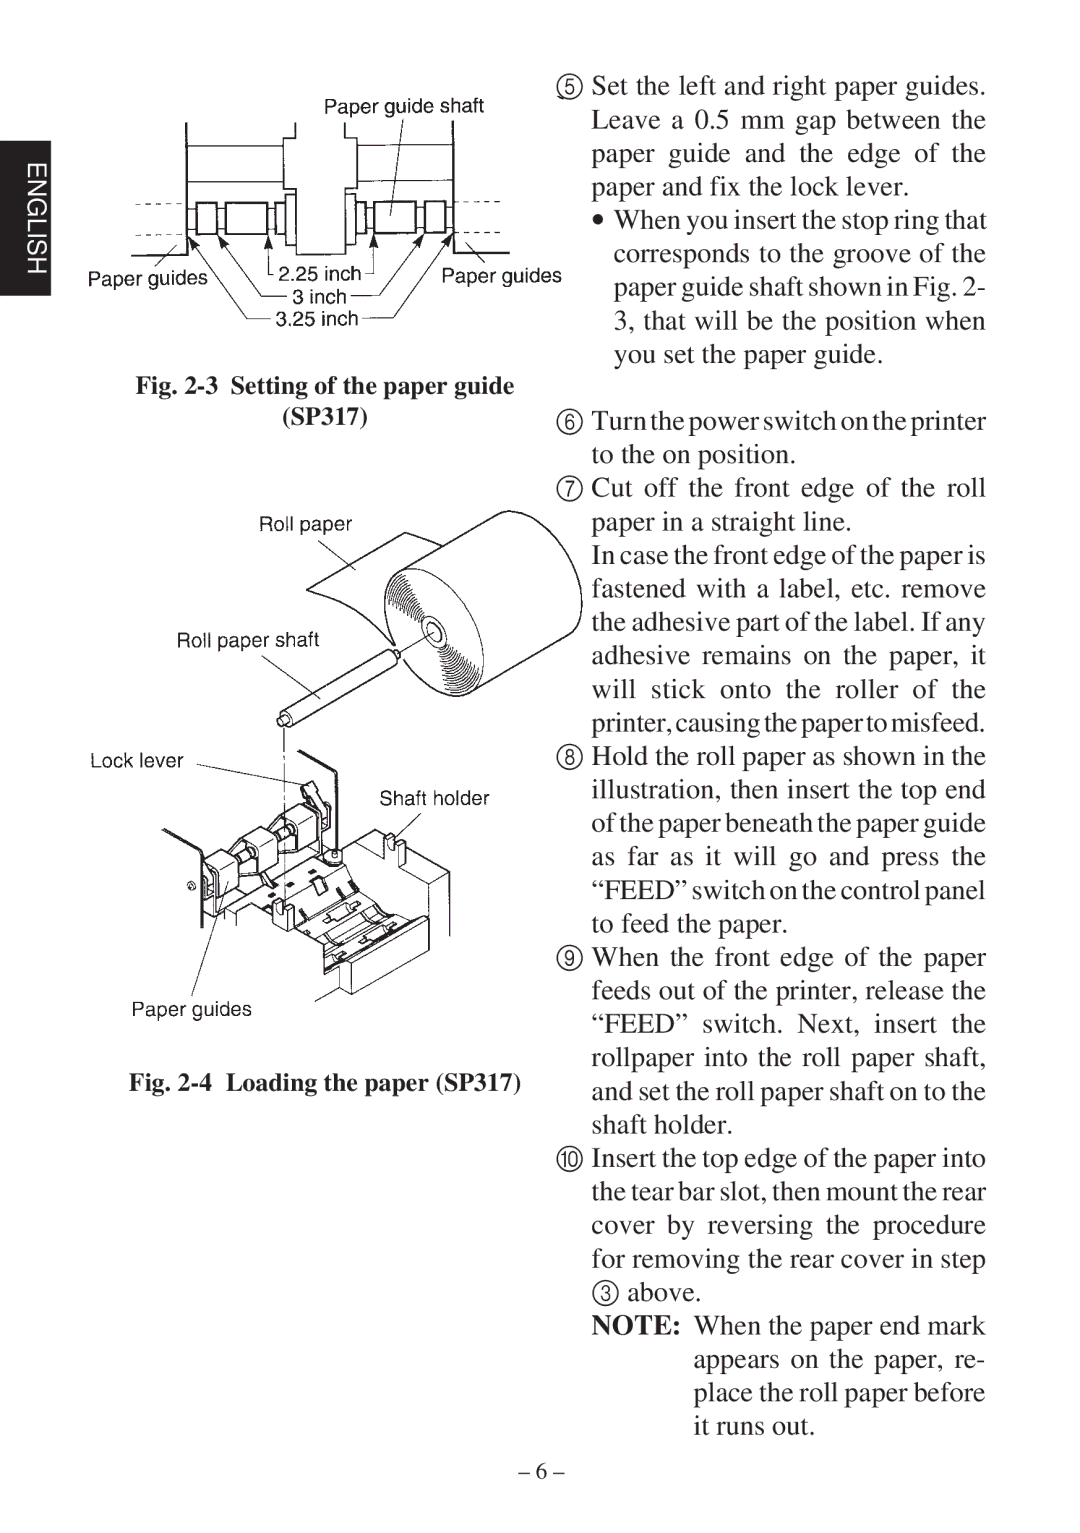
Fig. 2-3 Setting of the paper guide
(SP317)
Fig. 2-4 Loading the paper (SP317)
5Set the left and right paper guides. Leave a 0.5 mm gap between the paper guide and the edge of the paper and fix the lock lever.
∙When you insert the stop ring that corresponds to the groove of the paper guide shaft shown in Fig. 2- 3, that will be the position when you set the paper guide.
6Turn the power switch on the printer
to the on position.
7Cut off the front edge of the roll paper in a straight line.
In case the front edge of the paper is fastened with a label, etc. remove the adhesive part of the label. If any
adhesive remains on the paper, it will stick onto the roller of the printer, causing the paper to misfeed.
8Hold the roll paper as shown in the illustration, then insert the top end
of the paper beneath the paper guide as far as it will go and press the “FEED” switch on the control panel to feed the paper.
9When the front edge of the paper
feeds out of the printer, release the “FEED” switch. Next, insert the rollpaper into the roll paper shaft, and set the roll paper shaft on to the shaft holder.
0Insert the top edge of the paper into the tear bar slot, then mount the rear cover by reversing the procedure for removing the rear cover in step 3 above.
NOTE: When the paper end mark appears on the paper, re- place the roll paper before it runs out.
– 6 –