ENGLISH
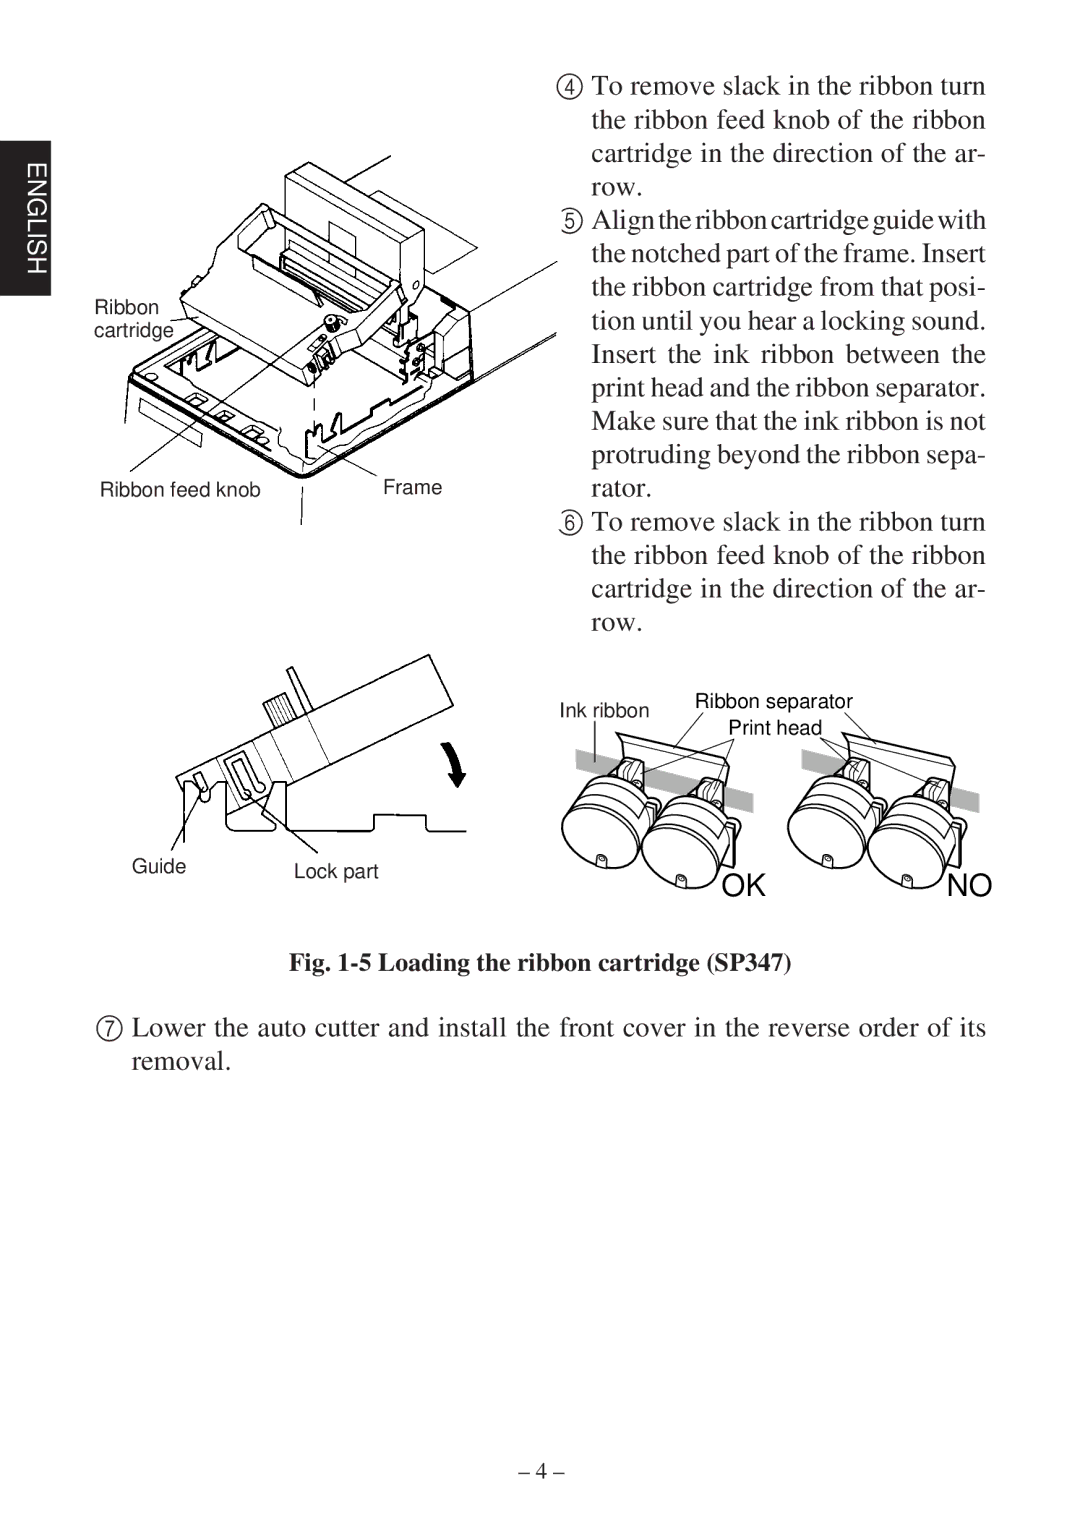
4 To remove slack in the ribbon turn the ribbon feed knob of the ribbon cartridge in the direction of the ar- row.
5 Align the ribbon cartridge guide with the notched part of the frame. Insert the ribbon cartridge from that posi-
Ribbon |
| tion until you hear a locking sound. |
cartridge |
| |
| Insert the ink ribbon between the | |
|
| |
|
| print head and the ribbon separator. |
|
| Make sure that the ink ribbon is not |
|
| protruding beyond the ribbon sepa- |
Ribbon feed knob | Frame | rator. |
|
| 6 To remove slack in the ribbon turn |
|
| the ribbon feed knob of the ribbon |
cartridge in the direction of the ar- row.
Ink ribbon | Ribbon separator | |
Print head | ||
|
Guide | Lock part | OK | NO |
|
|
Fig. 1-5 Loading the ribbon cartridge (SP347)
7Lower the auto cutter and install the front cover in the reverse order of its removal.
– 4 –