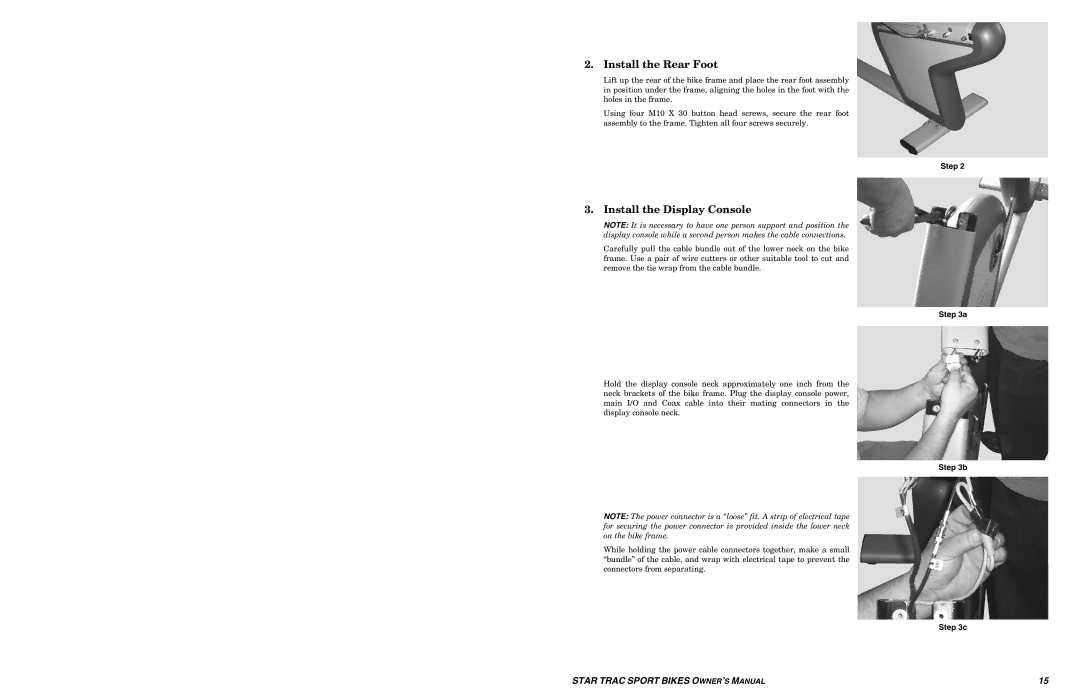
2. Install the Rear Foot
Lift up the rear of the bike frame and place the rear foot assembly in position under the frame, aligning the holes in the foot with the holes in the frame.
Using four M10 X 30 button head screws, secure the rear foot assembly to the frame. Tighten all four screws securely.
3. Install the Display Console
NOTE: It is necessary to have one person support and position the display console while a second person makes the cable connections.
Carefully pull the cable bundle out of the lower neck on the bike frame. Use a pair of wire cutters or other suitable tool to cut and remove the tie wrap from the cable bundle.
Hold the display console neck approximately one inch from the neck brackets of the bike frame. Plug the display console power, main I/O and Coax cable into their mating connectors in the display console neck.
NOTE: The power connector is a “loose” fit. A strip of electrical tape for securing the power connector is provided inside the lower neck on the bike frame.
While holding the power cable connectors together, make a small “bundle” of the cable, and wrap with electrical tape to prevent the connectors from separating.
STAR TRAC SPORT BIKES OWNER’S MANUAL
Step 2
Step 3a
Step 3b
Step 3c
15