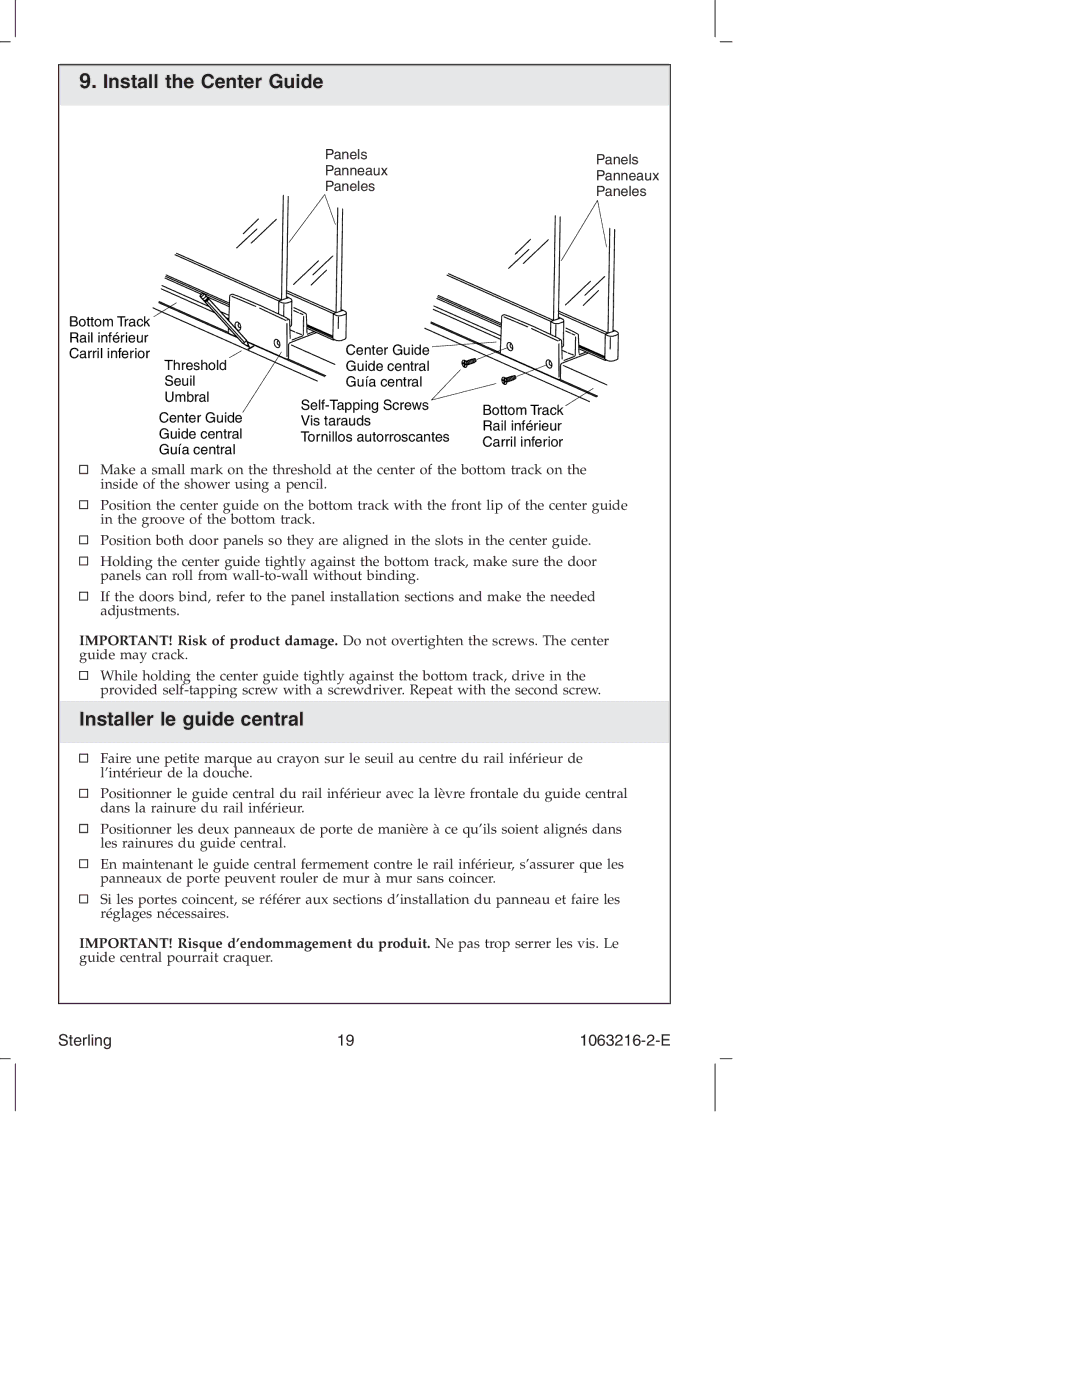
9.Install the Center Guide
Panels | Panels | |
Panneaux | ||
Panneaux | ||
Paneles | ||
Paneles | ||
|
Bottom Track |
|
| |
Rail inférieur | Center Guide |
| |
Carril inferior |
| ||
Threshold | Guide central |
| |
Seuil | Guía central |
| |
Umbral | Bottom Track | ||
Center Guide | |||
Vis tarauds | |||
Rail inférieur | |||
Guide central | Tornillos autorroscantes | ||
Carril inferior | |||
Guía central |
| ||
|
|
Make a small mark on the threshold at the center of the bottom track on the inside of the shower using a pencil.
Position the center guide on the bottom track with the front lip of the center guide in the groove of the bottom track.
Position both door panels so they are aligned in the slots in the center guide.
Holding the center guide tightly against the bottom track, make sure the door panels can roll from
If the doors bind, refer to the panel installation sections and make the needed adjustments.
IMPORTANT! Risk of product damage. Do not overtighten the screws. The center guide may crack.
While holding the center guide tightly against the bottom track, drive in the provided
Installer le guide central
Faire une petite marque au crayon sur le seuil au centre du rail inférieur de l’intérieur de la douche.
Positionner le guide central du rail inférieur avec la lèvre frontale du guide central dans la rainure du rail inférieur.
Positionner les deux panneaux de porte de manière à ce qu’ils soient alignés dans les rainures du guide central.
En maintenant le guide central fermement contre le rail inférieur, s’assurer que les panneaux de porte peuvent rouler de mur à mur sans coincer.
Si les portes coincent, se référer aux sections d’installation du panneau et faire les réglages nécessaires.
IMPORTANT! Risque d’endommagement du produit. Ne pas trop serrer les vis. Le guide central pourrait craquer.
Sterling | 19 |
