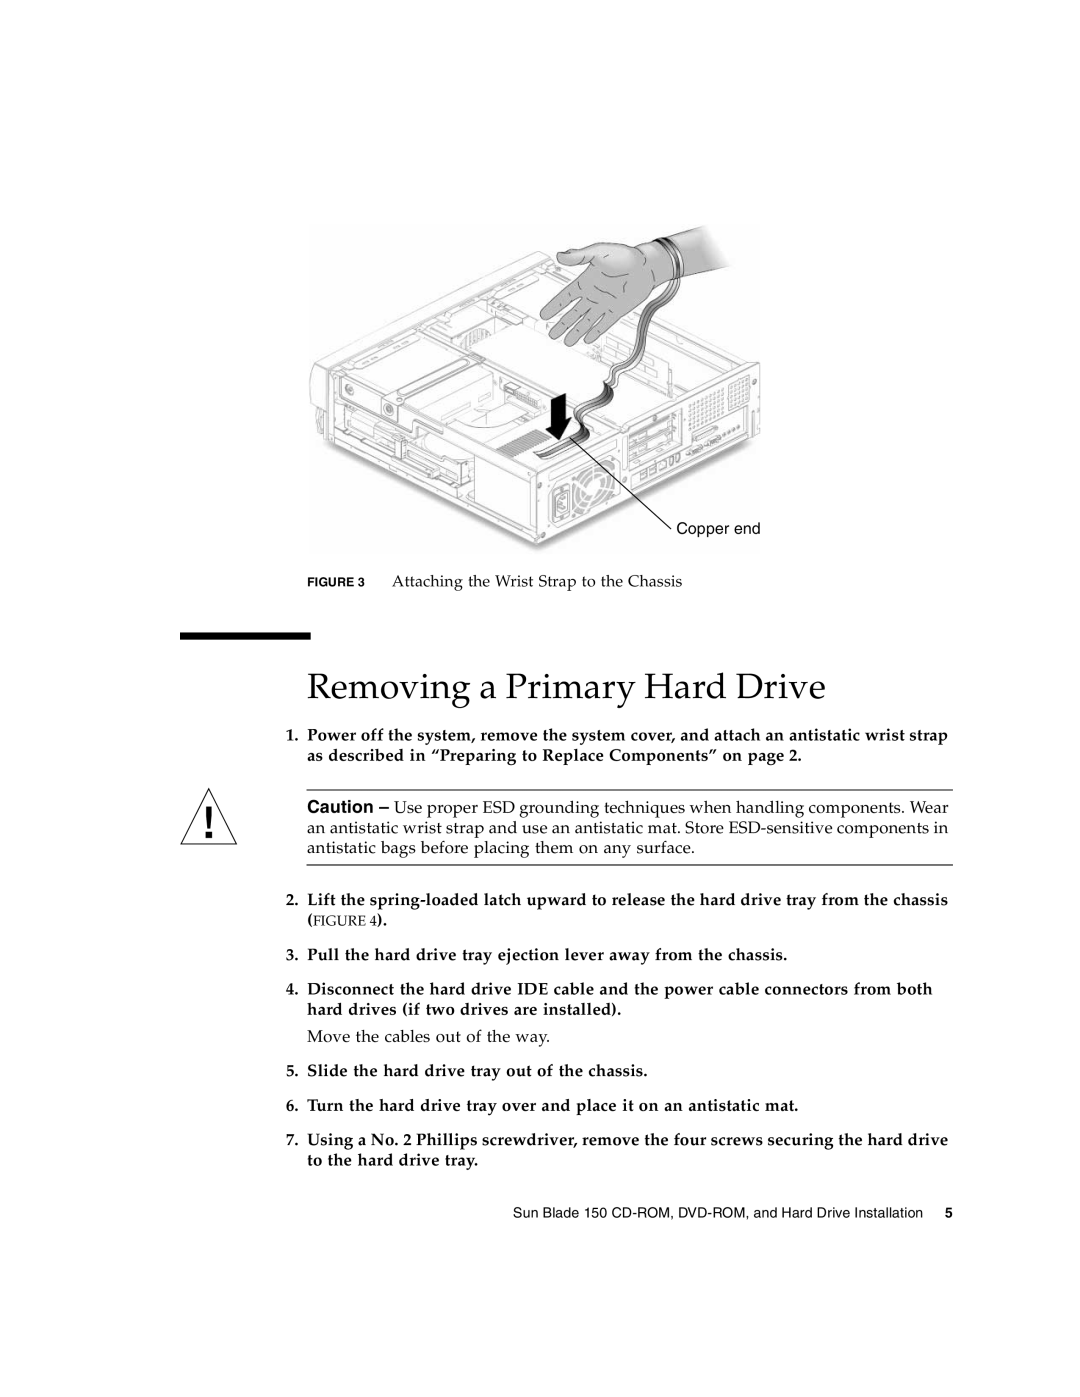
Copper end
FIGURE 3 Attaching the Wrist Strap to the Chassis
Removing a Primary Hard Drive
1.Power off the system, remove the system cover, and attach an antistatic wrist strap as described in “Preparing to Replace Components” on page 2.
Caution – Use proper ESD grounding techniques when handling components. Wear an antistatic wrist strap and use an antistatic mat. Store
2.Lift the
3.Pull the hard drive tray ejection lever away from the chassis.
4.Disconnect the hard drive IDE cable and the power cable connectors from both hard drives (if two drives are installed).
Move the cables out of the way.
5.Slide the hard drive tray out of the chassis.
6.Turn the hard drive tray over and place it on an antistatic mat.
7.Using a No. 2 Phillips screwdriver, remove the four screws securing the hard drive to the hard drive tray.
Sun Blade 150