❃IMPORTANT: Use the “Timer” button to delay the baking of your bread. You may delay the start time up to 13 hours.
❃IMPORTANT: Press the “Start/Stop” button and your machine will start making bread. If delay bake is selected, the remaining time will count
down in
❃IMPORTANT: The breadmaker has an automatic “keep warm” setting that will keep your bread warm for up to one hour. To turn warmer
off, press the “Start/Stop” button and hold until you hear a beep. We recommend removing the bread from the breadmaker right away to preserve its freshness.
❃IMPORTANT: Do NOT press the “Start/Stop” button while the breadmaker is making bread. This will cause the machine to turn off and you
will need to start over again, from scratch.
☞CAUTION: The breadmaker is very hot. Do not handle the machine while it is operating. Do NOT lift the lid while the breadmaker is baking bread.
Breadmaker Stages
It’s fun to watch your bread being made through the viewing window. For the basic cycle, you can expect the following things to happen
as the timer counts down to zero.
At 3:00 The dough is kneaded for the first time. (10 minutes) At 2:50 The dough begins to rise. (20 minutes)
At 2:30 The dough is kneaded for the second time. (15 minutes) At 2:15 The dough continues to rise. (20 minutes)
At 1:55 The dough is “punched down.” (30 seconds) At 1:55 The dough rises for the final time. (55 minutes) At 1:00 The bread begins to bake. (50 minutes)
At 0:00 The bread is finished.
☞CAUTION: Do not put your face near the lid when you open the breadmaker. Hot steam may escape that could burn you.
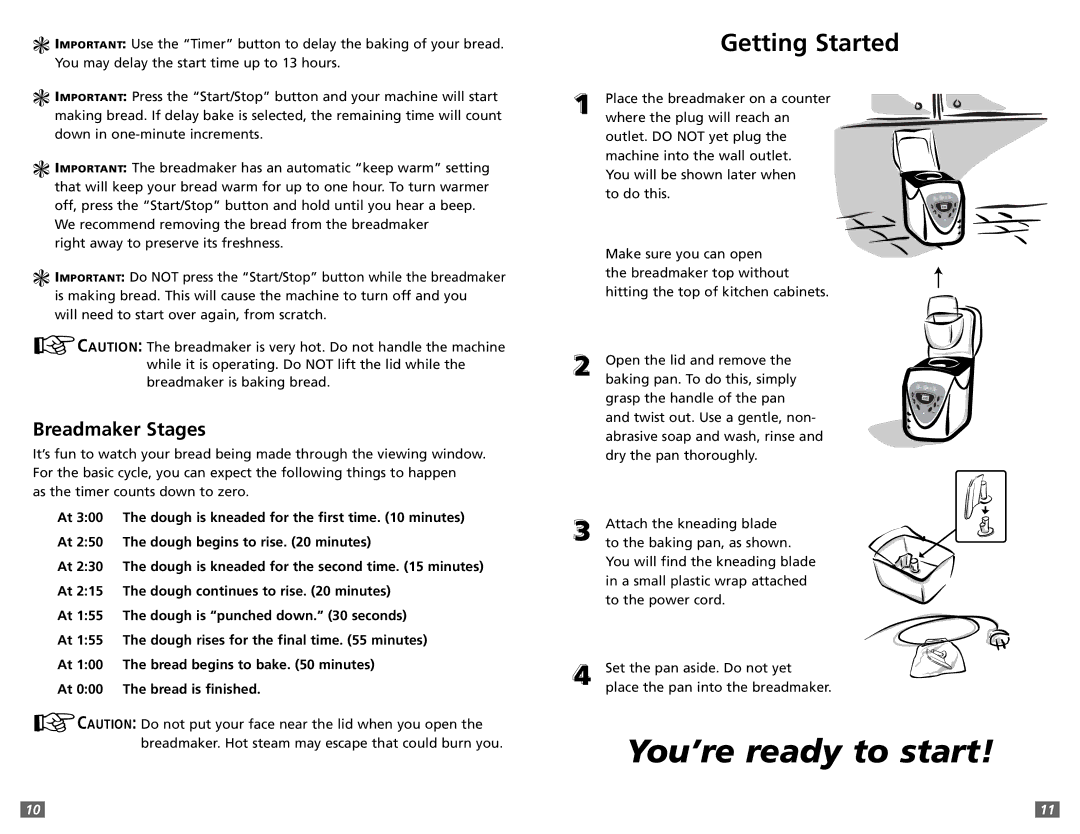
| Getting Started |
1 | Place the breadmaker on a counter |
| where the plug will reach an |
outlet. DO NOT yet plug the machine into the wall outlet. You will be shown later when to do this.
Make sure you can open the breadmaker top without hitting the top of kitchen cabinets.
2 | Open the lid and remove the |
| baking pan. To do this, simply |
grasp the handle of the pan and twist out. Use a gentle, non- abrasive soap and wash, rinse and dry the pan thoroughly.
3 | Attach the kneading blade |
| to the baking pan, as shown. |
You will find the kneading blade in a small plastic wrap attached to the power cord.
4 | Set the pan aside. Do not yet |
| place the pan into the breadmaker. |
You’re ready to start!
10 |
| 11 |