Using your Sunbeam MultiMincer® (continued)
Fitting and using the Sausage attachments
1.Place the mincer body, facing you on a level, dry surface.
2.Fit the mincing screw inside the Chute.
3.Fit the base plate over the mincing screw, so the dome is facing outwards.
4.Fit either the thick or thin sausage nozzle over the base plate
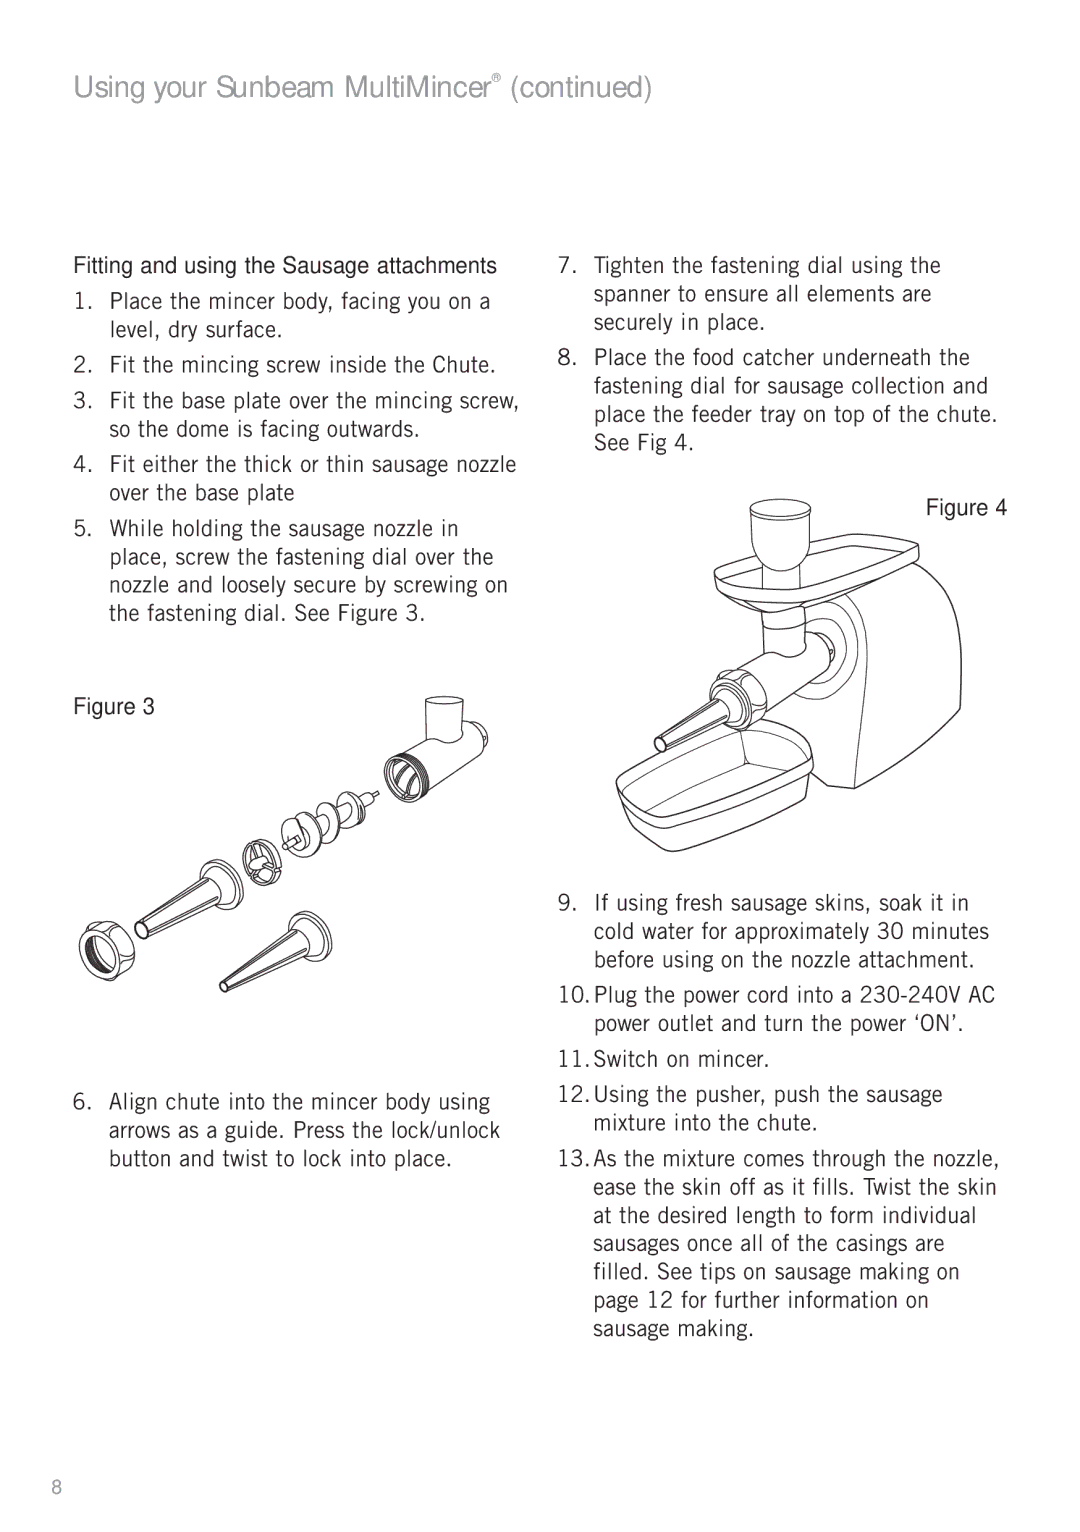
5.While holding the sausage nozzle in place, screw the fastening dial over the nozzle and loosely secure by screwing on the fastening dial. See Figure 3.
Figure 3
6.Align chute into the mincer body using arrows as a guide. Press the lock/unlock button and twist to lock into place.
7.Tighten the fastening dial using the spanner to ensure all elements are securely in place.
8.Place the food catcher underneath the fastening dial for sausage collection and place the feeder tray on top of the chute. See Fig 4.
Figure 4
9.If using fresh sausage skins, soak it in cold water for approximately 30 minutes before using on the nozzle attachment.
10.Plug the power cord into a
11.Switch on mincer.
12.Using the pusher, push the sausage mixture into the chute.
13.As the mixture comes through the nozzle, ease the skin off as it fills. Twist the skin at the desired length to form individual sausages once all of the casings are filled. See tips on sausage making on page 12 for further information on sausage making.
8