
TGP-5(E), TGP-5 specifications
The Sunfire TGP-5 and TGP-5(E) are high-end audio processors that cater to audiophiles and home theater enthusiasts seeking exceptional sound quality and advanced features. These models are designed with a commitment to delivering pristine audio performance across various formats, making them ideal for both music and movie playback.One of the standout features of the TGP-5 is its robust digital signal processing capabilities. The device is equipped with a state-of-the-art multichannel DAC that ensures accurate sound reproduction and a high signal-to-noise ratio. This component allows for the processing of high-resolution audio formats, including DSD, ensuring that users can enjoy their music as intended by the artist. The TGP-5(E) version further enhances this experience by offering enhanced room correction technology, which automatically calibrates the system based on the specific acoustics of the listening environment. This feature optimizes audio performance by adjusting frequency response, thereby eliminating unwanted resonances and improving overall sound clarity.
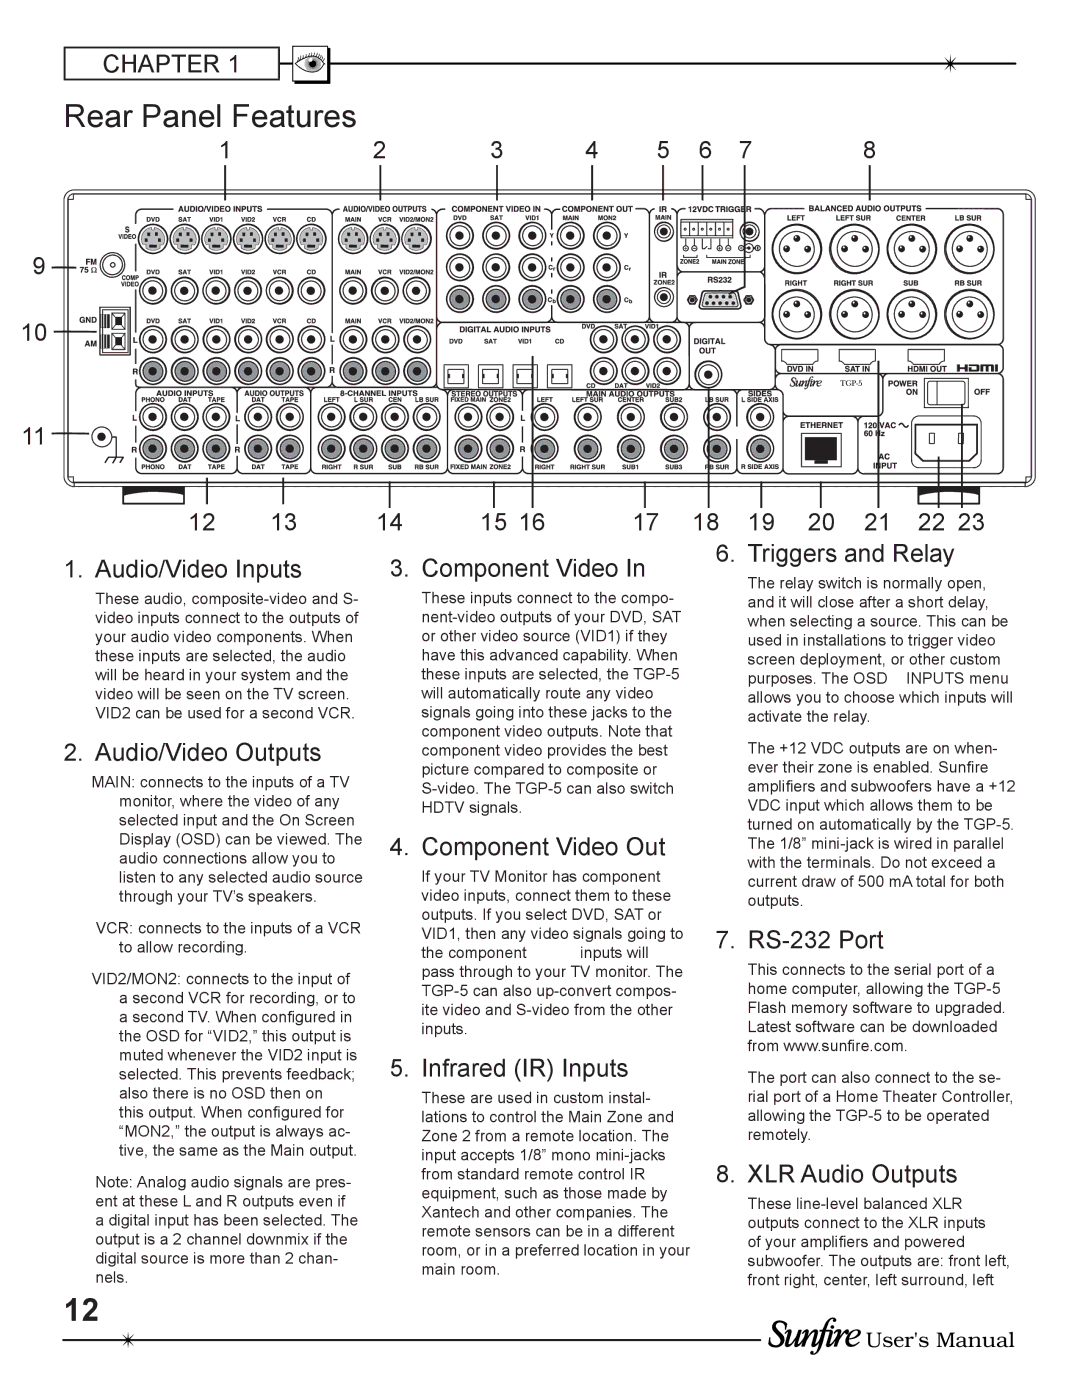
The user interface of the TGP-5 series is designed for ease of use, featuring a straightforward menu system accessible via its front panel display or remote control. Connections are abundant, offering a variety of digital inputs, including HDMI, coaxial, and optical, alongside traditional analog RCA inputs. These options ensure compatibility with almost any home theatre setup and allow integration with modern streaming services and devices.
Another noteworthy characteristic is the TGP-5's support for surround sound formats, including Dolby Atmos and DTS:X. This capability allows users to create an immersive audio experience that enhances movie watching and gaming sessions. Additionally, the TGP-5 incorporates advanced connectivity options, such as Bluetooth and Wi-Fi, enabling wireless streaming from smartphones and tablets.
In terms of build quality, the Sunfire TGP-5 series boasts a sleek and elegant design, typically encased in a sturdy chassis that minimizes vibration and interference. This construction not only enhances durability but also adds a touch of sophistication to any audio setup.
In summary, the Sunfire TGP-5 and TGP-5(E) represent a blend of cutting-edge technology, exceptional audio fidelity, and user-friendly features. With their advanced processing capabilities, comprehensive connectivity options, and support for modern audio formats, these processors are a compelling choice for anyone looking to elevate their audio experience.