24 | E n g l i s h |
|
![]()
![]()
![]()
![]()
![]()
![]()
![]()
![]()
![]()
![]()
![]()
![]()
![]()
![]()
![]()
![]()
![]()
![]() R e a r W h e e l s
R e a r W h e e l s ![]()
![]()
REAR WHEELS
![]() WARNING
WARNING
After ANY adjustments, repair or service and BEFORE use, make sure all attaching hardware is tightened securely – otherwise injury or damage may result.
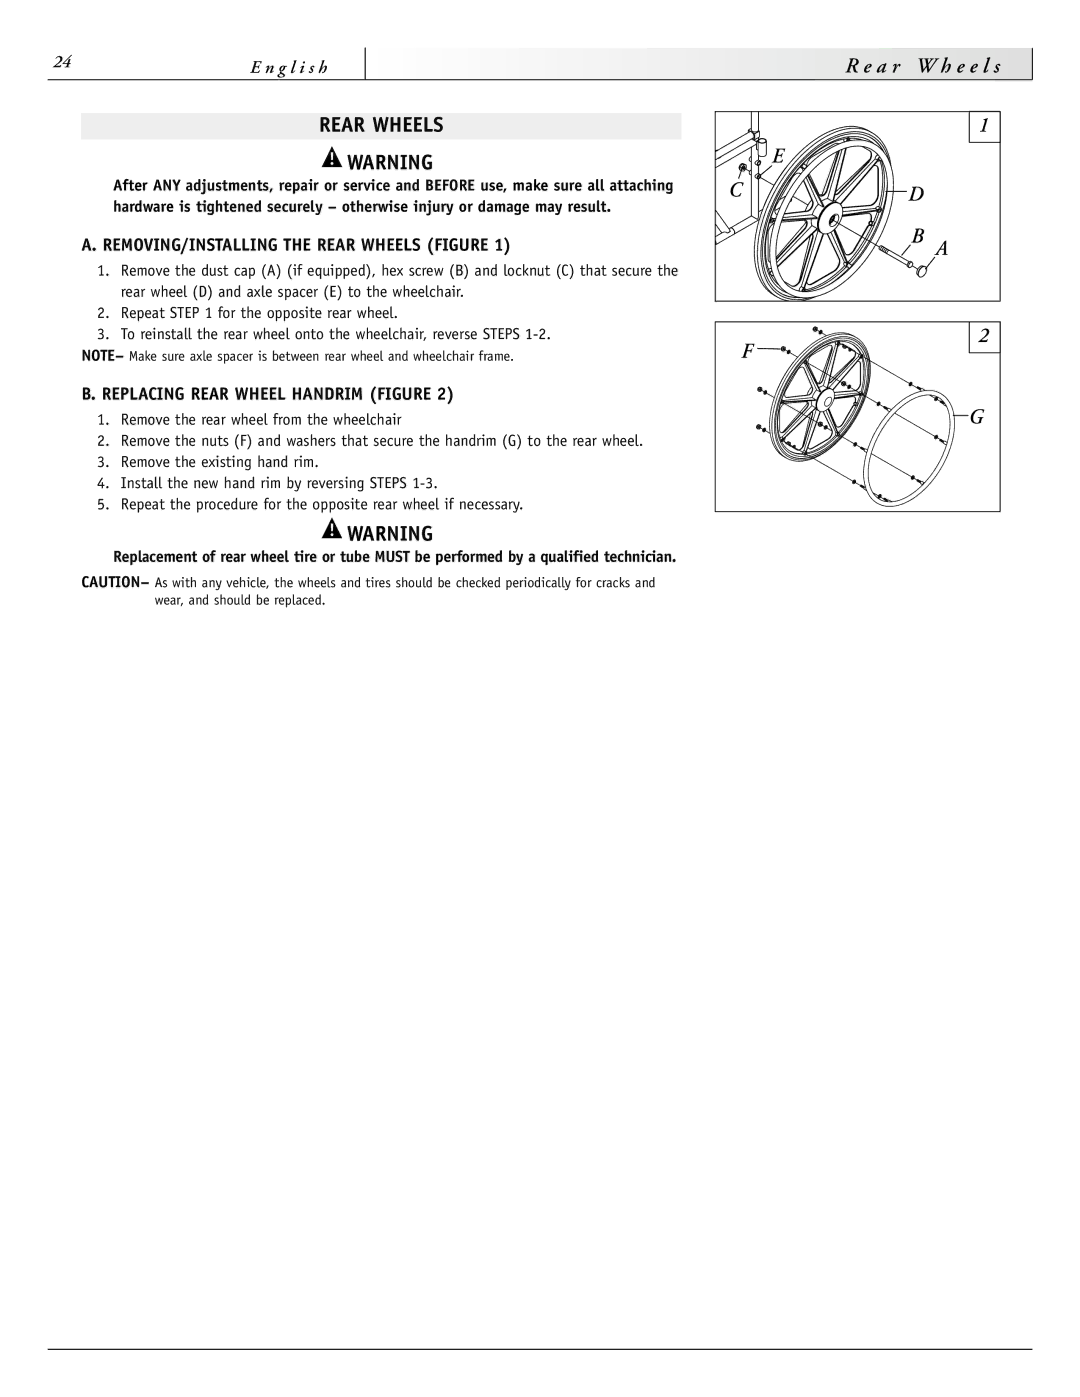
A. REMOVING/INSTALLING THE REAR WHEELS (FIGURE 1)
1.Remove the dust cap (A) (if equipped), hex screw (B) and locknut (C) that secure the rear wheel (D) and axle spacer (E) to the wheelchair.
2.Repeat STEP 1 for the opposite rear wheel.
3.To reinstall the rear wheel onto the wheelchair, reverse STEPS
NOTE– Make sure axle spacer is between rear wheel and wheelchair frame.
B. REPLACING REAR WHEEL HANDRIM (FIGURE 2)
1.Remove the rear wheel from the wheelchair
2.Remove the nuts (F) and washers that secure the handrim (G) to the rear wheel.
3.Remove the existing hand rim.
4.Install the new hand rim by reversing STEPS
5.Repeat the procedure for the opposite rear wheel if necessary.
![]() WARNING
WARNING
Replacement of rear wheel tire or tube MUST be performed by a qualified technician.
CAUTION– As with any vehicle, the wheels and tires should be checked periodically for cracks and wear, and should be replaced.
| 1 |
| E |
C | D |
| B A |
F | 2 |
| |
| G |