9. RECORD MODE |
| |||||||||||
You can either switch MOTION DETECTION ON in the setup page or press the UP |
| |||||||||||
button as a quick access button to turn MOTION DETECTION ON when the recorder is |
| |||||||||||
in monitoring mode. Press the UP button again to turn MOTION DETECTION OFF. |
| |||||||||||
Note: By default, motion detection mode will be activated every time the power is |
| |||||||||||
switched on. |
| |||||||||||
1. | When motion detect is ON, it will enter | |||||||||||
flashing automatically for about 60 seconds). The | ||||||||||||
will learn the current camera status to minimize false triggering. The recorder will enter |
| |||||||||||
| ||||||||||||
2. | Don't walk through the detection area when in | |||||||||||
the detection sensitivity. When it triggers, the icon will become green and record a |
| |||||||||||
picture (.jpg format) or a video (.avi format) depending on your capture settings. |
| |||||||||||
3. | This DVR will only record one channel at a time, and will not record in |
| ||||||||||
picture mode. Do not program motion detection while in |
| |||||||||||
4. | In order to prevent and avoid false triggers, we recommend: |
| ||||||||||
a) | Do not aim camera at the sun light |
| ||||||||||
b) | Aim camera away from constant moving objects |
| ||||||||||
c) | Avoid mirror and reflected light from bright surfaces |
| ||||||||||
d) | Avoid areas which have shadow variation |
| ||||||||||
5. | When aiming the camera, bright areas will be more sensitive than dark areas. |
| ||||||||||
6. | When memory is full, the movie mode icon will become RED in color and your old |
| ||||||||||
footage will be overwritten with new footage. |
| |||||||||||
7. | The pictures stored on the SD card cannot be displayed on most digital cameras. |
| ||||||||||
10. PLAY MODES |
| |||||||||||
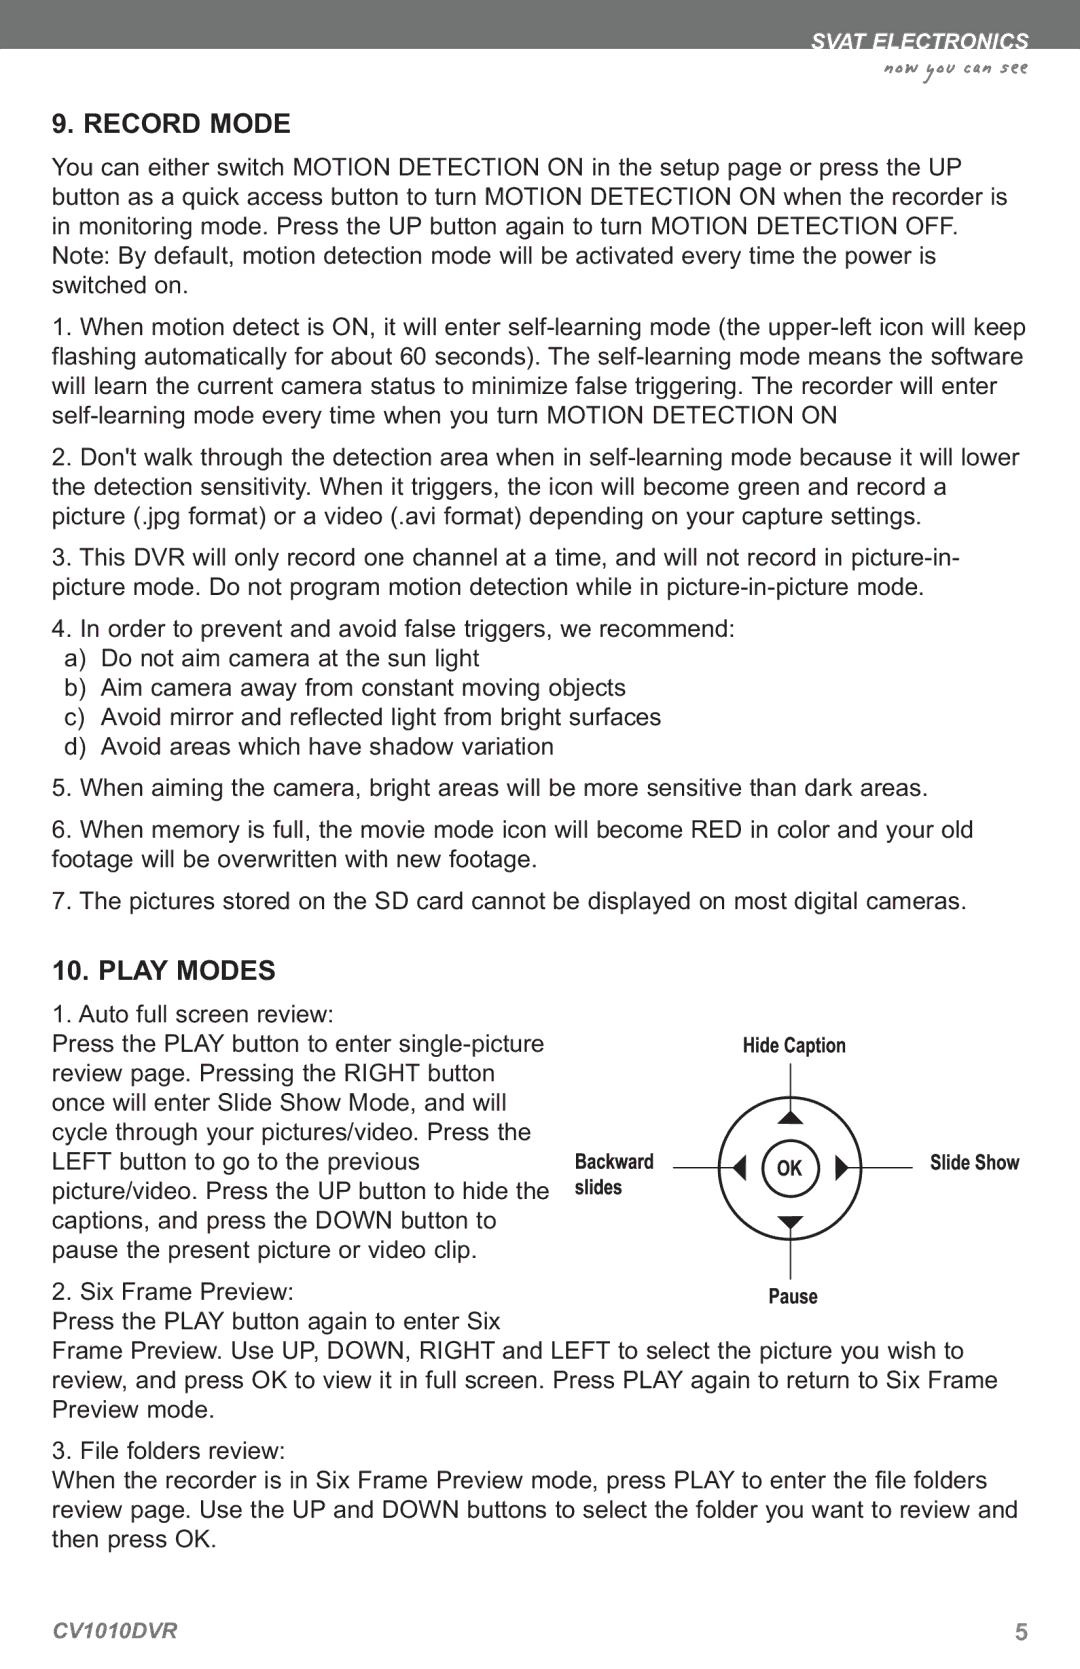
1. Auto full screen review: |
| |||||||||||
Press the PLAY button to enter |
| |||||||||||
review page. Pressing the RIGHT button |
|
|
| |||||||||
|
| |||||||||||
once will enter Slide Show Mode, and will |
|
|
| |||||||||
cycle through your pictures/video. Press the |
|
|
| |||||||||
|
| |||||||||||
LEFT button to go to the previous |
|
|
|
|
|
| ||||||
|
|
|
| |||||||||
picture/video. Press the UP button to hide the |
|
|
| |||||||||
|
| |||||||||||
|
| |||||||||||
captions, and press the DOWN button to |
|
|
| |||||||||
pause the present picture or video clip. |
|
|
| |||||||||
2. | Six Frame Preview: |
|
|
| ||||||||
|
| |||||||||||
Press the PLAY button again to enter Six |
| |||||||||||
Frame Preview. Use UP, DOWN, RIGHT and LEFT to select the picture you wish to |
| |||||||||||
review, and press OK to view it in full screen. Press PLAY again to return to Six Frame |
| |||||||||||
Preview mode. |
| |||||||||||
3. | File folders review: |
| ||||||||||
When the recorder is in Six Frame Preview mode, press PLAY to enter the file folders |
| |||||||||||
review page. Use the UP and DOWN buttons to select the folder you want to review and | ||||||||||||
then press OK. |
| |||||||||||
CV1010DVR | 5 | |||||||||||