User Manual
3.1Installing Hard Drive
1.Unplug the power supply. Never install or uninstall HDD when DVR is on.
2.Pull the HDD tray from the unit using the finger hole.
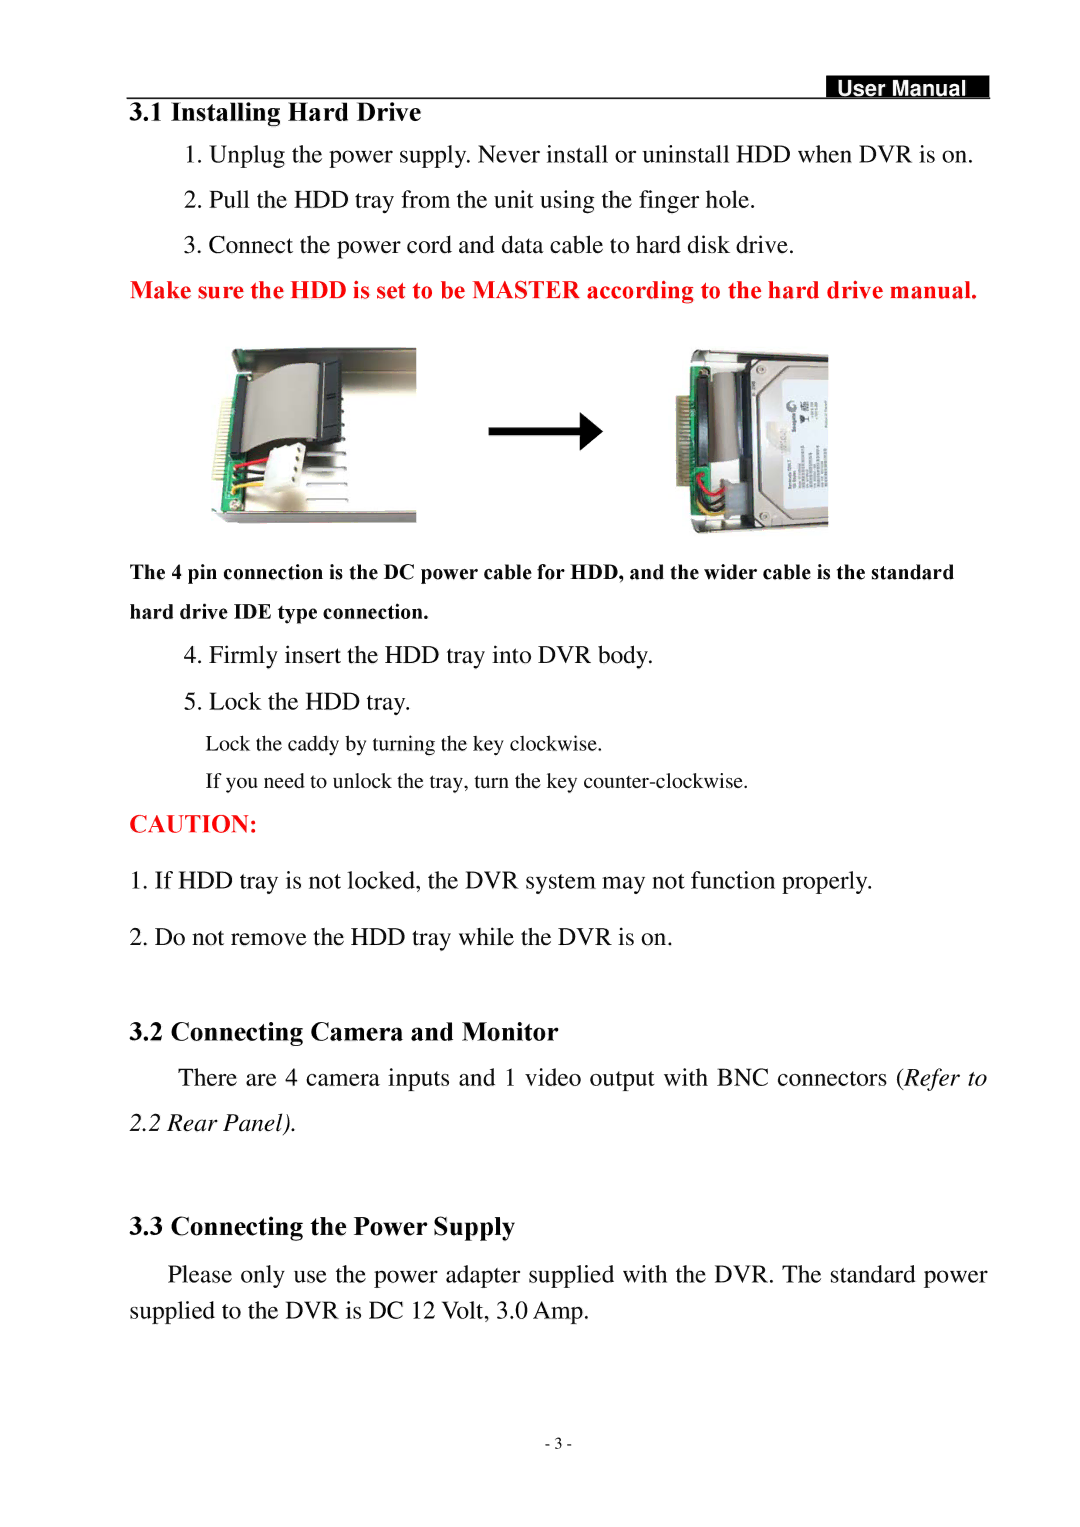
3.Connect the power cord and data cable to hard disk drive.
Make sure the HDD is set to be MASTER according to the hard drive manual.
The 4 pin connection is the DC power cable for HDD, and the wider cable is the standard
hard drive IDE type connection.
4.Firmly insert the HDD tray into DVR body.
5.Lock the HDD tray.
Lock the caddy by turning the key clockwise.
If you need to unlock the tray, turn the key
CAUTION:
1.If HDD tray is not locked, the DVR system may not function properly.
2.Do not remove the HDD tray while the DVR is on.
3.2 Connecting Camera and Monitor
There are 4 camera inputs and 1 video output with BNC connectors (Refer to
2.2 Rear Panel).
3.3 Connecting the Power Supply
Please only use the power adapter supplied with the DVR. The standard power supplied to the DVR is DC 12 Volt, 3.0 Amp.
- 3 -
