H2160SL9
Hdmi Mode and Actual Output Signals
Plug in the power cords of the devices to the AC outlet
6Repeat steps 4 to 5 until you register all
5Use K / L / s / B to select a desired title, then
7After adding all the titles you want, use K / L
To select Dubbing Start in the dubbing menu
Do not Open
Precautions
Laser Safety
Precautions
FCC Warning
RADIO-TV Interference
Location and Handling
Supplied Accessories
Dew Condensation Warning
To Avoid the Hazards of Electrical Shock and Fire
Cleaning the cabinet
Maintenance Servicing
Cleaning discs
Cleaning the disc lens Disc handling
Contents
Contents
Recording
Features
Dubbing
Playback
Symbol Description
Features
Editing
Compatibility
DVD-RW HDD
Color Systems
Unplayable Discs
Region Codes
Disc Type Logo Icon Type of title Media
Front Panel
Functional Overview
Functional Overview
Rear Panel
Introduction Connections
Installing the Batteries in the Remote Control
Remote Control
Using a Remote Control
Open the cover Insert batteries
Digital mode
Confirm − button Analog mode
Setup button
REC Mode button
Display Message
Front Panel Display
Title / track and chapter mark
Current status of the unit
Cable
Antenna Cable Connection
RF Modulator Connection
Plug in the power cords of the devices to the AC outlet
You cannot record one channel while watching another channel
With this setup
RCA
Connection to a TV
Audio OUT Video OUT
Component Video Output
2channel PCM
Actual Output Modes by Media
DVD-video Stream Dolby Digital
Copyright protection system
Connection to AN Audio System
Audio OUT
Digital Audio Output
Before YOU Start
Guide to On-Screen Displays and Menus
OFF
Before YOU Start
Title name information
File name information
Main Menu
HDD mode
Switching HDD / DVD Mode
DVD mode
Press HDD to activate the HDD component
Setting
Initial Setting
Setting on
Press POWER. Before
When scanning is over, press Setup to exit
Channel Setting
To cancel the auto channel preset during scanning
Auto Channel Scan
Channel Setting
Adding/Deleting Channels
Instructions continue on the next
Press Setup to exit
Delete
Use K / L to select Add or Delete, then press Enter
Auto Clock Setting
Setting the Clock
Use K / L to select Auto Clock Setting, then press Enter
Press Setup to exit and turn off the unit
Daylight Saving Time
Setting the Clock
You can set the built-in calendar from the year 2007 up to
On MAR NOV
Tuner Settings
Switching Analog Mode Digital Mode
Channel Selection
Tuner Settings
Selecting TV Audio
Press Audio to cycle through available audio languages
Selecting TV Audio cont’d
Use K / L to select TV Audio Select, then press Enter
SAP secondary audio program
Select if you do not want DTV CC. This is the default
Service 1 to Service
DTV Closed Caption
Closed Caption Style
Press Setup and use K / L to
Press Enter
Then press Enter
Switched as below
Switch the setting for each item you
Use K / L to select the item
Want to set, then press Enter
Choosing the Recording Format of a Brand-New DVD-RW
Formatting a Disc
Use K / L to select Format, then press ENTER.DVD Menu
Insert a brand-new disc. Formatting will start
Formatting a Disc
If you want to cancel formatting, select No
Reformatting a Disc Manually
Formatting is completed.100% is indicated
Press Setup Use K / L to select DVD Menu, then press Enter
Setting a Disc to Protect
To cancel the disc protect
Use K / L to select Disc Protect OFF ON, then press Enter
Auto Finalizing
Use K / L to select Recording, then press Enter
Recording menu will appear
Playing the Discs in Other DVD Players
Finalizing a Disc
Finalizing is completed
Information on Recording
Recording Mode
Restrictions on Recording
Video
Setting for Auto Chapter
Settings for a Recording
Press Setup to exit
You can set a specified time for chapter marks
Refer to Recording Mode on
Follow the steps to record TV programs
Align the disc to the disc tray guide
Press Stop C to stop recording
I HDD or I DVD mark will be displayed
On the TV screen briefly Refer to Guide to a Title List on
Autostart Recording
Recording the Contents of the Autostart Recording
Press Stop C twice to stop recording
Press REC/OTR to start recording
Use K / L to enter the date, then press B
Timer Recording
Timer Recording
To exit, press Timer PROG. or Setup
Use K / L to select a recordingNew ProgramStart EndDatemode
To stop the timer recording in progress
How to select a channel number for the timer recording
Press Timer PROG. to exit
Priority of Overlapped Settings
Hints for Timer Recording
Connection to an External Device
Settings for AN External Device
External device
If you want to use S-VIDEO in jack, select Video
Recording from an External Device
Settings for AN External Device
Guide to DV and On-Screen Display
DV Dubbing
DVC to HDD/DVD Dubbing
DV Dubbing
Use Input Select or CH / to select DV
Preparing for DV dubbing DVC to HDD
DV Dubbing
Dubbing
Information on Dubbing
Before Starting Dubbing
Selected Title Dubbing
Dubbing
Use K / L to select HDD DVD, then press Enter
Use K / L to select DVD HDD, then press Enter
Use s / B to select a desired
Use K / L to select Yes, then press
Recording mode, then press Enter
Press TOP Menu
One-Title Dubbing between HDD and DVD
HDD Playlist
Dubbing of the selected title will start
Information on Playback
Structure of Disc Contents
Basic Playback
Direct Playback
Some discs may start playback automatically
Basic Playback
Playback from the Title List
Temporarily
When selecting folder
When selecting track/file
Playing Back an Audio CD and a CD-RW/-R with MP3/JPEG Files
Hints for audio CD tracks and MP3/JPEG files
Pause
Using the Title/Disc Menu
Special Playback
Slow Forward / Slow Reverse Playback
Special Playback
Zoom
4x REV
Chasing Playback during Recording
Marker Setting
Simultaneous Playback and Recording
During recording, press Play B
TV program will be paused and sound will be muted
Playing Back the Autostart Recording
Variable Replay
To go back to the specific time
Using Display
Using Skip j / Skip
Search
Title/Chapter Search
Repeat Playback
Random Playback
Enter
Program Playback Slide Show
5Press Play B
Playback Editing
Special Settings
Switching Subtitles
Switching Audio Soundtrack
Switching Virtual Surround System
Special Settings
Switching Camera Angles
Reducing Block Noise
Information on Editing
Guide to a Title List
About Editing
After the disc is fully recorded
Deleting Titles
Use K / L to select Title Delete
Deleting Titles
Press Return or Stop C to exit
Then press Enter
Use K / L to select Delete Plural Titles, then press Enter
Deleting Selected Titles
Repeat until you select all the titles you want to delete
Use K / L / / B to select any title
Adding Titles to a Playlist
CREATING/DELETING Playlist
Use K / L to select Add To
Title is added to playlist
Erasing All Playlist
CREATING/DELETING Playlist
Use K / L to select Yes, then press ENTER.DVD Menu
Playlist can be deleted if it is no longer needed
Putting Names on Titles
Editing
Use K / L to select Edit Title Name, then press Enter
Stop mode, press TOP Menu
Editing
Putting Names on Titles cont’d
Guide to Edit Title Name
Press Return
Adding or Deleting Chapter Markers Manually
Deleting a Part of a Title
VR mode DVD-RW playlist
Use K / L to select Delete then press Enter
Deleting a Part of a Title cont’d
Cursor will move to Preview
Then press Enter
Dividing a Title
Combining Titles
Use K / L to select Title
Use K / L/ / B to select another
Names on Titles on page 82 to
Setting or Releasing the Title Protection
Display Edit menu
Applied.2 Use K / L to select Protect, then press Enter
Setting or Clearing All Chapter Marks at Once
Use K / L to select the desired interval, then press Enter
If you select OFF at , all the chapter marks are erased
Press Setup Use K / L to select HDD Menu, then press Enter
Deleting All Titles in HDD
Press Stop C if you are playing back an HDD or a disc
Items highlight is the default Contents
List of the Default Settings
TV-PG TV-G TV-Y7
List of the Default Settings
94 EN
Playback
General Setting
Enter
Use K / L to select Playback, then press Enter
Parental Lock Default OFF
General Setting
Use the Number buttons to enter the current password
Playback cont’d
Audio Language Default Original
Disc Menu Language Default English
Audio Out
PCM
Angle Icon Default on
Subtitle Language Default OFF
Still Mode Default Auto
Variable Skip / Replay
Display
Display cont’d
Use the Number buttons to enter the access password
Chip
Mpaa rating
Use the Number Buttons to enter new access password
Canadian English Rating
To set the rating
TV Aspect Default 43 Letter Box
Progressive Default OFF
Video
Selected item
Hdmi Audio Default on
Format Default RGB
Set to OFF when the Hdmi sound is not output
RGB Range Default Normal
Reset All
Select Yes using K / L , then press Enter
Reset the setting to default
Symptom Remedy
Troubleshooting
Troubleshooting
HDD / DVD
DVD
Disc may be dirty or flawed. Clean the disc
Protection signal
Check the parental lock setting. Refer to
Disc is not supported by this unit
Frequently Asked Questions
Error message Cause Solution
Language Code
Language Code
Glossary
General
Specifications
Recording
Tuner
Discos no Reproducibles
Español
Sistemas de Color
Códigos de Región
Modo Hdmi y señales efectivas de salida
Español
Esta unidad
Cables suministrados
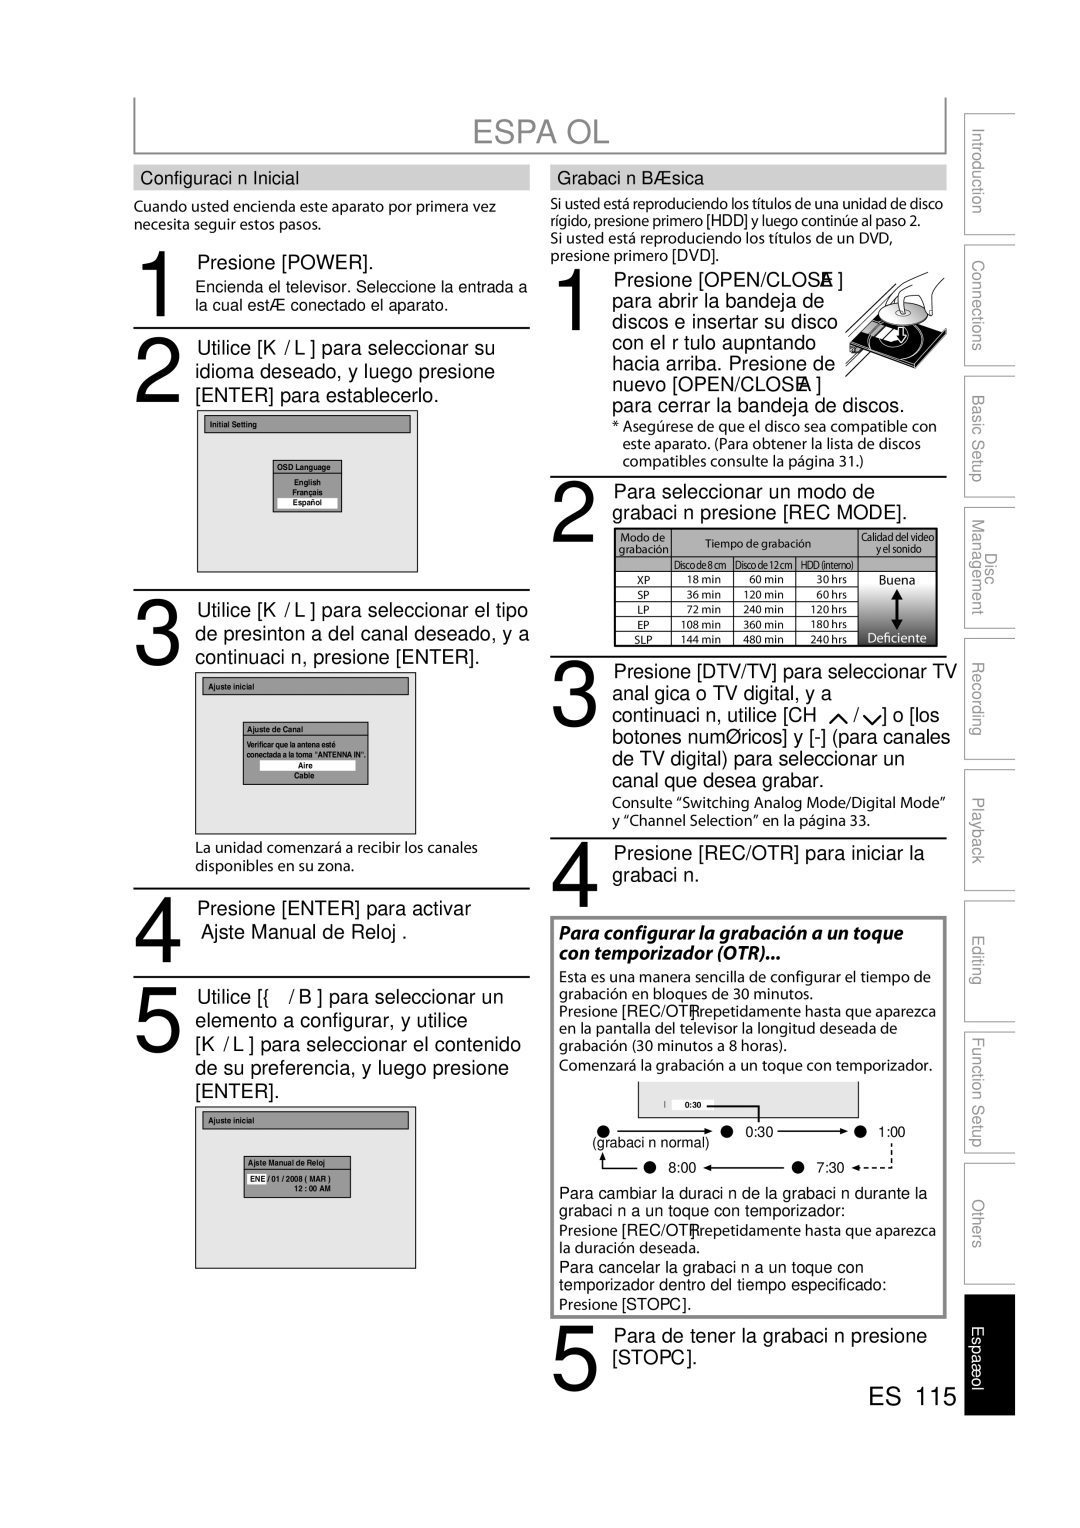
Para cerrar la bandeja de discos
Presione Power
Canal que desea grabar
Presione REC/OTR para iniciar la grabación
Copiado Básica
Presione Setup en el modo de detención
Luego presione Enter
DVD a Unidad de disco rígido
Reproducción Directa
Para iniciar una reproducción presione Play B
Consulte Resume Playback en la página
1VMN24833
Customer Service Tel