CHANGE ACCESS CODE
To change access code, follow the steps.
1Select
Press the MENU button on the remote control. Press the PLAY/K or STOP/L button to select “V-
CHIP SET UP”.
Then, press the F.FWD/B button.
2 Enter Access code | ACCESS CODE | |
Use the number on the remote con- |
|
|
trol to enter the access code. |
| _ _ _ _ |
|
| |
The default code is 0000. |
|
|
3 | Select “CHANGE CODE” | – |
|
TV RATING
MPAA RATING
Press the PLAY/K or STOP/L but- B CHANGE CODE ton to select "CHANGE CODE".
Then, press the F.FWD/B button.
4Enter New code
Use the number buttons to enter your desired access code in the NEW CODE space. Then enter the same code in the CONFIRM CODE space.
•If you enter wrong code, repeat step 4, making sure you enter the same new code exactly in the confirm code space.
5Exit the
Press the MENU button on the remote control to exit the screen.
Note: If you unplug the power code or power failure occurs, the changed access code will be lost and will return to default (0000). Change your access code again as necessary.
PLAYBACK
This TV/VCR will operate with any cassette that has the ![]() mark. For best results, we recommend the use of
mark. For best results, we recommend the use of
PRECAUTIONS
•Avoid moisture. Moisture condensation may occur on the tape if it is moved from a cold place to a warm place or visa versa. Before using a tape with these conditions, to avoid damage of the tape and your TV/VCR, wait until the tape has warmed to room temperature and the moisture has evaporated.
•Avoid extreme heat, high humidity and magnetic fields.
•Do not tamper with the cassette mechanism.
•Do not touch the tape with your fingers.
INSERTING A CASSETTE
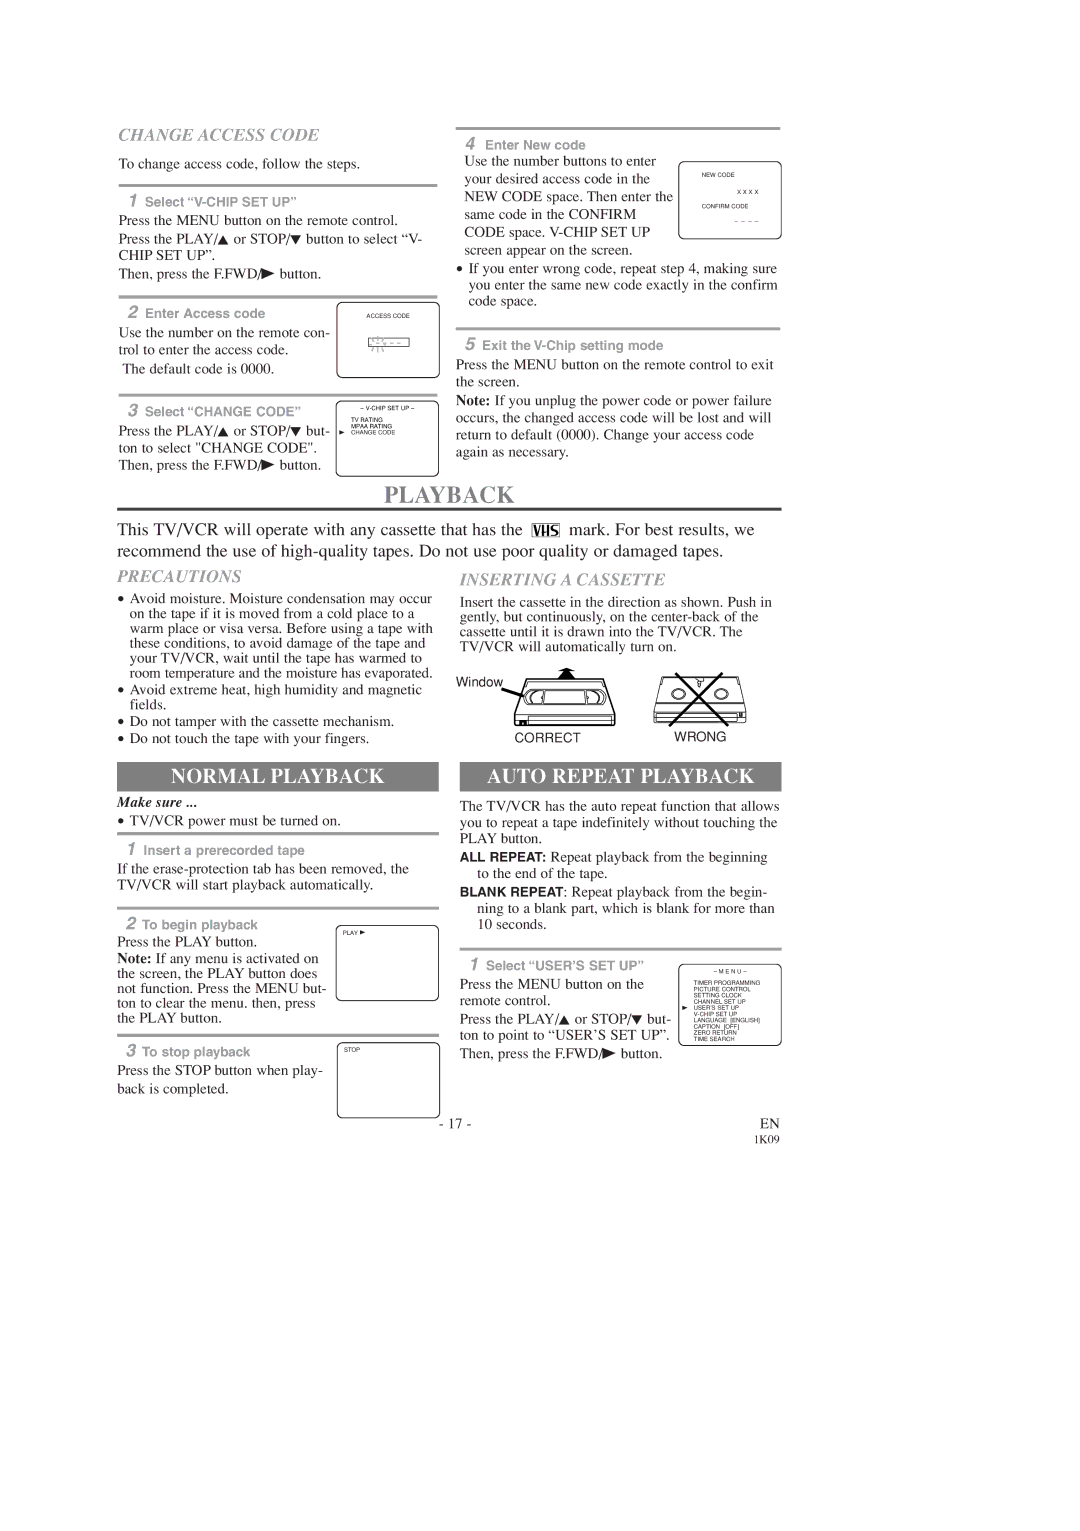
Insert the cassette in the direction as shown. Push in gently, but continuously, on the
Window
CORRECTWRONG
NORMAL PLAYBACK
Make sure ...
•TV/VCR power must be turned on.
1Insert a prerecorded tape
If the
2To begin playback
PLAY B
Press the PLAY button.
Note: If any menu is activated on the screen, the PLAY button does not function. Press the MENU but- ton to clear the menu. then, press the PLAY button.
3 To stop playback | STOP |
Press the STOP button when play- back is completed.
AUTO REPEAT PLAYBACK
The TV/VCR has the auto repeat function that allows you to repeat a tape indefinitely without touching the PLAY button.
ALL REPEAT: Repeat playback from the beginning to the end of the tape.
BLANK REPEAT: Repeat playback from the begin- ning to a blank part, which is blank for more than 10 seconds.
1 Select “USER’S SET UP” | – M E N U – |
Press the MENU button on the | PICTURE CONTROL |
| TIMER PROGRAMMING |
remote control. | SETTING CLOCK |
CHANNEL SET UP | |
Press the PLAY/K or STOP/L but- | B USER’S SET UP |
LANGUAGE [ENGLISH] | |
ton to point to “USER’S SET UP”. | CAPTION [OFF] |
TIME SEARCH | |
| ZERO RETURN |
Then, press the F.FWD/B button. |
|
- 17 - | EN |
