Telephone Usage
4.Replace and secure the directory cover by placing the directory cover on and moving the holding clip down.
Warning: Setting this switch in a position other than OFF can cause this phone to function incorrectly. When enabled, this feature is for certain PBX systems, and not meant for direct Central Office (CO) interface. If connecting to TalkSwitch or CO telephone lines, make sure this switch is set to OFF.
WALL MOUNT INSTRUCTIONS
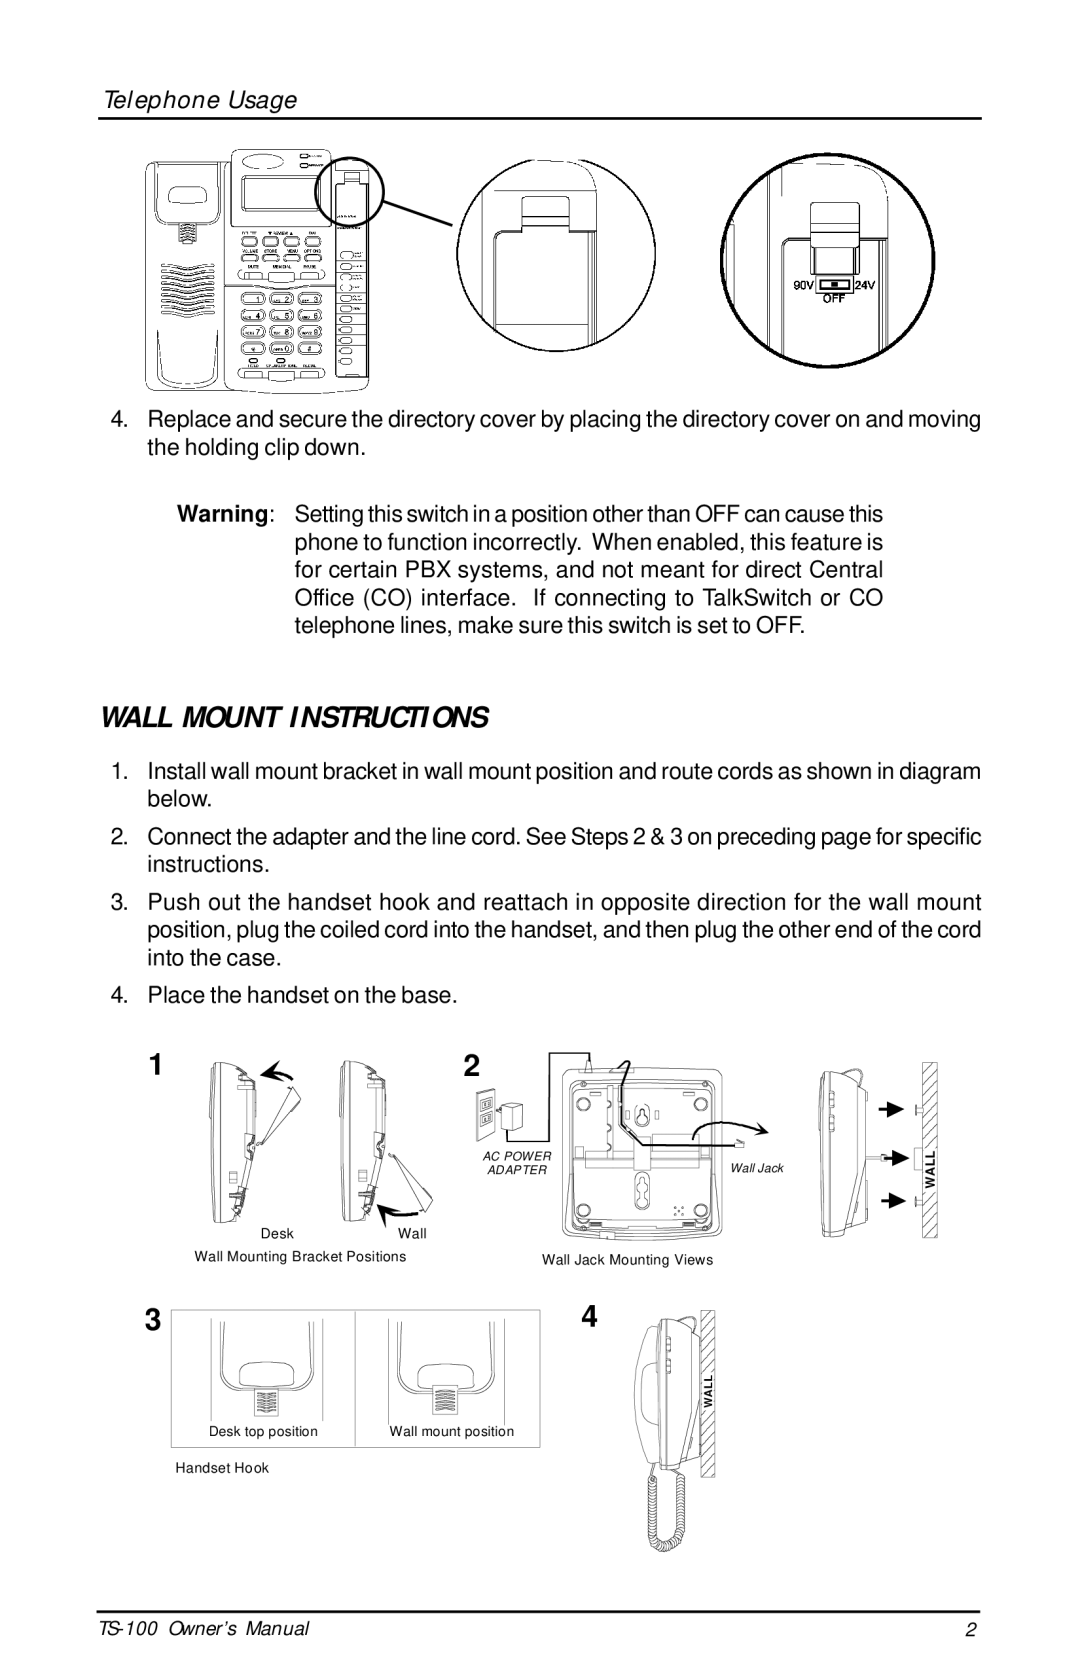
1.Install wall mount bracket in wall mount position and route cords as shown in diagram below.
2.Connect the adapter and the line cord. See Steps 2 & 3 on preceding page for specific instructions.
3.Push out the handset hook and reattach in opposite direction for the wall mount position, plug the coiled cord into the handset, and then plug the other end of the cord into the case.
4.Place the handset on the base.
1 | 2 |
|
|
| AC POWER | Wall Jack | WALL |
| ADAPTER |
| |
Desk | Wall |
|
|
Wall Mounting Bracket Positions | Wall Jack Mounting Views |
3
Desk top position | Wall mount position |
Handset Hook
4
WALL |
2 |