TOB-120,TOB-300
Adjustments
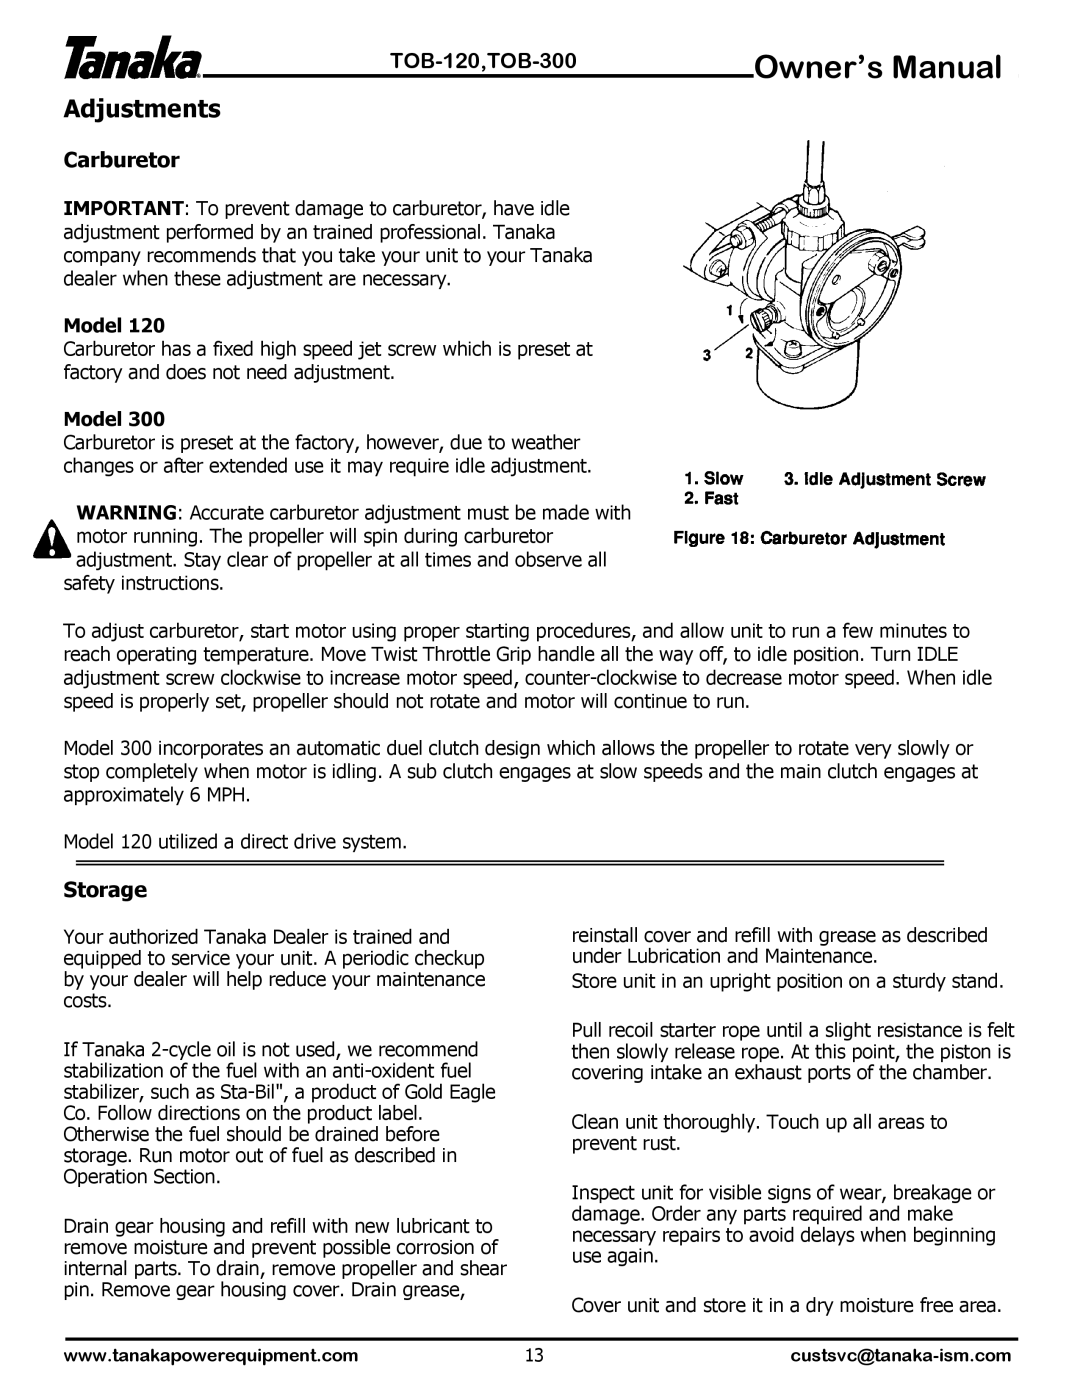
Carburetor
IMPORTANT: To prevent damage to carburetor, have idle adjustment performed by an trained professional. Tanaka company recommends that you take your unit to your Tanaka dealer when these adjustment are necessary.
Model 120
Carburetor has a fixed high speed jet screw which is preset at factory and does not need adjustment.
Model 300
Carburetor is preset at the factory, however, due to weather changes or after extended use it may require idle adjustment.
WARNING: Accurate carburetor adjustment must be made with motor running. The propeller will spin during carburetor adjustment. Stay clear of propeller at all times and observe all
safety instructions.
Owner’s Manual
To adjust carburetor, start motor using proper starting procedures, and allow unit to run a few minutes to reach operating temperature. Move Twist Throttle Grip handle all the way off, to idle position. Turn IDLE adjustment screw clockwise to increase motor speed,
Model 300 incorporates an automatic duel clutch design which allows the propeller to rotate very slowly or stop completely when motor is idling. A sub clutch engages at slow speeds and the main clutch engages at approximately 6 MPH.
Model 120 utilized a direct drive system.
Storage
Your authorized Tanaka Dealer is trained and equipped to service your unit. A periodic checkup by your dealer will help reduce your maintenance costs.
If Tanaka
Drain gear housing and refill with new lubricant to remove moisture and prevent possible corrosion of internal parts. To drain, remove propeller and shear pin. Remove gear housing cover. Drain grease,
reinstall cover and refill with grease as described under Lubrication and Maintenance.
Store unit in an upright position on a sturdy stand.
Pull recoil starter rope until a slight resistance is felt then slowly release rope. At this point, the piston is covering intake an exhaust ports of the chamber.
Clean unit thoroughly. Touch up all areas to prevent rust.
Inspect unit for visible signs of wear, breakage or damage. Order any parts required and make necessary repairs to avoid delays when beginning use again.
Cover unit and store it in a dry moisture free area.
www.tanakapowerequipment.com | 13 |