2- Features of the CC-222MK$
kDisc tray Open and close this tray with the OPEN/ CLOSE key to load and unload discs.
lMULTI DIAL Used to select and confirm menu set- tings etc. (turn to make the setting, push to confirm), and also as a track search key when playing back discs.
;REMOTE SENSOR window Receives the infrared signals from the remote control unit. Do not block this window if you are using the remote control unit.
zPITCH CONTROL knob This is a centerdetented knob which allows the tape speed (and therefore the pitch) to be changed by ±10%.
xREV MODE switch This
cDOLBY NR (OFF/ON) switch Use this switch to turn the Dolby noise reduction on and off for the cas- sette deck.
bCD TIMER (OFF/PLAY) switch Use this switch to turn the CD timer option on or off. When this is in the PLAY position, turning on the machine with a disc inserted will automatically start playback.
nCD STOP key Stops CD playback or disc recording.
mCD PLAY key Starts CD playback or recording (from record standby mode).
,CD PAUSE key Pauses or resumes CD playback or recording (starts recording from record standby mode).
.CD RECORD key Places the disc in record standby mode and performs manual track incrementing while recording.
/MONITOR (TAPE,MIX,DISC) switch This switch selects the source for the headphone outputs as either the cassette deck, the disc recorder, or a mixture of both.
!PHONES jack and volume control Connect a stan- dard pair of stereo headphones to this 1/4” jack, and adjust the level with the control.
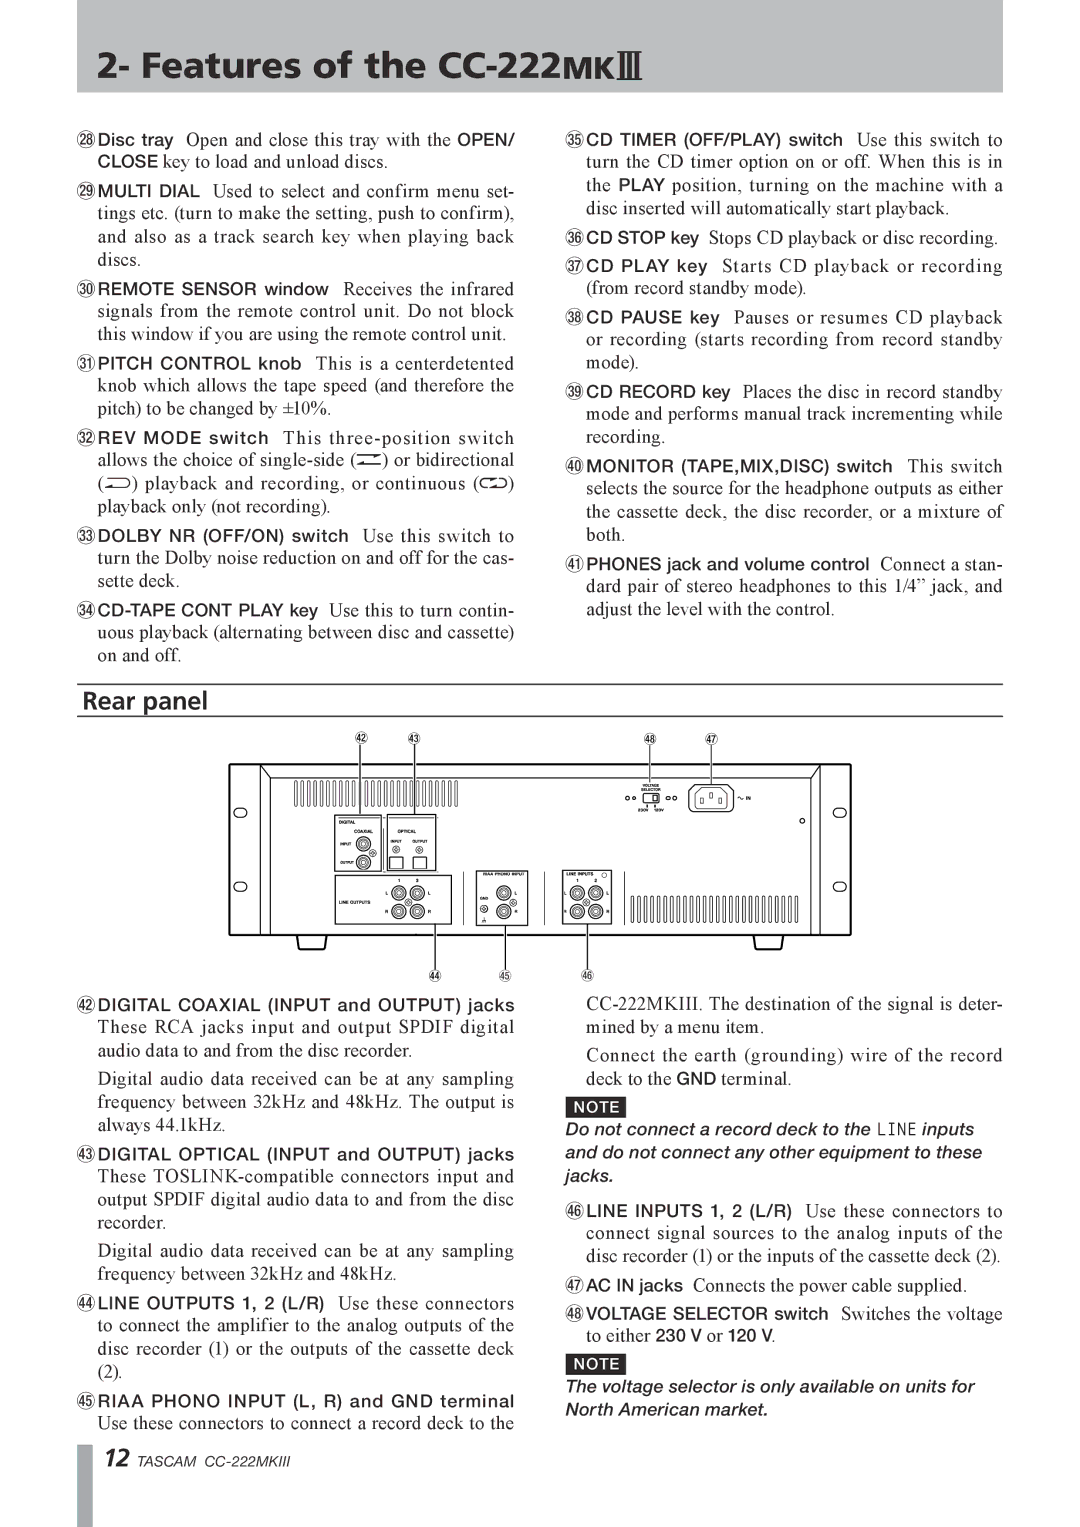
Rear panel
@ # | * | & |
$ %
@DIGITAL COAXIAL (INPUT and OUTPUT) jacks
These RCA jacks input and output SPDIF digital audio data to and from the disc recorder.
Digital audio data received can be at any sampling frequency between 32kHz and 48kHz. The output is always 44.1kHz.
#DIGITAL OPTICAL (INPUT and OUTPUT) jacks
These
Digital audio data received can be at any sampling frequency between 32kHz and 48kHz.
$LINE OUTPUTS 1, 2 (L/R) Use these connectors to connect the amplifier to the analog outputs of the disc recorder (1) or the outputs of the cassette deck
(2).
%RIAA PHONO INPUT (L, R) and GND terminal
Use these connectors to connect a record deck to the
^
Connect the earth (grounding) wire of the record deck to the GND terminal.
NOTE
Do not connect a record deck to the LINE inputs and do not connect any other equipment to these jacks.
^LINE INPUTS 1, 2 (L/R) Use these connectors to connect signal sources to the analog inputs of the disc recorder (1) or the inputs of the cassette deck (2).
&AC IN jacks Connects the power cable supplied.
*VOLTAGE SELECTOR switch Switches the voltage to either 230 V or 120 V.
NOTE
The voltage selector is only available on units for North American market.
12 TASCAM
