DVD Stereo System
Supplied accessories
Dear customer
System SC-DV170
Table of contents
EB area code model only
How to replace the fuse
Before use
Before use
If irregular coloring occurs on your television
» Placement of center/surround Speakers and subwoofer
Set the voltage
Locating the components
Basic connections
SUB
Woofer Center R L Surround
AM outdoor antenna
FM outdoor antenna
Television settings
Press DVD to select DVD as the source
Press Return to exit
FPLAY/FREC
Front panel controls
»A Tuner/amplifier
»B DVD/Video CD/CD changer
Front panel controls
COUNTER, RESET, Display
»A Cassette deck
»B Sound processor
»C Use
Remote control
»A Controls
»B Batteries
»A Setting the time
» Saving power in the standby C mode
»B Turning Demo off
Type of disc for the type of connected TV
Region numbers
Types of discs
Glossary
Basic operations
Adjust the volume
Discs
Normal play
DISC/ALL
Press 1 DISC/ALL to select the desired Method while stopped
Operations
Basic
»D Slow-motion play
»A Skip function
»B Search function
»C Still picture Pause
Press TOP Menu or Menu
»B Using menus to play
» Changing soundtrack, subtitle Languages and angles
Press the appropriate buttons during play
Press Marker during play
» Changing the picture quality for Movie viewing
Press Cinema
»B Marking a position
Repeat function
Press Repeat during play
Repeat
While stopped
Press Play Mode to select Prgm on the tuner/amplifier
Program play
Press
»B Starting play from a specific track
Press Play Mode to select RAN
»A Random play
DOM on the tuner/amplifier
Press the cursor button 2 or 1 to select an item
Using GUI screens
Cancel
Press Display
Shuttle GUI descriptions
Content Operation
Disc GUI descriptions
Unit GUI descriptions
Radio manual tuning
Disp Mode PTY
FM Auto Mono TUNER/BAND RDS
Hold down SET
Radio preset tuning
Automatic presetting
Manual presetting
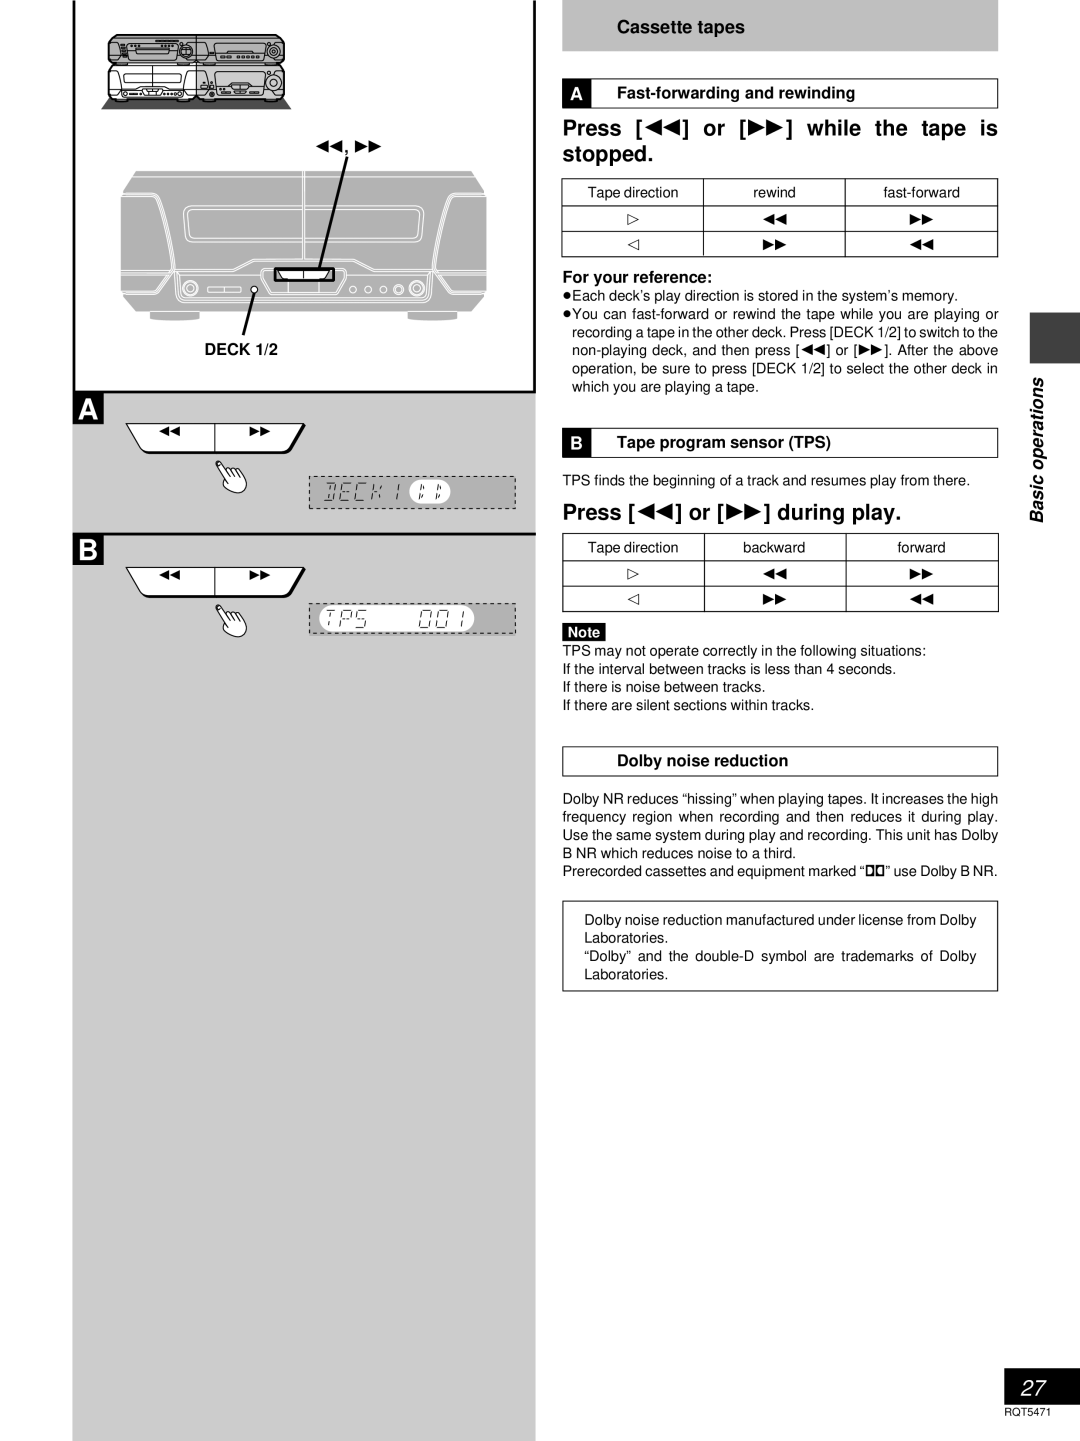
Cassette tapes
Press REV Mode to select the re- verse mode
Press 6 or 5 while the tape is stopped
Press 6 or 5 during play
Cassette tapes
Use , !, #, $ to make the desired curve
Turn Multi JOG to select a setting
»B Using the manual equalizer
Changing sound field and quality
Press Digital S.WOOFER
» Using the acoustic image equalizer 3D AI EQ
»B Boosting the super woofer
Change the sound quality with #, $
Amplifier modes
Features Software
Enjoying surround sound
Changing sound field
Multi rear surround
Seat position
Additional effects
Center focus
Enjoying surround sound
To down-mix Dolby Digital 5.1ch signals to 2 chan Nels
To adjust the levels during play
Play a DVD encoded with Dolby Digital
Sound
Speaker level adjustments Remote control only
Press ëPRO LOGIC, OFF/ON
Play a Dolby Surround source
Press Super Surround and select
Adjust the seat position with Multi JOG
Surround effects
Press Super Surround and select Movie or Music
Press 3D Enhanced Surround
Press Center Focus
Press Virtual Rear Surround
Press Multi Rear Surround
Counter
Reset Display
Press Counter Display
Recording operations
Preparatory steps
Press Open on deck 2 and insert the cassette
Before recording Deck 2 only
Press CD Edit
Recording discs
»A Normal recording
»B One touch disc editing
»B Tape-to-tape recording
Recording the radio
Convenient functions
Start the source Select the Karaoke mode
Adjust the main volume and micro- phone volume
Enjoying Karaoke
Key
Press Tuning Ý or ß to change
Press Echo
Press KEY CON
Press ê/I to turn the unit off
Using the timers
Play timer
Press CLOCK/TIMER, -DEMO to select Fplay
Functions
Record timer
Press CLOCK/TIMER, -DEMO to select Frec
Prepare for recording
ÏPLAY/ÏREC CLOCK/TIMER Demo
»A The play and record timers
»B The sleep timer
Using the timers together
DVD
Initial settings
Changing the initial settings
Press Shift r Setup
Summary of initial settings
Initial settings
Function Options
Remarks
³Shaded items are the factory settings
»A Entering a password
»B Calculating delay time
Return
Pan and scan Wide screen Letterbox Non-pan and scan Regular
Language code list
How different kinds of software appear on your television
Software format Wide screen
» Changing the sound range a display
»B Muting the volume
Press Display Mode
Reduce the volume before connection
Digital Woofer
External unit connections
Recording onto an external unit
Using other equipment
»A Listening to an external source
»B Recording an external source
Reference
Technical specifications
Troubleshooting guide
Listening to the radio
Listening to tapes
Maintenance
Osaka 542-8588, Japan RQT5471-B