A B ![]()
![]() 1
1![]()
![]()
COUNTER
RESET DISPLAY 6DECK31/2452
A
COUNTER
DISPLAY
COUNTER
RESET
C
< | 2 3 1 |
1 | OPEN |
|
2 | DOLBY NR | ÎNR |
| 2 | |
3 | REV MODE | ÎNR |
|
| 2 |
Before recording (Deck 2 only)
See page 3 for tape selection.
Volume, sound quality and surround effects have no effect on re- cording. Sound quality and surround effects are automatically set to flat when recording.
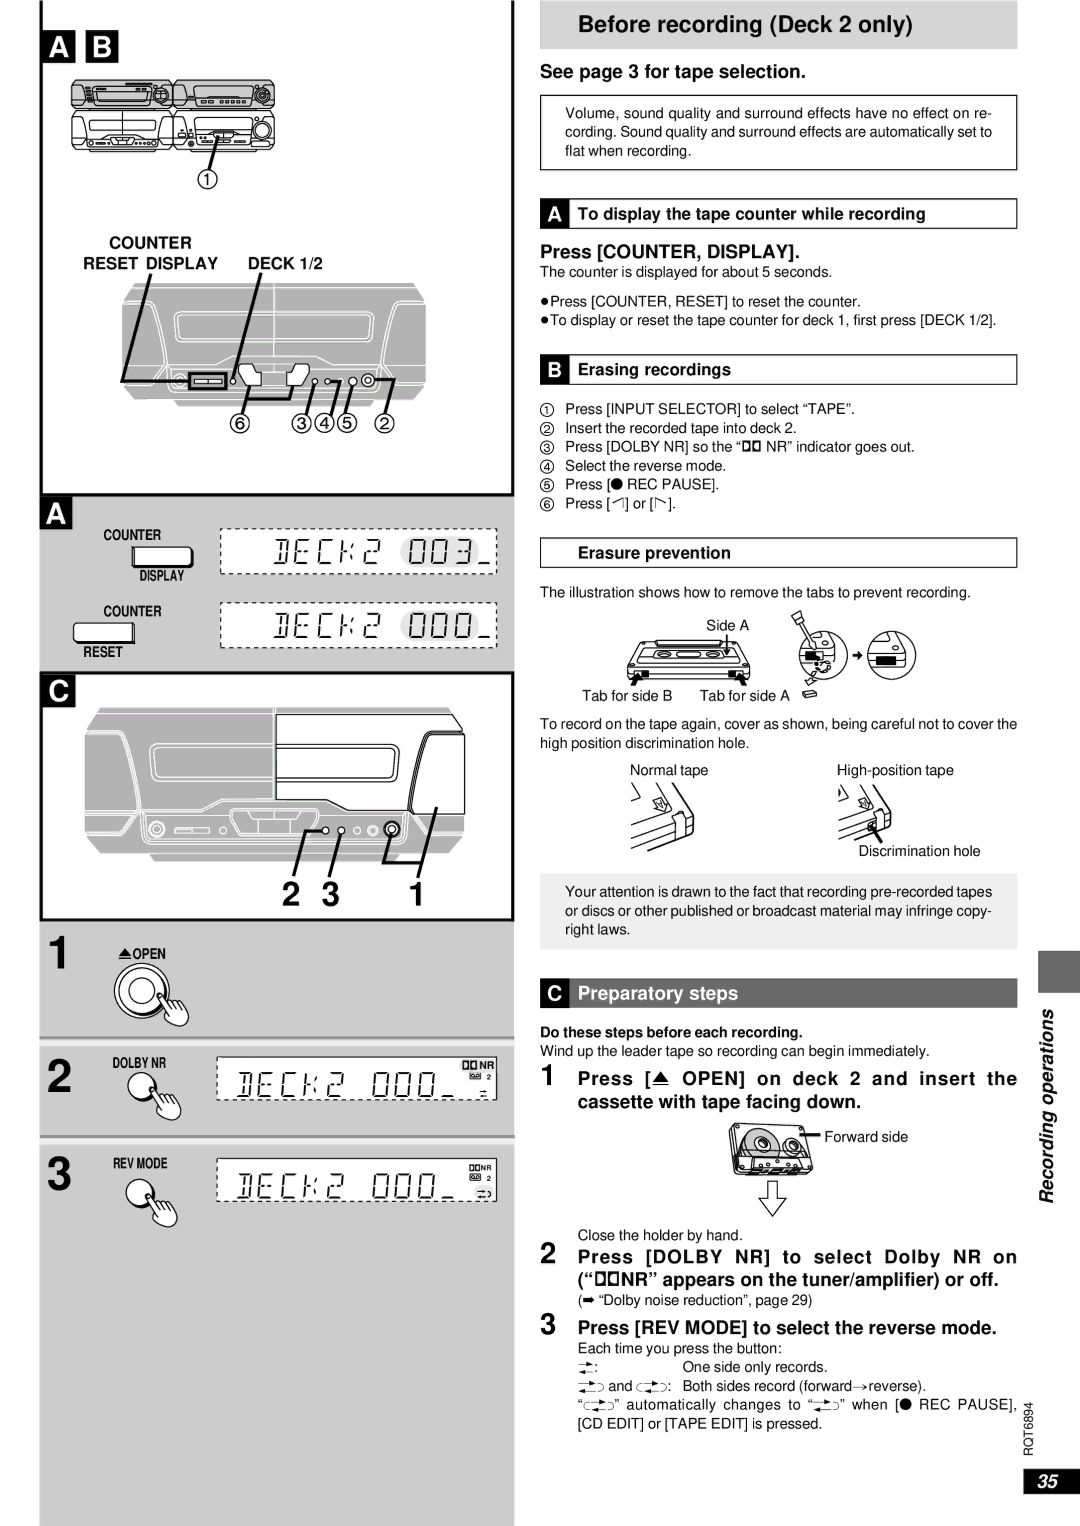
ªA To display the tape counter while recording
Press [COUNTER, DISPLAY].
The counter is displayed for about 5 seconds.
≥Press [COUNTER, RESET] to reset the counter.
≥To display or reset the tape counter for deck 1, first press [DECK 1/2].
ªB Erasing recordings
1Press [INPUT SELECTOR] to select “TAPE”.
2 Insert the recorded tape into deck 2.
3 Press [DOLBY NR] so the “Î NR” indicator goes out. 4 Select the reverse mode.
5 Press [¥ REC PAUSE].
6 Press ["] or [!].
Erasure prevention
The illustration shows how to remove the tabs to prevent recording.
Side A
Tab for side B | Tab for side A |
To record on the tape again, cover as shown, being careful not to cover the high position discrimination hole.
Normal tape | |
A | A |
| Discrimination hole |
Your attention is drawn to the fact that recording
ªC | Preparatory steps | operations | |
Do these steps before each recording. | |||
| |||
Wind up the leader tape so recording can begin immediately. |
| ||
1 | Press [< OPEN] on deck 2 and insert the |
| |
| cassette with tape facing down. | Recording | |
| Forward side | ||
|
| ||
Close the holder by hand.
2 Press [DOLBY NR] to select Dolby NR on (“ÎNR” appears on the tuner/amplifier) or off.
(➡ “Dolby noise reduction”, page 29)
3 Press [REV MODE] to select the reverse mode.
Each time you press the button:
b:One side only records.
dand f: Both sides record (forward>reverse).
“f” automatically changes to “d” when [¥ REC PAUSE], | |
[CD EDIT] or [TAPE EDIT] is pressed. | RQT6894 |
| |
35
