A |
COUNTER |
B |
Side A
Before recording
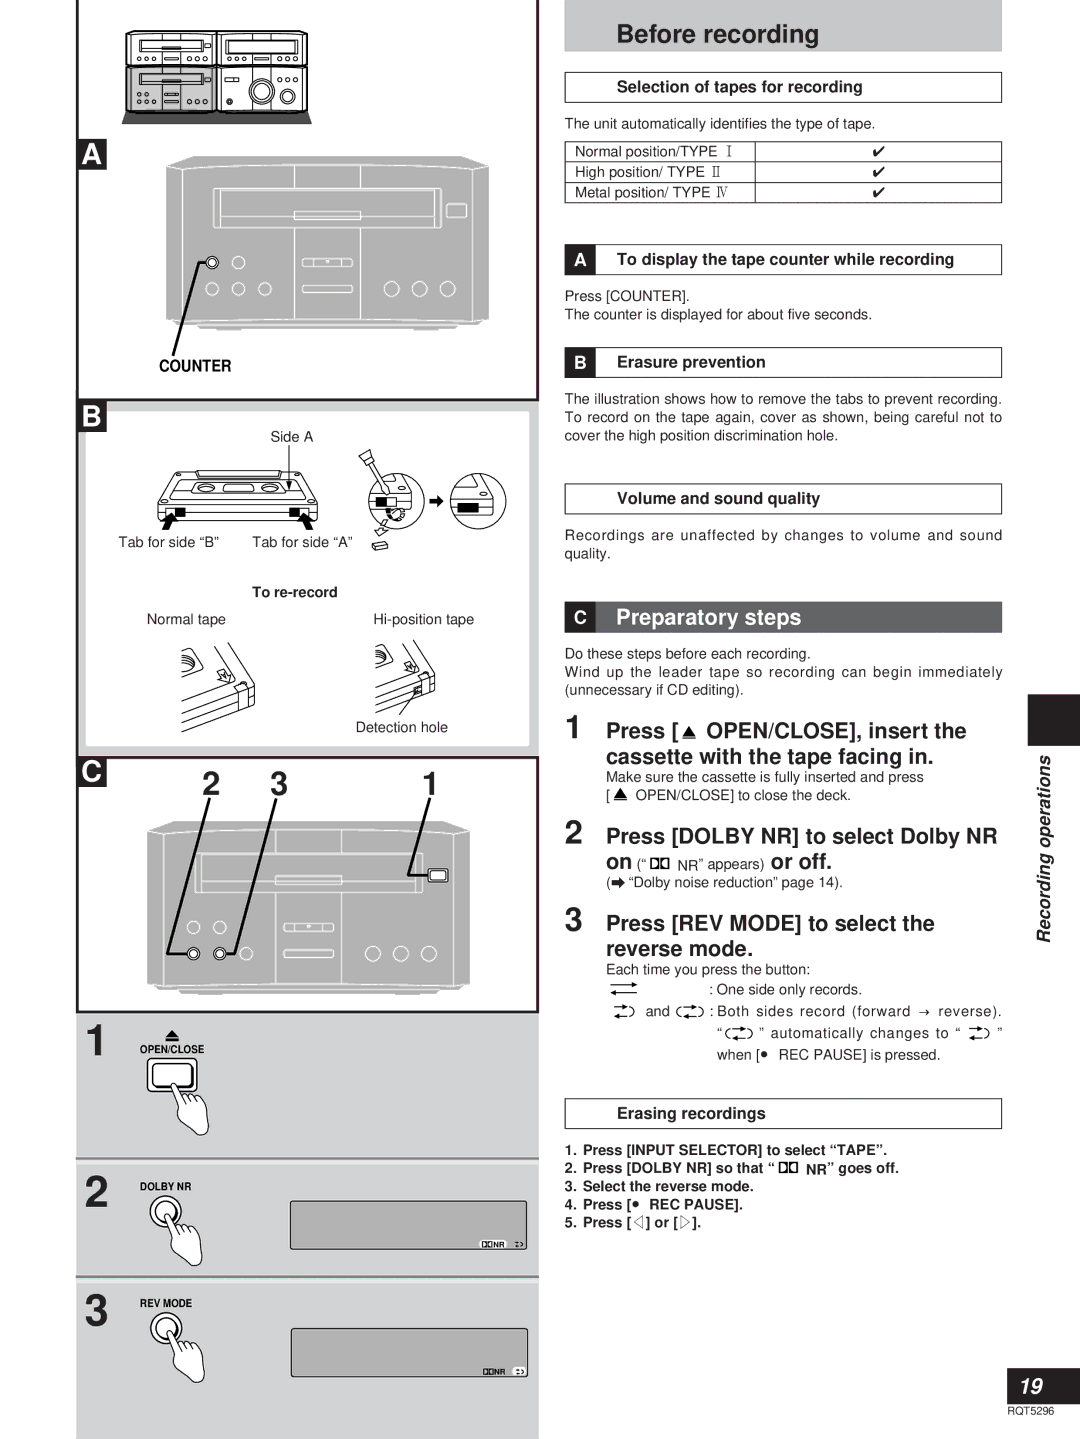
Selection of tapes for recording
The unit automatically identifies the type of tape.
Normal position/TYPE 1 | ✔ |
High position/ TYPE 2 | ✔ |
Metal position/ TYPE 4 | ✔ |
ATo display the tape counter while recording
Press [COUNTER].
The counter is displayed for about five seconds.
BErasure prevention
The illustration shows how to remove the tabs to prevent recording. To record on the tape again, cover as shown, being careful not to cover the high position discrimination hole.
Tab for side “B” | Tab for side “A” |
| To |
Normal tape |
|
|
|
|
|
| Detection hole |
|
|
|
|
|
| |
|
|
|
|
|
|
|
|
|
|
|
|
|
|
C |
| 2 | 3 | 1 | ||
|
| |||||
|
|
|
|
|
|
|
1 OPEN/CLOSE
2 DOLBY NR
![]() NR
NR
3 REV MODE
![]() NR
NR
Volume and sound quality
Recordings are unaffected by changes to volume and sound quality.
CPreparatory steps
Do these steps before each recording.
Wind up the leader tape so recording can begin immediately (unnecessary if CD editing).
1 Press [ |
| OPEN/CLOSE], insert the |
| |||||||
cassette with the tape facing in. | operations | |||||||||
2 Press [DOLBY NR] to select Dolby NR | ||||||||||
Make sure the cassette is fully inserted and press |
| |||||||||
[ |
| OPEN/CLOSE] to close the deck. |
| |||||||
on (“ |
| NR” appears) or off. | Recording | |||||||
| ||||||||||
(a “Dolby noise reduction” page 14). | ||||||||||
| ||||||||||
3 Press [REV MODE] to select the |
| |||||||||
reverse mode. |
| |||||||||
Each time you press the button: |
| |||||||||
|
|
|
|
|
|
|
| : One side only records. |
| |
|
|
|
|
|
|
|
| |||
|
|
|
|
|
|
|
| |||
|
|
|
| and |
| : Both sides record (forward → reverse). |
| |||
|
|
|
|
|
|
|
| “ ” automatically changes to “ | ” | |
|
|
|
|
|
|
|
| when [● REC PAUSE] is pressed. |
| |
Erasing recordings
1.Press [INPUT SELECTOR] to select “TAPE”.
2.Press [DOLBY NR] so that “ ![]()
![]() NR” goes off.
NR” goes off.
3.Select the reverse mode.
4.Press [● REC PAUSE].
5.Press [v] or [u].
19
RQT5296