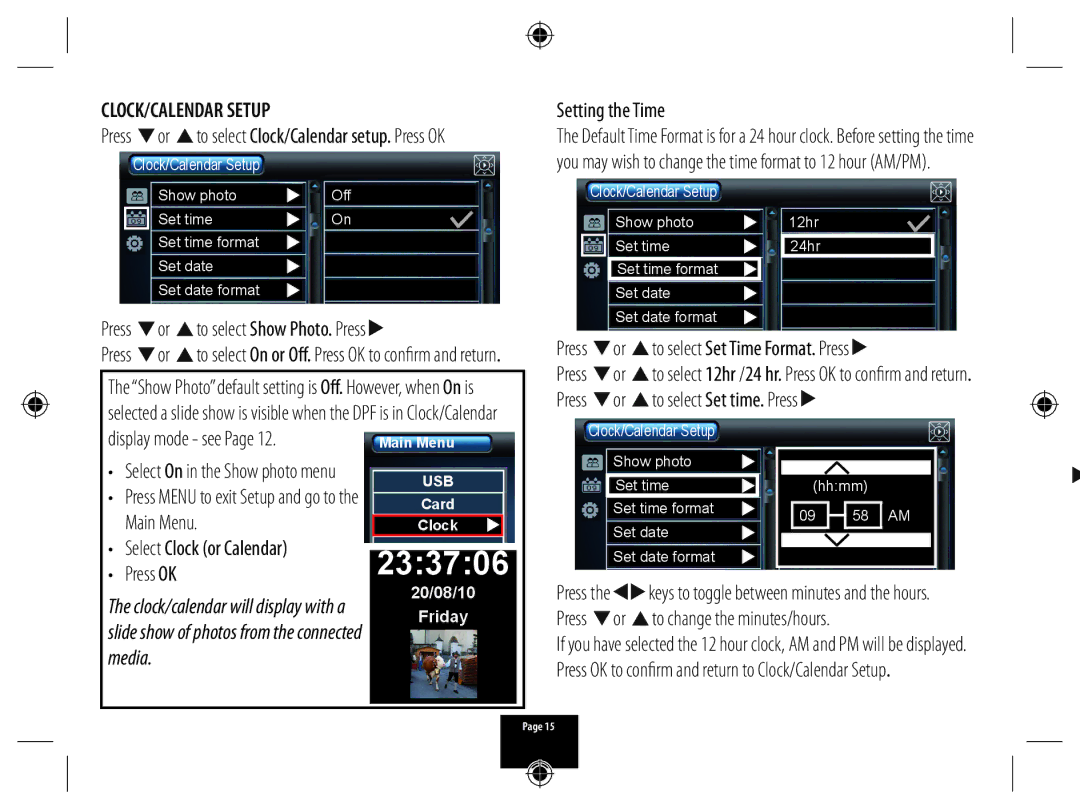
CLOCK/CALENDAR SETUP
Press ![]() or
or ![]() to select Clock/Calendar setup. Press OK
to select Clock/Calendar setup. Press OK
Clock/Calendar Setup
| Show photo |
| Off |
| |
|
|
|
| ||
| Set time |
| On |
| |
|
|
|
|
| |
| Set time format |
|
|
| |
|
|
|
|
| |
| Set date |
|
|
| |
|
|
|
|
| |
| Set date format |
|
|
| |
Press | or | to select Show Photo. Press | |||
Press | or | to select On or Off. Press OK to confirm and return. | |||
The “Show Photo” default setting is Off. However, when On is selected a slide show is visible when the DPF is in Clock/Calendar
display mode - see Page 12. | Main Menu |
Setting the Time
The Default Time Format is for a 24 hour clock. Before setting the time you may wish to change the time format to 12 hour (AM/PM).
Clock/Calendar Setup
| Show photo |
| 12hr |
| |
|
|
|
| ||
| Set time |
| 24hr |
| |
| Set time format |
|
|
| |
| Set date |
|
|
| |
| Set date format |
|
|
| |
Press | or | to select Set Time Format. Press | |||
Press | or | to select 12hr /24 hr. Press OK to confirm and return. | |||
Press | or | to select Set time. Press | |||
Clock/Calendar Setup
• Select On in the Show photo menu | |
• Press MENU to exit Setup and go to the | |
| Main Menu. |
• | Select Clock (or Calendar) |
• | Press OK |
USB
Card
Clock
23:37:06
Show photo
Set time
Set time format
Set date
Set date format
(hh:mm)
09 | 58 | AM |
The clock/calendar will display with a slide show of photos from the connected media.
20/08/10
Friday
Press the ![]()
![]() keys to toggle between minutes and the hours. Press
keys to toggle between minutes and the hours. Press ![]() or
or ![]() to change the minutes/hours.
to change the minutes/hours.
If you have selected the 12 hour clock, AM and PM will be displayed. Press OK to confirm and return to Clock/Calendar Setup.
Page 15