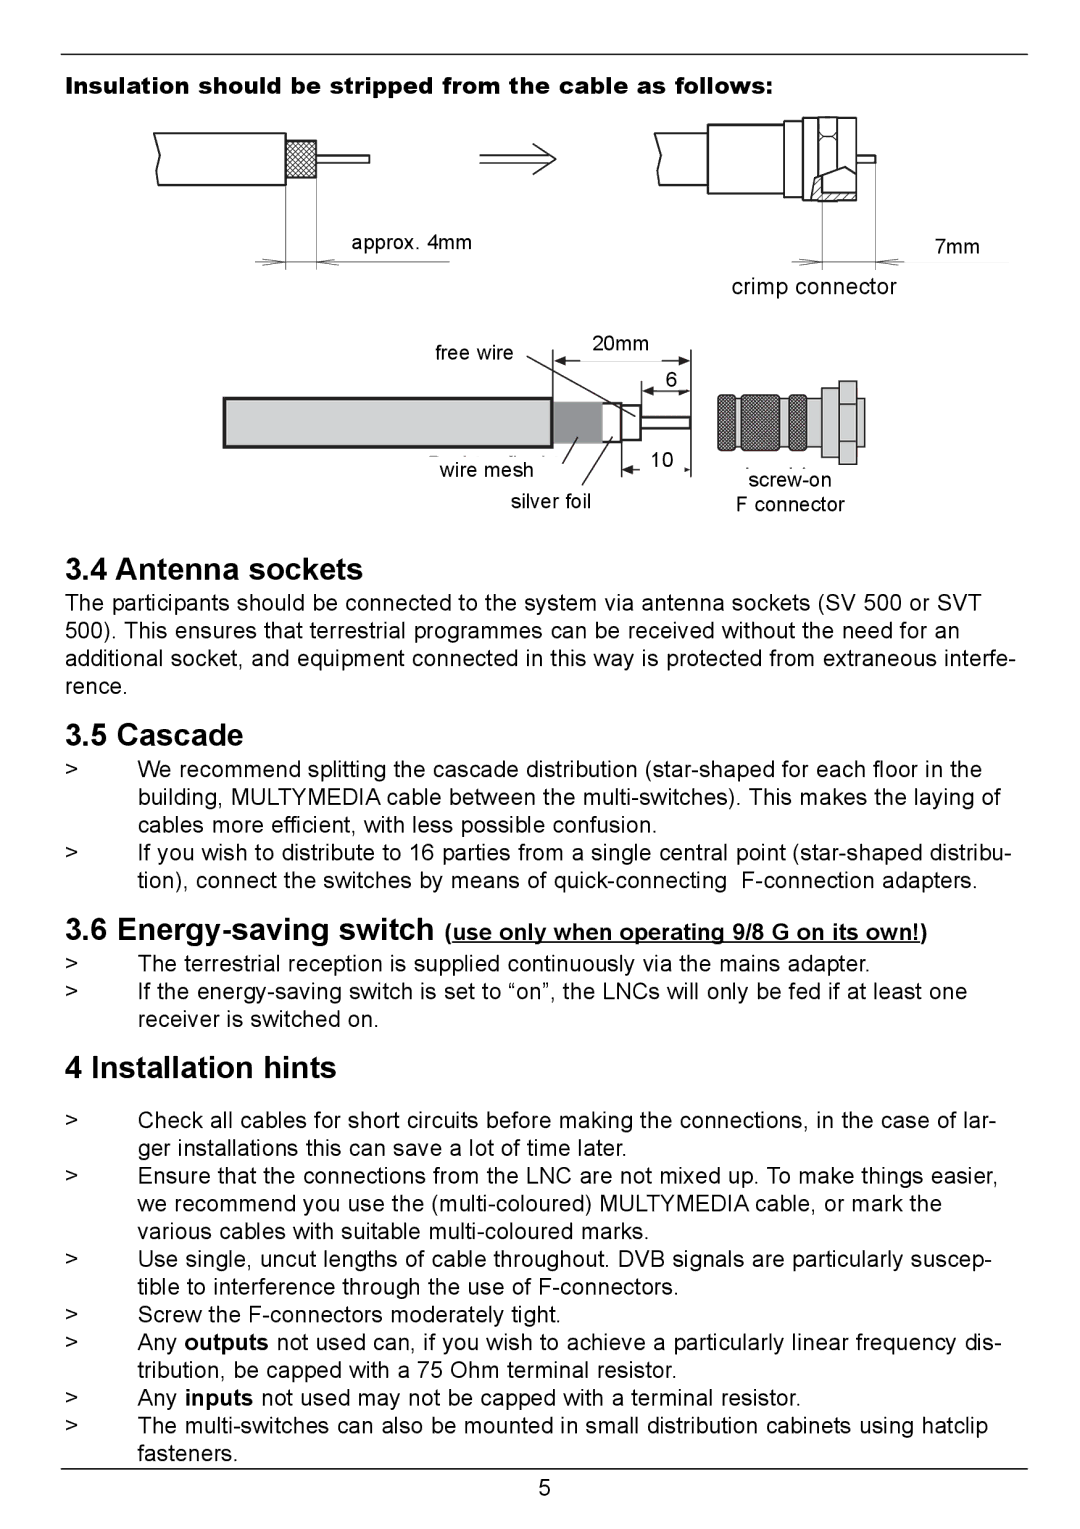
Insulation should be stripped from the cable as follows:
![]() approx. 4mm
approx. 4mm
free wire |
| 20mm |
|
|
|
|
| 6 |
wire mesh | 10 |
| |
silver foil |
|
![]() 7mm
7mm
crimp connector
![]()
![]()
![]() F connector
F connector
3.4 Antenna sockets
The participants should be connected to the system via antenna sockets (SV 500 or SVT 500). This ensures that terrestrial programmes can be received without the need for an additional socket, and equipment connected in this way is protected from extraneous interfe- rence.
3.5 Cascade
>We recommend splitting the cascade distribution
>If you wish to distribute to 16 parties from a single central point
3.6
> The terrestrial reception is supplied continuously via the mains adapter.
> If the
4 Installation hints
>Check all cables for short circuits before making the connections, in the case of lar- ger installations this can save a lot of time later.
>Ensure that the connections from the LNC are not mixed up. To make things easier, we recommend you use the
>Use single, uncut lengths of cable throughout. DVB signals are particularly suscep- tible to interference through the use of
>Screw the
>Any outputs not used can, if you wish to achieve a particularly linear frequency dis- tribution, be capped with a 75 Ohm terminal resistor.
>Any inputs not used may not be capped with a terminal resistor.
>The
5
