www.ti.com | Basic Operating |
3.2Basic Operating Set-Up—Windows XP
This section reviews how to set up the
When the installation is complete, the EVM software is ready to use.
3.2.1 Basic Setup Before Evaluation
Follow these steps to set up the
Step 1. Connect the USB connector of the
After the EVM is connected to the PC, the standard Windows XP driver installs automatically to the PC. A custom driver for the
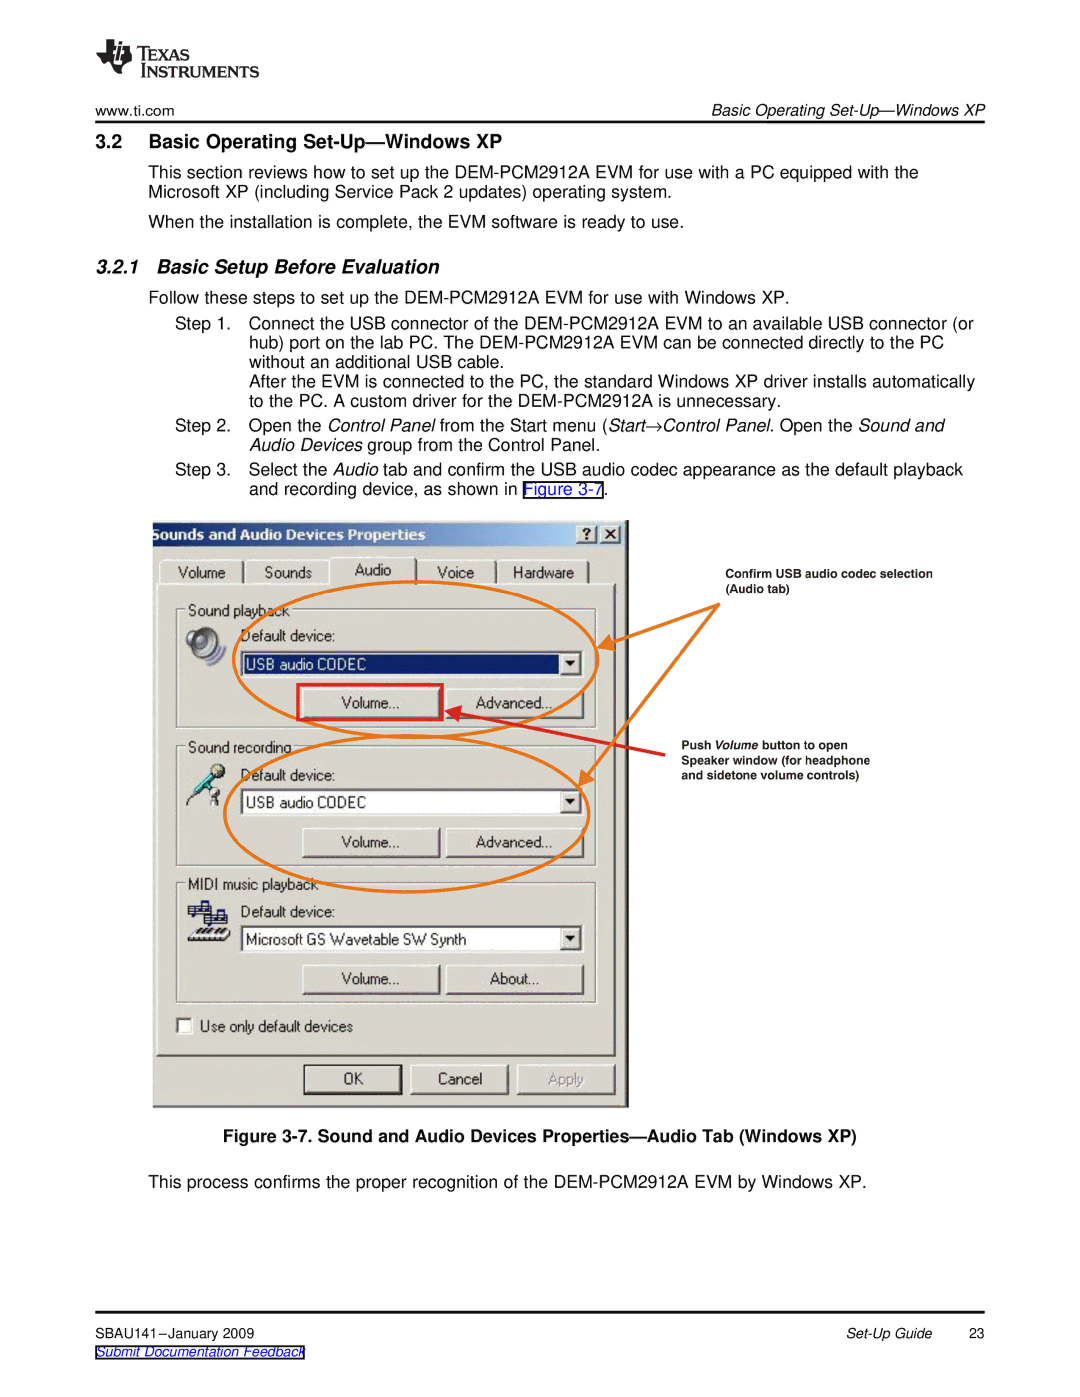
Step 2. Open the Control Panel from the Start menu (Start→Control Panel. Open the Sound and Audio Devices group from the Control Panel.
Step 3. Select the Audio tab and confirm the USB audio codec appearance as the default playback and recording device, as shown in Figure
Figure 3-7. Sound and Audio Devices Properties—Audio Tab (Windows XP)
This process confirms the proper recognition of the
23 |