FOR HVAC INSTALLER ONLY
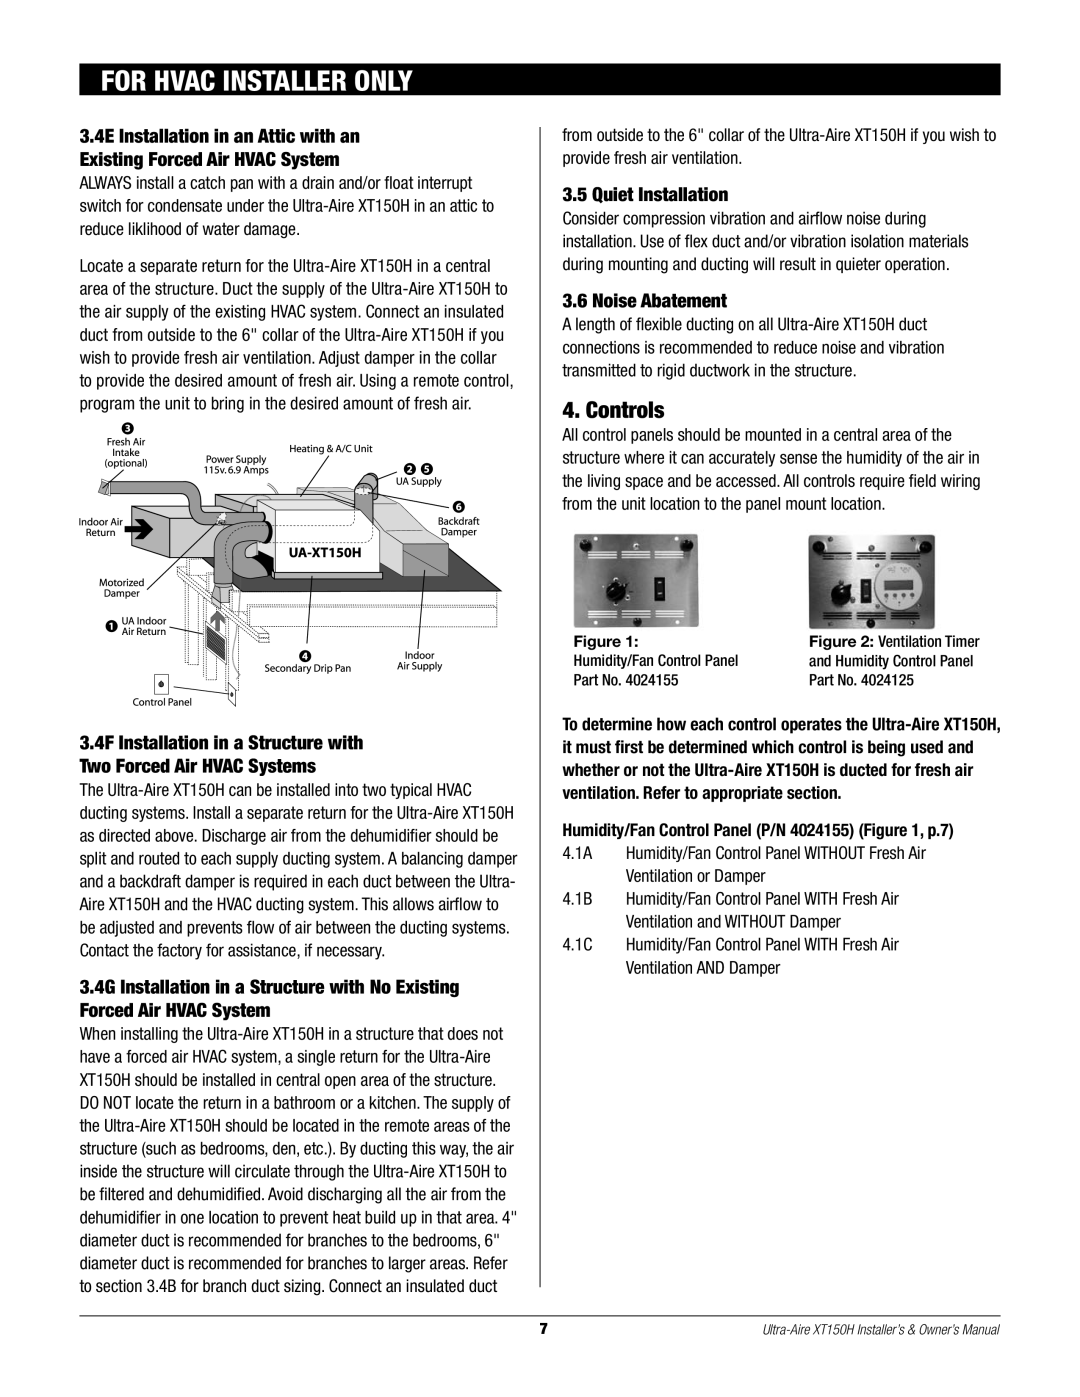
3.4E Installation in an Attic with an Existing Forced Air HVAC System
ALWAYS install a catch pan with a drain and/or float interrupt switch for condensate under the Ultra-Aire XT150H in an attic to reduce liklihood of water damage.
Locate a separate return for the Ultra-Aire XT150H in a central area of the structure. Duct the supply of the Ultra-Aire XT150H to the air supply of the existing HVAC system. Connect an insulated duct from outside to the 6" collar of the Ultra-Aire XT150H if you wish to provide fresh air ventilation. Adjust damper in the collar to provide the desired amount of fresh air. Using a remote control, program the unit to bring in the desired amount of fresh air.
3.4F Installation in a Structure with Two Forced Air HVAC Systems
The Ultra-Aire XT150H can be installed into two typical HVAC ducting systems. Install a separate return for the Ultra-Aire XT150H as directed above. Discharge air from the dehumidifier should be split and routed to each supply ducting system. A balancing damper and a backdraft damper is required in each duct between the Ultra- Aire XT150H and the HVAC ducting system. This allows airflow to be adjusted and prevents flow of air between the ducting systems. Contact the factory for assistance, if necessary.
3.4G Installation in a Structure with No Existing Forced Air HVAC System
When installing the Ultra-Aire XT150H in a structure that does not have a forced air HVAC system, a single return for the Ultra-Aire XT150H should be installed in central open area of the structure. DO NOT locate the return in a bathroom or a kitchen. The supply of the Ultra-Aire XT150H should be located in the remote areas of the structure (such as bedrooms, den, etc.). By ducting this way, the air inside the structure will circulate through the Ultra-Aire XT150H to be filtered and dehumidified. Avoid discharging all the air from the dehumidifier in one location to prevent heat build up in that area. 4" diameter duct is recommended for branches to the bedrooms, 6" diameter duct is recommended for branches to larger areas. Refer to section 3.4B for branch duct sizing. Connect an insulated duct
from outside to the 6" collar of the Ultra-Aire XT150H if you wish to provide fresh air ventilation.
3.5 Quiet Installation
Consider compression vibration and airflow noise during installation. Use of flex duct and/or vibration isolation materials during mounting and ducting will result in quieter operation.
3.6 Noise Abatement
A length of flexible ducting on all Ultra-Aire XT150H duct connections is recommended to reduce noise and vibration transmitted to rigid ductwork in the structure.
4. Controls
All control panels should be mounted in a central area of the structure where it can accurately sense the humidity of the air in the living space and be accessed. All controls require field wiring from the unit location to the panel mount location.
| |
Figure 1: | Figure 2: Ventilation Timer |
Humidity/Fan Control Panel | and Humidity Control Panel |
Part No. 4024155 | Part No. 4024125 |
| |
To determine how each control operates the Ultra-Aire XT150H, it must first be determined which control is being used and whether or not the Ultra-Aire XT150H is ducted for fresh air ventilation. Refer to appropriate section.
Humidity/Fan Control Panel (P/N 4024155) (Figure 1, p.7)
4.1A Humidity/Fan Control Panel WITHOUT Fresh Air Ventilation or Damper
4.1B Humidity/Fan Control Panel WITH Fresh Air
Ventilation and WITHOUT Damper
4.1C Humidity/Fan Control Panel WITH Fresh Air Ventilation AND Damper