three or four studs as available. Countersink the heads to pre- vent interference with the hood.
8.On the wood bracket mark the locations used to hang the hood according to Figure 7.
9.Drill a 1/8” tap hole through the wooden bracket and drywall. These screws do not need to go into the studs.
10.Screw 2 (4.2mm x 18 mm) | J | ||
screws into the wood bracket | |||
| |||
leaving 1/4” of the screw ex- |
| ||
posed for hanging the hood. | I | ||
|
| ||
11.Discharge Direction: Horizon- |
| ||
tal discharge | requires a wall |
| |
cutout, as shown in Figure 1 of |
| ||
this manual, to provide clear- |
| ||
ance for the transition. The |
| ||
location of the cutout is deter- | K | ||
mined by the hood installation |
| ||
height. |
| Figure 8 | |
For Vertical | discharge,please | ||
| |||
refer to step 4, Page 10.
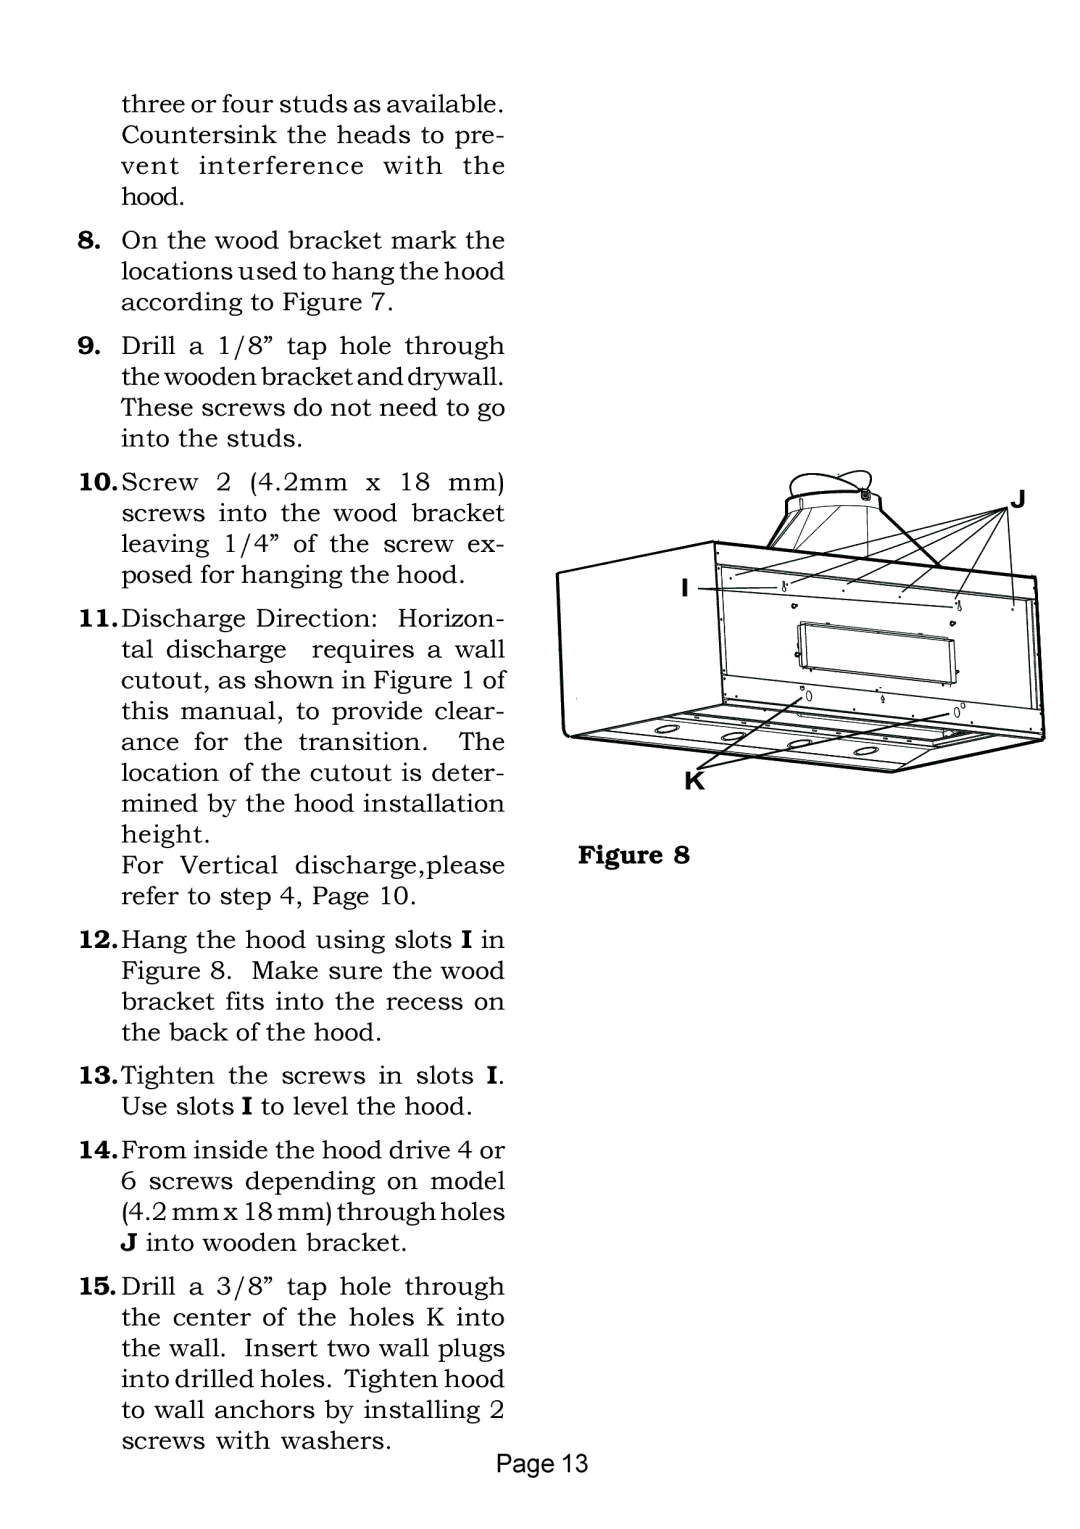
12.Hang the hood using slots I in Figure 8. Make sure the wood bracket fits into the recess on the back of the hood.
13.Tighten the screws in slots I. Use slots I to level the hood.
14.From inside the hood drive 4 or
6 screws depending on model
(4.2 mm x 18 mm) through holes J into wooden bracket.
15.Drill a 3/8” tap hole through the center of the holes K into the wall. Insert two wall plugs into drilled holes. Tighten hood to wall anchors by installing 2 screws with washers.
Page 13