Step 6: Electrical Requirements, Connection & Grounding
A3- or
3-WIRE LEAD CONNECTION
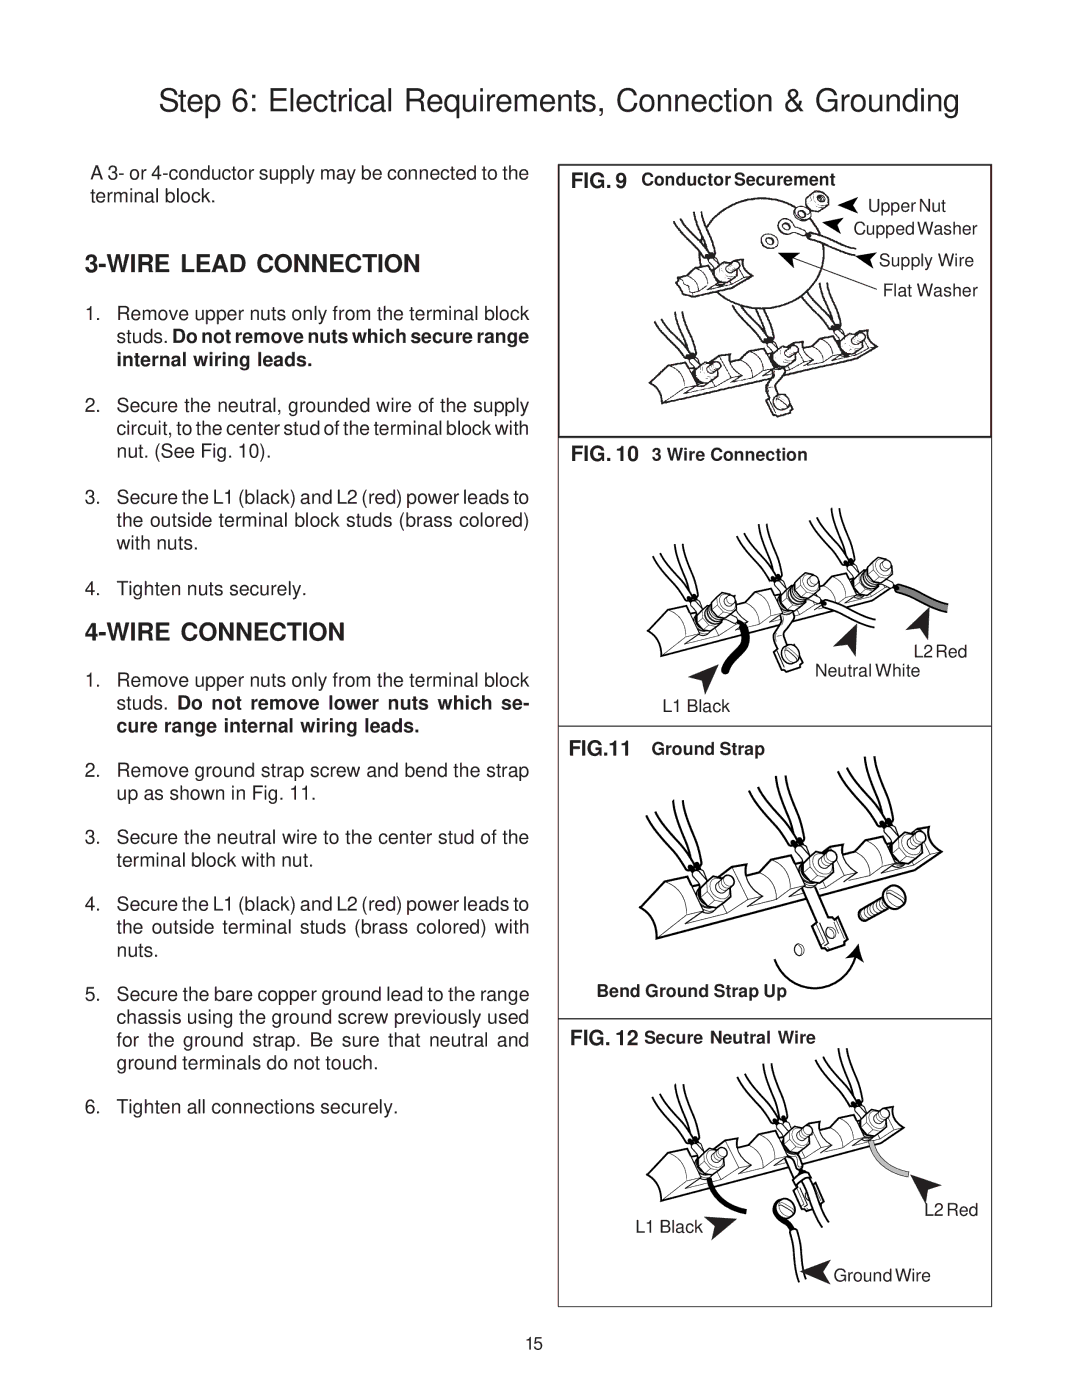
1.Remove upper nuts only from the terminal block studs. Do not remove nuts which secure range internal wiring leads.
2.Secure the neutral, grounded wire of the supply circuit, to the center stud of the terminal block with nut. (See Fig. 10).
3.Secure the L1 (black) and L2 (red) power leads to the outside terminal block studs (brass colored) with nuts.
4.Tighten nuts securely.
4-WIRE CONNECTION
1.Remove upper nuts only from the terminal block studs. Do not remove lower nuts which se- cure range internal wiring leads.
2.Remove ground strap screw and bend the strap up as shown in Fig. 11.
3.Secure the neutral wire to the center stud of the terminal block with nut.
4.Secure the L1 (black) and L2 (red) power leads to the outside terminal studs (brass colored) with nuts.
5.Secure the bare copper ground lead to the range chassis using the ground screw previously used for the ground strap. Be sure that neutral and ground terminals do not touch.
6.Tighten all connections securely.
FIG. 9 Conductor Securement
| ➤ Upper Nut |
| ➤ Cupped Washer |
➤ | ➤Supply Wire |
| Flat Washer |
FIG. 10 3 Wire Connection
| ➤ | ➤ | |
➤ | L2 Red | ||
| |||
Neutral White | |||
| |||
L1 Black
FIG.11 Ground Strap
Bend Ground Strap Up
FIG. 12 Secure Neutral Wire
| ➤ |
L1 Black➤ | L2 Red |
| |
| ➤ |
| Ground Wire |
15
