26HLV66 32HLV66 37HLV66
Trademark Information
Part
Important notes about your LCD TV/DVD combination
About this Guide DVD player section
Contents
Troubleshooting
Welcome to Toshiba
Features of your new TV
Introduction
Introduction
ColorStream HD-1, ColorStream HD-2, HDMI, PC
TV front and side panel controls and connections
Blue and Yellow LEDs
Thinc system Toshiba Home Interactive Network Connection
TV back panel connections
ColorStream HD-1 and ColorStream HD-2
Remote control effective range
Using the remote control
Preparing the remote control for use
Installing the remote control batteries
Eject Chapter
TheaterWide 1/2/3, and Full
REC, SLOW, ANGLE, SUB TITLE, AUDIO,
DVD player or HTIB, set the Mode Select switch to
Using the remote control to control your other devices
To use your TV remote control to operate a
VCR, set the Mode Select switch to VCR
VCR AUX
Remote Control functional key chart
Programming the remote control to control your other devices
DVD/VCR Combo
Cable converter box
Satellite receiver
TV/VCR Combo
Htib
Icon Option
Menu layout and navigation
Main menu layout
Thinc menu layout
Setup/Installation menu layout
Setup menu
Installation
To select the menu language
Setting up your TV
To configure the ANT input source
Selecting the menu language
To add or delete channels in the channel memory
Programming channels automatically
Manually adding and deleting channels in the channel memory
To program channels automatically
Programming your favorite channels
Viewing the digital signal meter
Setting the Hdmi audio mode
Viewing the system status
Reset Factory Defaults
To select the video input source to view
Using the TV’s features
Selecting the video input source to view
Labeling the video input sources
Input labeling example
Tuning channels
Tuning channels using Channel Browser
To set up the Channel Browser
Elements of the Channel Browser banner
Switching between two channels using SurfLock
Tuning your favorite channels
Tuning to a specific channel programmed or unprogrammed
Switching between two channels using Channel Return
TheaterWide 1 picture size for 43 format programs
Selecting the picture size
To select the picture size
Natural picture size
Full picture size for 169 480i, 480p source programs only
To set the scroll settings
Signal source Selected when Auto Aspect is On
To turn on the auto aspect ratio feature
To turn off the auto aspect ratio feature
To set the Cinema Mode to Video
To select the picture mode
Adjusting the picture
Selecting the picture mode
Adjusting the picture quality
To customize the closed captions
Using the closed caption mode
Closed Caption Advanced
To view captions or text
Muting the sound
Adjusting the audio
Using the digital audio selector
Digital closed captions
To listen to stereo sound
Adjusting the audio quality
To adjust the audio quality
Selecting stereo/SAP broadcasts
Entering the PIN code
Using the Locks menu
Using the StableSound feature
Blocking TV programs and movies by rating V-Chip
When the correct PIN code is entered, the Locks menu opens
If you cannot remember your PIN code
Changing your PIN code
To download the additional rating system if available
Blocking TV programs and movies by additional ratings
Unlocking programs temporarily
Blocking channels
To lock the control panel
Using the input lock feature
Using the control panel lock feature
To lock/unlock the video inputs
To set the PC Audio
Using the PC setting feature
To adjust the PC settings
PC Audio
Setting the sleep timer
Understanding the last mode memory feature
Understanding the auto power off feature
Using Mpeg noise reduction
Using the TV’s advanced features
Using the advanced picture settings features
Using dynamic contrast
To turn on Game Mode
Selecting the color temperature
Using the Game Mode feature
To select the color temperature
On or Off
Using the advanced audio settings features
Using the SRS WOW surround sound feature
To adjust the WOW settings
To set up the network address
Using the Thinc home network feature
Connecting the TV to your home network
Automatically setting up the network address
Either… Highlight OK and press T
Manually setting up the network address
Basic Network Setup menu appears
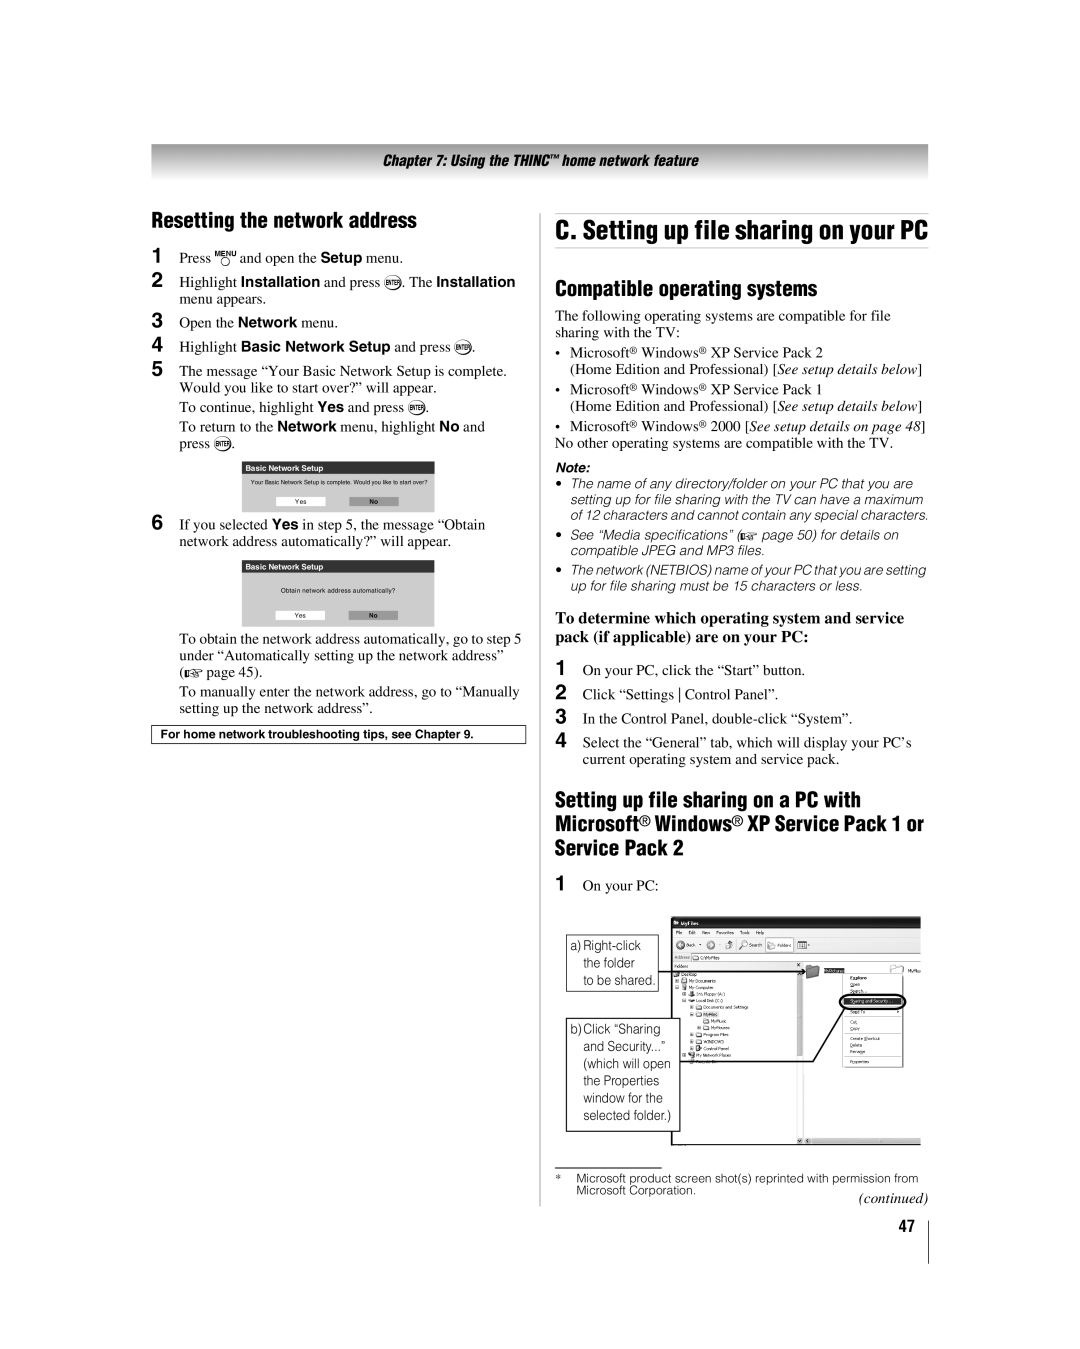
On your PC
Resetting the network address
Service Pack
Compatible operating systems
Permissions window for the selected folder
Go to section D, Setting up file sharing on the TV
Microsoft Windows
Properties window for the selected folder
Properties window
Setting up file sharing on the TV
Picture Viewer/JPEG file specifications
About the Software Upgrade feature
Media specifications
File/folder name specifications
Accessing Jpeg files stored on a networked PC
Using the Picture Viewer
Audio Player/MP3 file specifications
Networked PC specifications
To set the slide show interval
To view your Jpeg files in Native Resolution mode
Viewing Jpeg files on the TV
During the slide show
To use the mute function
Using the Audio Player
Accessing MP3 files stored on a networked PC
Playing MP3 audio files on the TV
Basic playback DVD VCD CD
DVD Playback
Playing a disc
To stop playback
To start playback in the stop mode
To pause playback still mode
About
Changing angles DVD
Playing frame by frame DVD VCD
Playing in slow motion DVD VCD
Locating a chapter or track DVD VCD CD
Case of Video CD playback
Title selection DVD
Changing soundtrack language
Subtitles DVD
MP3 CD playback CD
Disc status DVD VCD CD
MP3/JPEG CD operation
MP3/JPEG CD information VCD
About the file menu
Jpeg CD playback CD
General troubleshooting
Troubleshooting
Closed caption problems
Sound problems
Remote control problems
Channel tuning problems
Router, you must manually set up the network address
Home network troubleshooting
Picture Viewer problems
Basic network setup problems
Home server setup problems
DVD Troubleshooting
LED indications
LED Indication Condition Solution
Appendix
Specifications
For LCD TV/DVD Combinations 26 and Larger
Limited United States Warranty
For LCD TV/DVD Combination
Limited Canada Warranty
Appendix
DVD
Index
Page
Page
Page
Page
06-07

