Before use
1
2
3
4
CONTENTS | 14 |
|
|
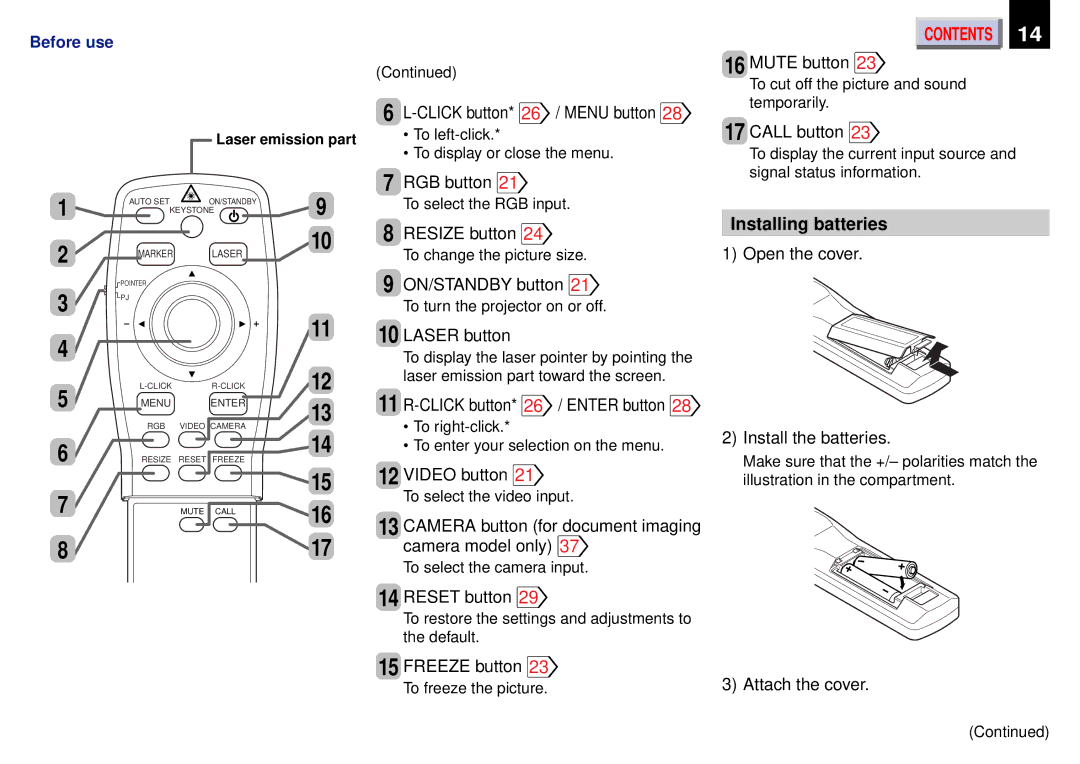
| (Continued) | 16 MUTE button 23 | |
|
|
|
|
| To cut off the picture and sound |
|
|
| 6 | temporarily. | |
|
|
| 17 CALL button 23 | ||
| Laser emission part |
| • To | ||
|
|
|
| • To display or close the menu. | To display the current input source and |
|
|
| 7 | RGB button 21 | signal status information. |
|
| 9 |
| ||
KEYSTONE |
| To select the RGB input. |
| ||
AUTO SET | ON/STANDBY |
|
|
|
|
|
| 10 | 8 | RESIZE button 24 | Installing batteries |
|
| 1) Open the cover. | |||
MARKER | LASER |
| To change the picture size. | ||
|
| ||||
POINTER |
|
| 9 ON/STANDBY button 21 |
| |
|
|
|
|
| |
PJ |
|
|
| To turn the projector on or off. |
|
|
| 11 |
|
| |
|
| 10 LASER button |
| ||
5
6
7
8
MENU ENTER
RGB VIDEO CAMERA
RESIZE RESET FREEZE
MUTE CALL
| To display the laser pointer by pointing the |
12 | laser emission part toward the screen. |
|
1311 ![]() / ENTER button 28
/ ENTER button 28![]()
•To
14• To enter your selection on the menu.
1512 VIDEO button 21![]()
To select the video input.
1613 CAMERA button (for document imaging
17camera model only) 37![]()
To select the camera input.
2)Install the batteries.
Make sure that the +/– polarities match the illustration in the compartment.
14 RESET button 29![]()
To restore the settings and adjustments to the default.
15 FREEZE button 23![]()
To freeze the picture. | 3) Attach the cover. |
(Continued)