FM/AM aerial connections
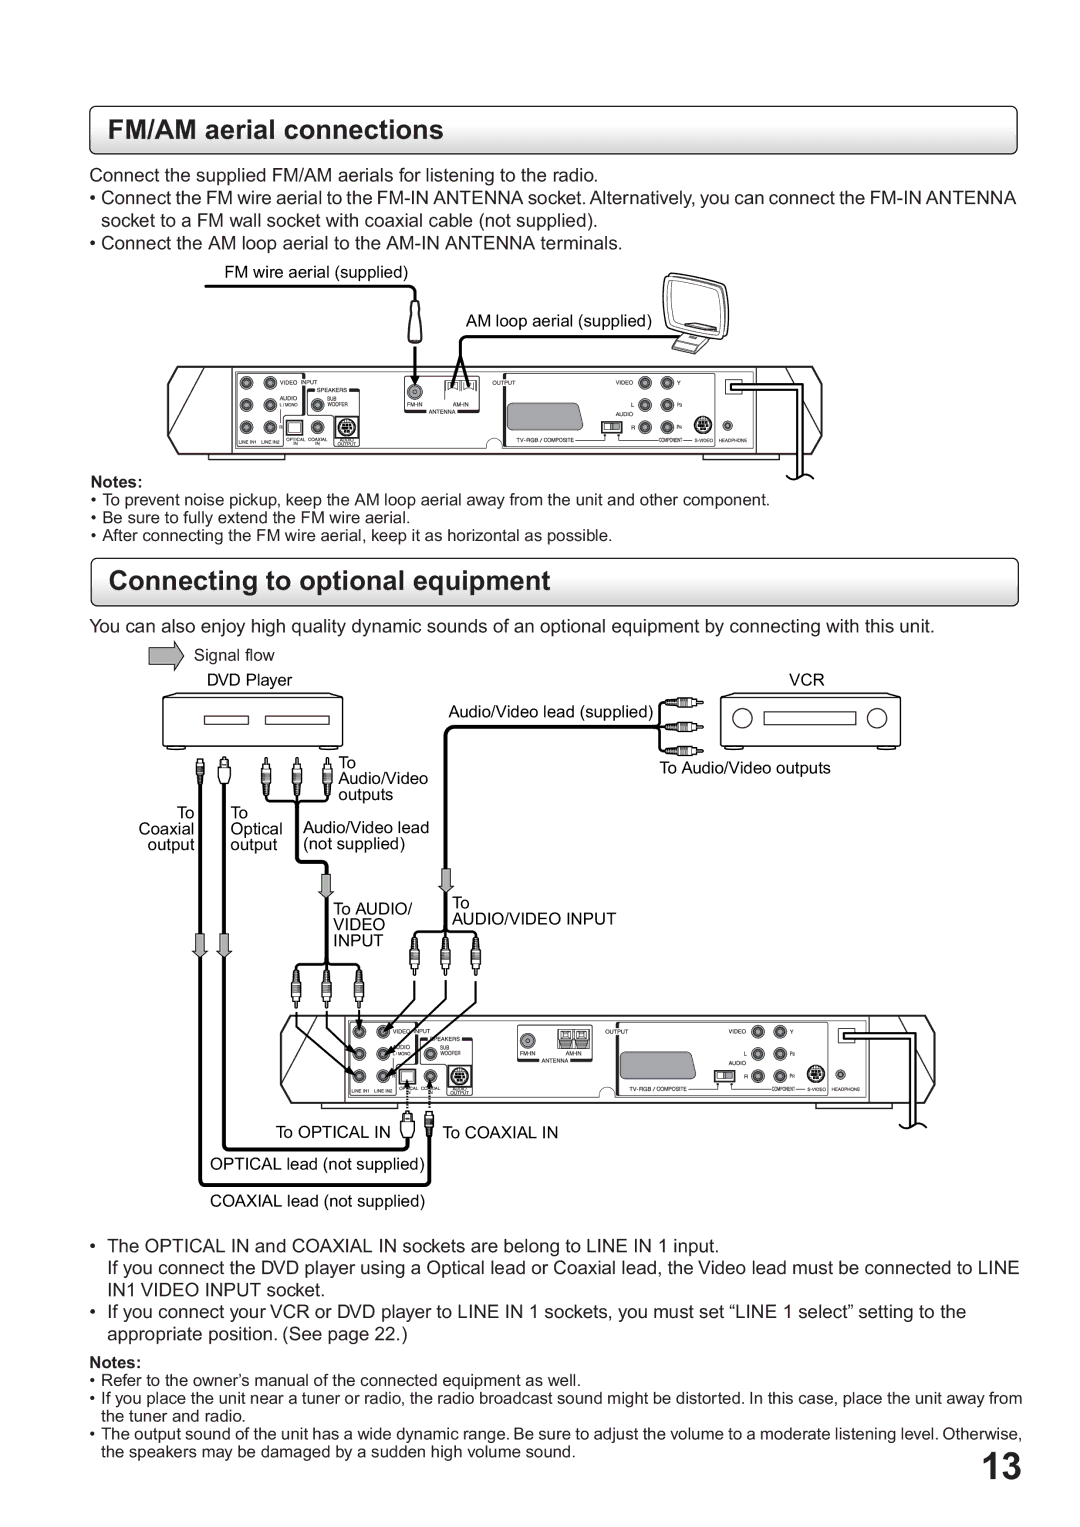
Connect the supplied FM/AM aerials for listening to the radio.
•Connect the FM wire aerial to the
•Connect the AM loop aerial to the
FM wire aerial (supplied)
AM loop aerial (supplied)
Notes:
•To prevent noise pickup, keep the AM loop aerial away from the unit and other component.
•Be sure to fully extend the FM wire aerial.
•After connecting the FM wire aerial, keep it as horizontal as possible.
Connecting to optional equipment
You can also enjoy high quality dynamic sounds of an optional equipment by connecting with this unit.
Signal flow |
|
DVD Player | VCR |
Audio/Video lead (supplied)![]()
![]() To
To
![]() Audio/Video
Audio/Video
![]() outputs
outputs
To | To | Audio/Video lead |
Coaxial | Optical | |
output | output | (not supplied) |
To AUDIO/
VIDEO
INPUT
To Audio/Video outputs
To
AUDIO/VIDEO INPUT
To OPTICAL IN ![]()
![]() To COAXIAL IN
To COAXIAL IN
OPTICAL lead (not supplied)
COAXIAL lead (not supplied)
•The OPTICAL IN and COAXIAL IN sockets are belong to LINE IN 1 input.
If you connect the DVD player using a Optical lead or Coaxial lead, the Video lead must be connected to LINE IN1 VIDEO INPUT socket.
•If you connect your VCR or DVD player to LINE IN 1 sockets, you must set “LINE 1 select” setting to the appropriate position. (See page 22.)
Notes:
• Refer to the owner’s manual of the connected equipment as well.
• If you place the unit near a tuner or radio, the radio broadcast sound might be distorted. In this case, place the unit away from the tuner and radio.
• The output sound of the unit has a wide dynamic range. Be sure to adjust the volume to a moderate listening level. Otherwise,
the speakers may be damaged by a sudden high volume sound.
13
