1.Remove computer cover and faceplate if required (refer to your computer system’s manual for removal information).
2.If the CD-RW/DVD-ROM is replacing a CD-ROM, disconnect all connectors and remove the CD-ROM presently installed in your system.
3.Your Toshiba CD-RW/DVD-ROM can be placed in any free half-height drive slot at the front of your computer. (It can be mounted horizontally or vertically.)
4.Carefully start sliding the CD-RW/DVD-ROM into the opening with the disc tray facing the front of the computer. Before you push the drive all the way in you will need to connect the IDE BUS cable, audio cable and the power cable to the back of the drive.
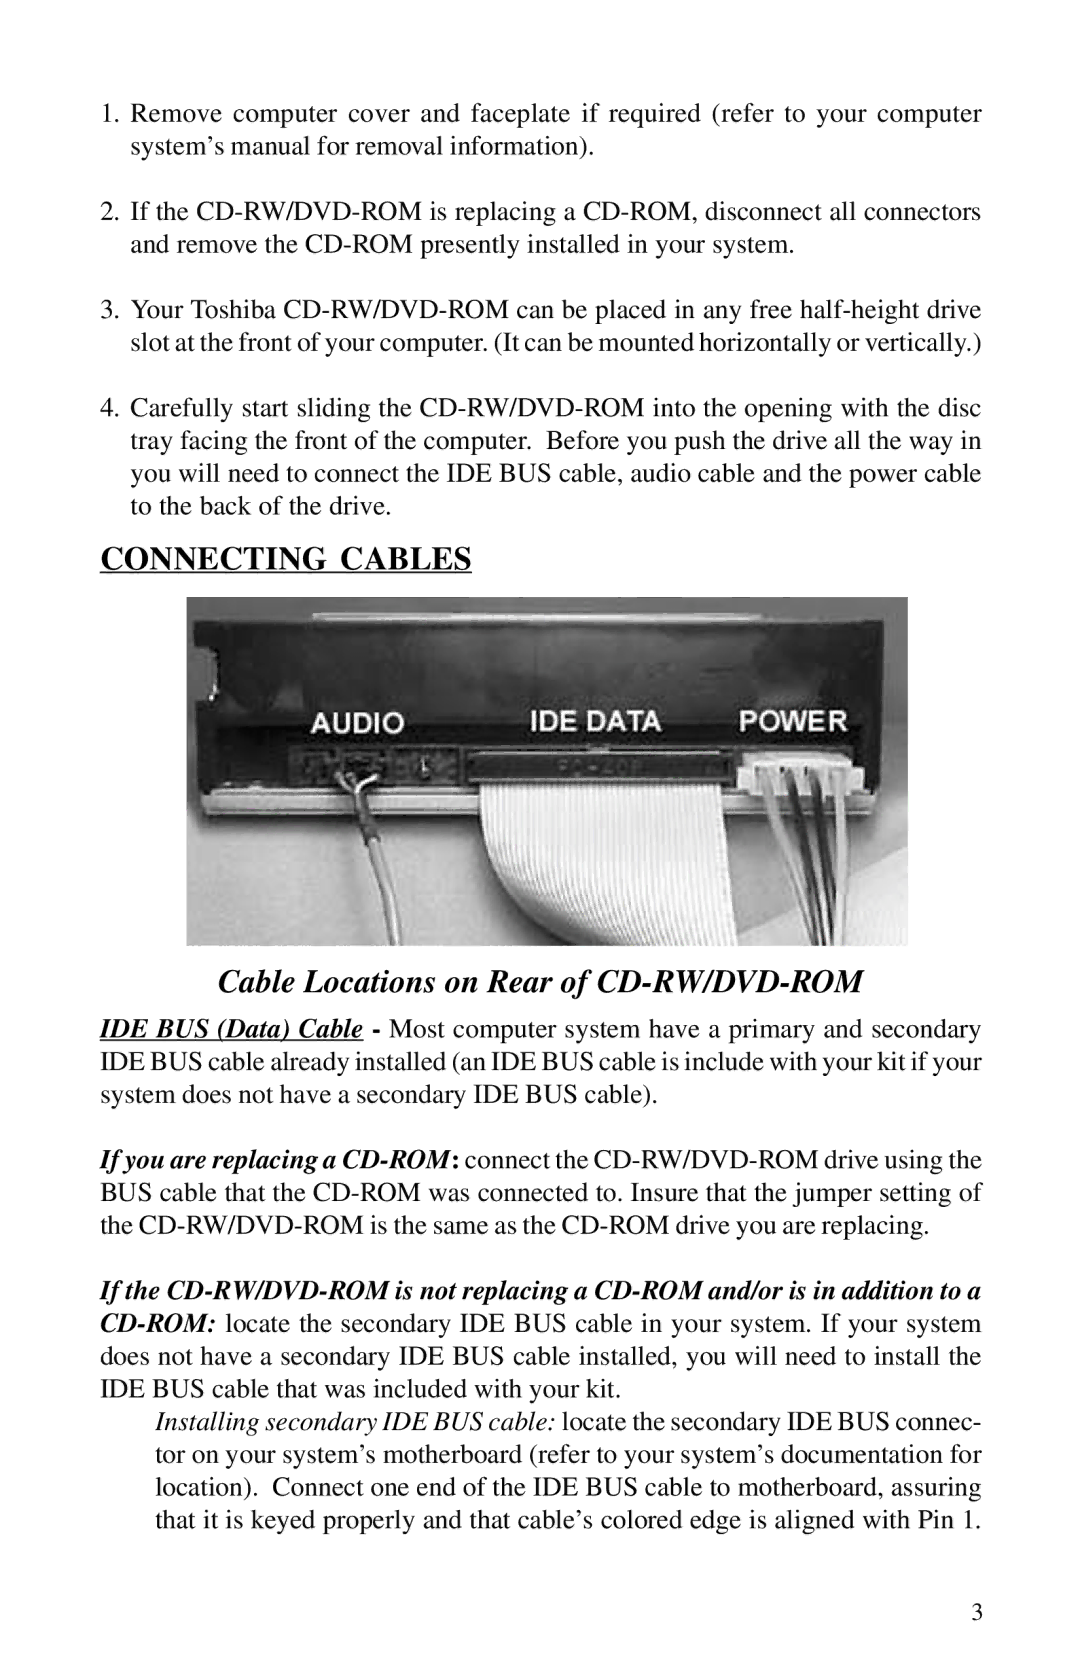
CONNECTING CABLES
Cable Locations on Rear of CD-RW/DVD-ROM
IDE BUS (Data) Cable - Most computer system have a primary and secondary IDE BUS cable already installed (an IDE BUS cable is include with your kit if your system does not have a secondary IDE BUS cable).
If you are replacing a CD-ROM:connect the CD-RW/DVD-ROM drive using the BUS cable that the CD-ROM was connected to. Insure that the jumper setting of the CD-RW/DVD-ROM is the same as the CD-ROM drive you are replacing.
If the CD-RW/DVD-ROM is not replacing a CD-ROM and/or is in addition to a
CD-ROM:locate the secondary IDE BUS cable in your system. If your system does not have a secondary IDE BUS cable installed, you will need to install the IDE BUS cable that was included with your kit.
Installing secondary IDE BUS cable: locate the secondary IDE BUS connec- tor on your system’s motherboard (refer to your system’s documentation for location). Connect one end of the IDE BUS cable to motherboard, assuring that it is keyed properly and that cable’s colored edge is aligned with Pin 1.