The following steps must be performed to properly install your DVD Writeable drive.
zSet drive’s jumpers
zConnect audio cable
zAttach IDE BUS cable
zConnect power cable
zMount DVD Writeable Drive
zInstall Nero6 Ultra Edition Software
SETTING JUMPERS
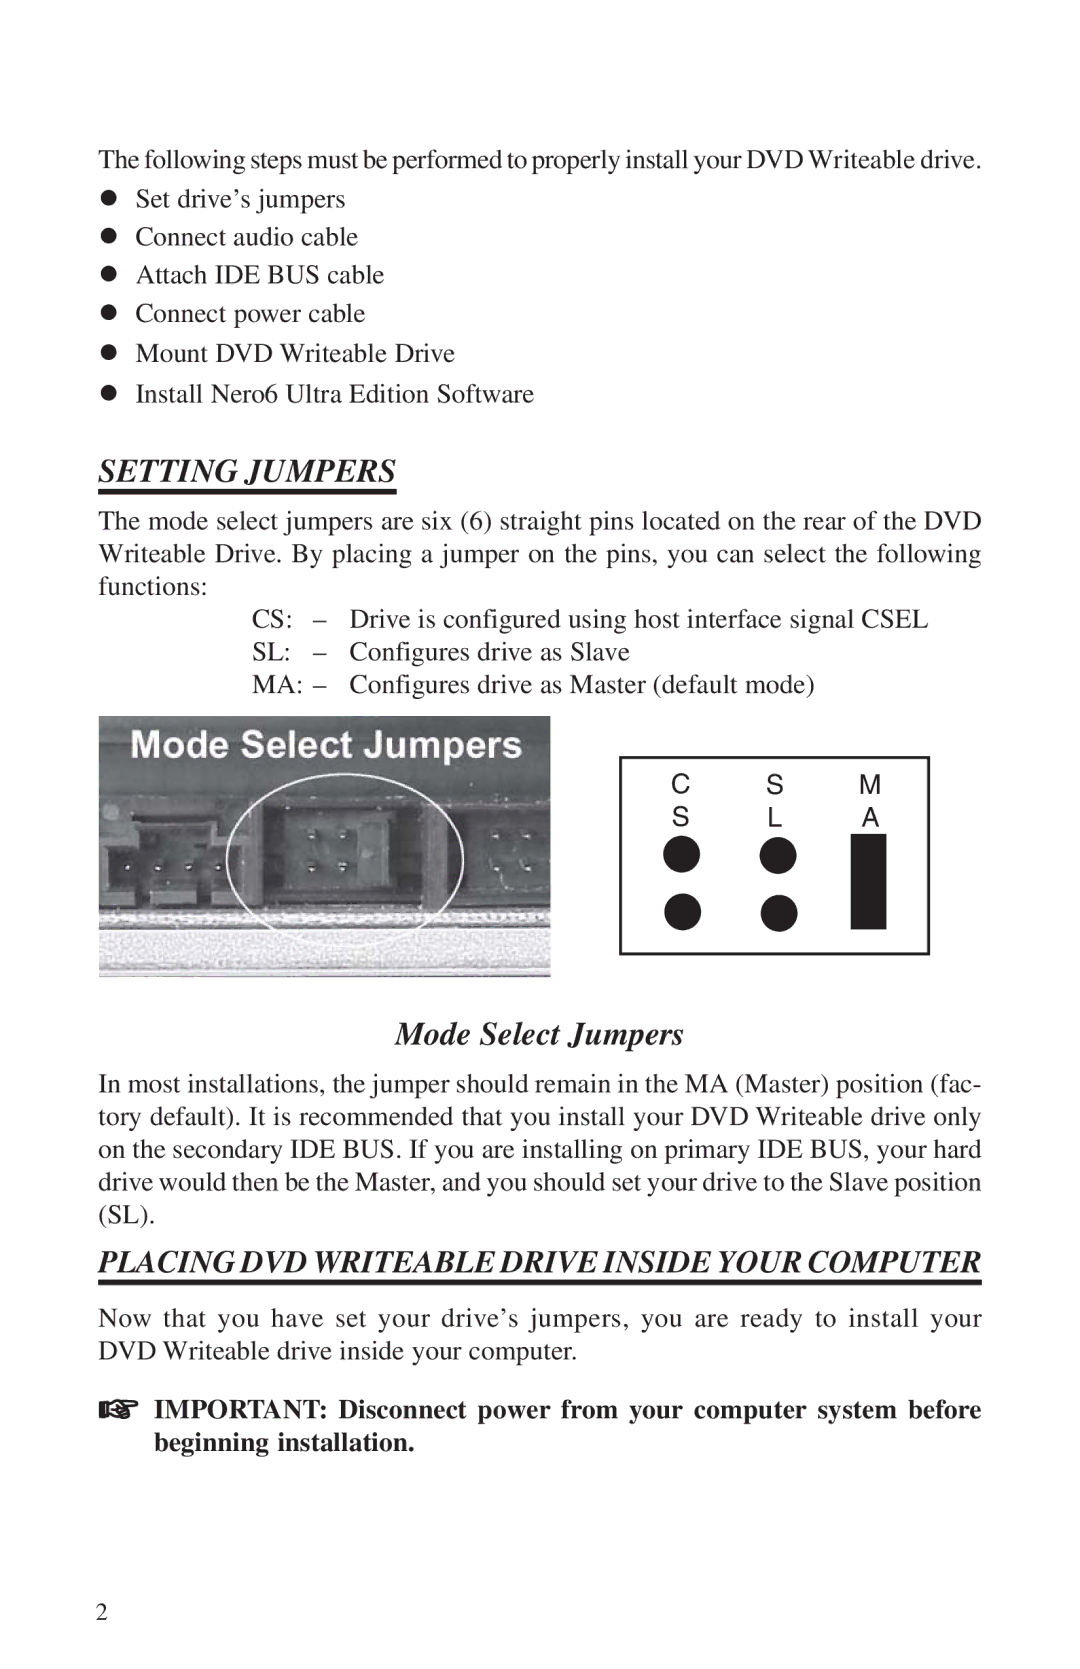
The mode select jumpers are six (6) straight pins located on the rear of the DVD Writeable Drive. By placing a jumper on the pins, you can select the following functions:
CS: – Drive is configured using host interface signal CSEL
SL: – Configures drive as Slave
MA: – Configures drive as Master (default mode)
C S M
S L A
Mode Select Jumpers
In most installations, the jumper should remain in the MA (Master) position (fac- tory default). It is recommended that you install your DVD Writeable drive only on the secondary IDE BUS. If you are installing on primary IDE BUS, your hard drive would then be the Master, and you should set your drive to the Slave position (SL).
PLACING DVD WRITEABLE DRIVE INSIDE YOUR COMPUTER
Now that you have set your drive’s jumpers, you are ready to install your DVD Writeable drive inside your computer.
☞IMPORTANT: Disconnect power from your computer system before beginning installation.
2