Rear Panel
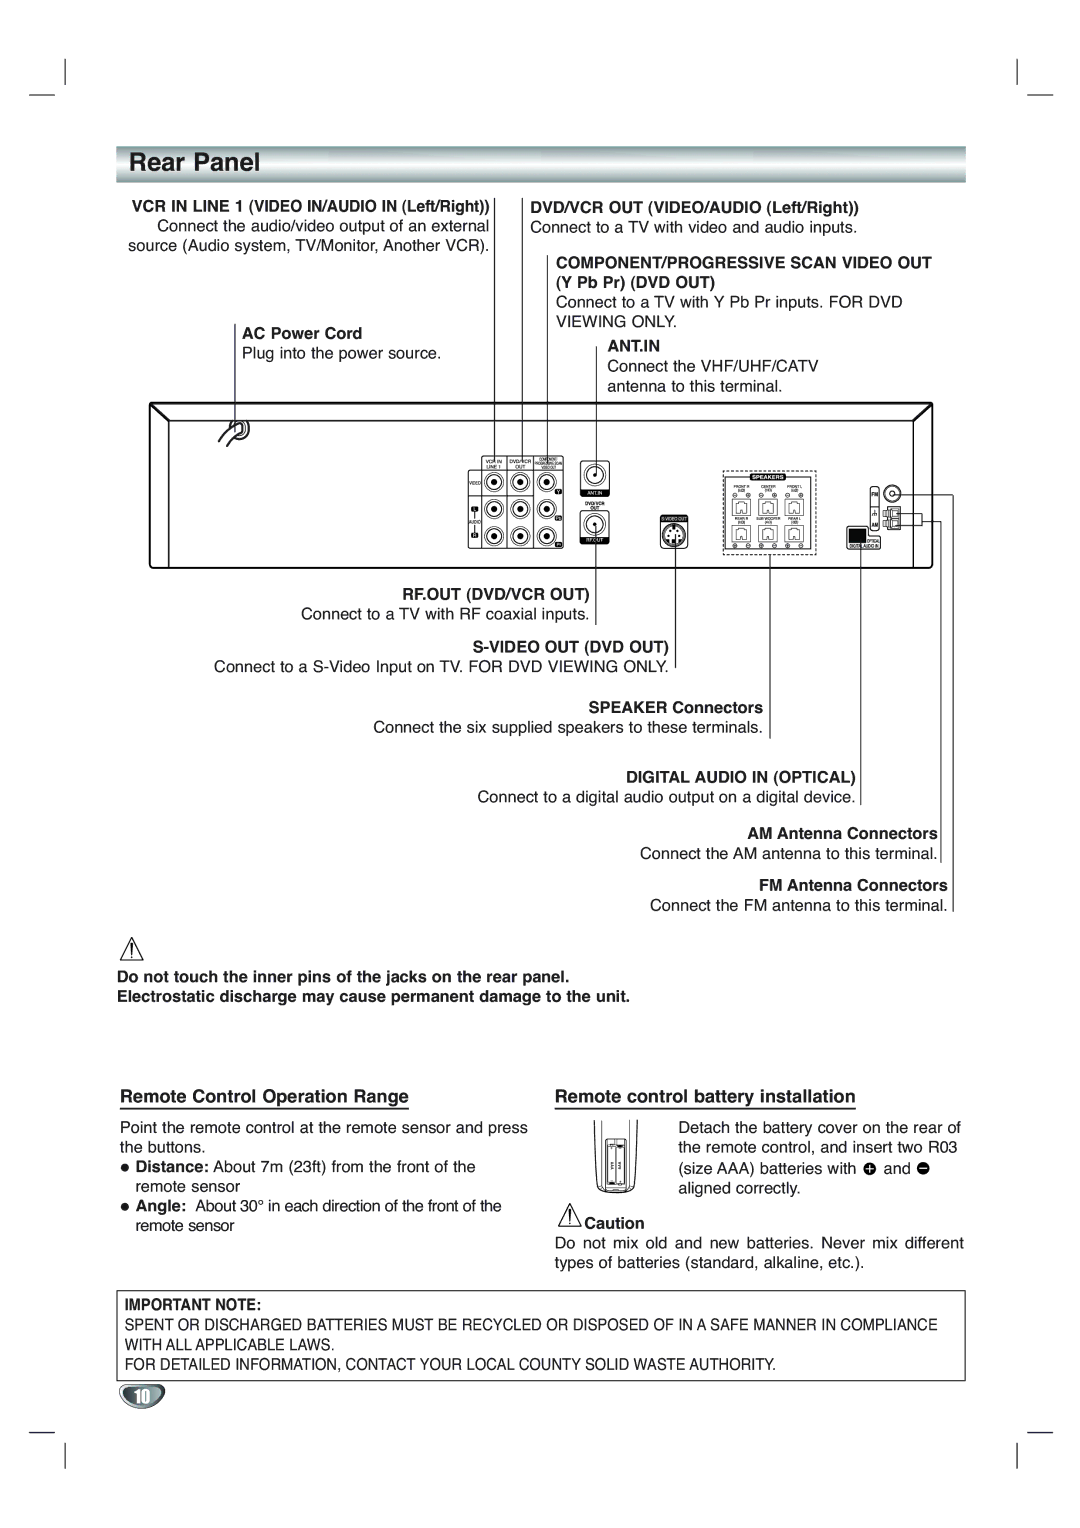
VCR IN LINE 1 (VIDEO IN/AUDIO IN (Left/Right)) Connect the audio/video output of an external source (Audio system, TV/Monitor, Another VCR).
AC Power Cord
Plug into the power source.
DVD/VCR OUT (VIDEO/AUDIO (Left/Right))
Connect to a TV with video and audio inputs.
COMPONENT/PROGRESSIVE SCAN VIDEO OUT (Y Pb Pr) (DVD OUT)
Connect to a TV with Y Pb Pr inputs. FOR DVD VIEWING ONLY.
ANT.IN
Connect the VHF/UHF/CATV antenna to this terminal.
![]() 6
6![]()
![]() 6
6![]()
![]() 6
6![]()
![]() 6
6![]()
![]()
![]()
![]() 6
6![]()
RF.OUT (DVD/VCR OUT)
Connect to a TV with RF coaxial inputs.
S-VIDEO OUT (DVD OUT)
Connect to a
SPEAKER Connectors
Connect the six supplied speakers to these terminals.
DIGITAL AUDIO IN (OPTICAL)
Connect to a digital audio output on a digital device.
AM Antenna Connectors
Connect the AM antenna to this terminal.
FM Antenna Connectors
Connect the FM antenna to this terminal.
Do not touch the inner pins of the jacks on the rear panel.
Electrostatic discharge may cause permanent damage to the unit.
Remote Control Operation Range |
| Remote control battery installation |
Point the remote control at the remote sensor and press the buttons.
Distance: About 7m (23ft) from the front of the remote sensor
Angle: About 30° in each direction of the front of the remote sensor
IMPORTANT NOTE:
| Detach the battery cover on the rear of |
| the remote control, and insert two R03 |
AAA AAA | (size AAA) batteries with and |
| |
| aligned correctly. |
![]() Caution
Caution
Do not mix old and new batteries. Never mix different types of batteries (standard, alkaline, etc.).
SPENT OR DISCHARGED BATTERIES MUST BE RECYCLED OR DISPOSED OF IN A SAFE MANNER IN COMPLIANCE WITH ALL APPLICABLE LAWS.
FOR DETAILED INFORMATION, CONTACT YOUR LOCAL COUNTY SOLID WASTE AUTHORITY.
10