Wireless remote controller kit | Installation Manual |
|
4 HOW TO INSTALL THE SIGNAL RECEIVING UNIT
NOTE
•To avoid malfunction of the remote controller, do not assemble or run remote control wiring together with the power cables, and do not enclose them in the same metal conduit.
•When the power unit induces electrical noise, it is recommended that a noise filter or the like be installed.
For flush mounting into a wall, install the Signal receiving unit in a metal switch box (field supply) that has been recessed into the wall in advance.
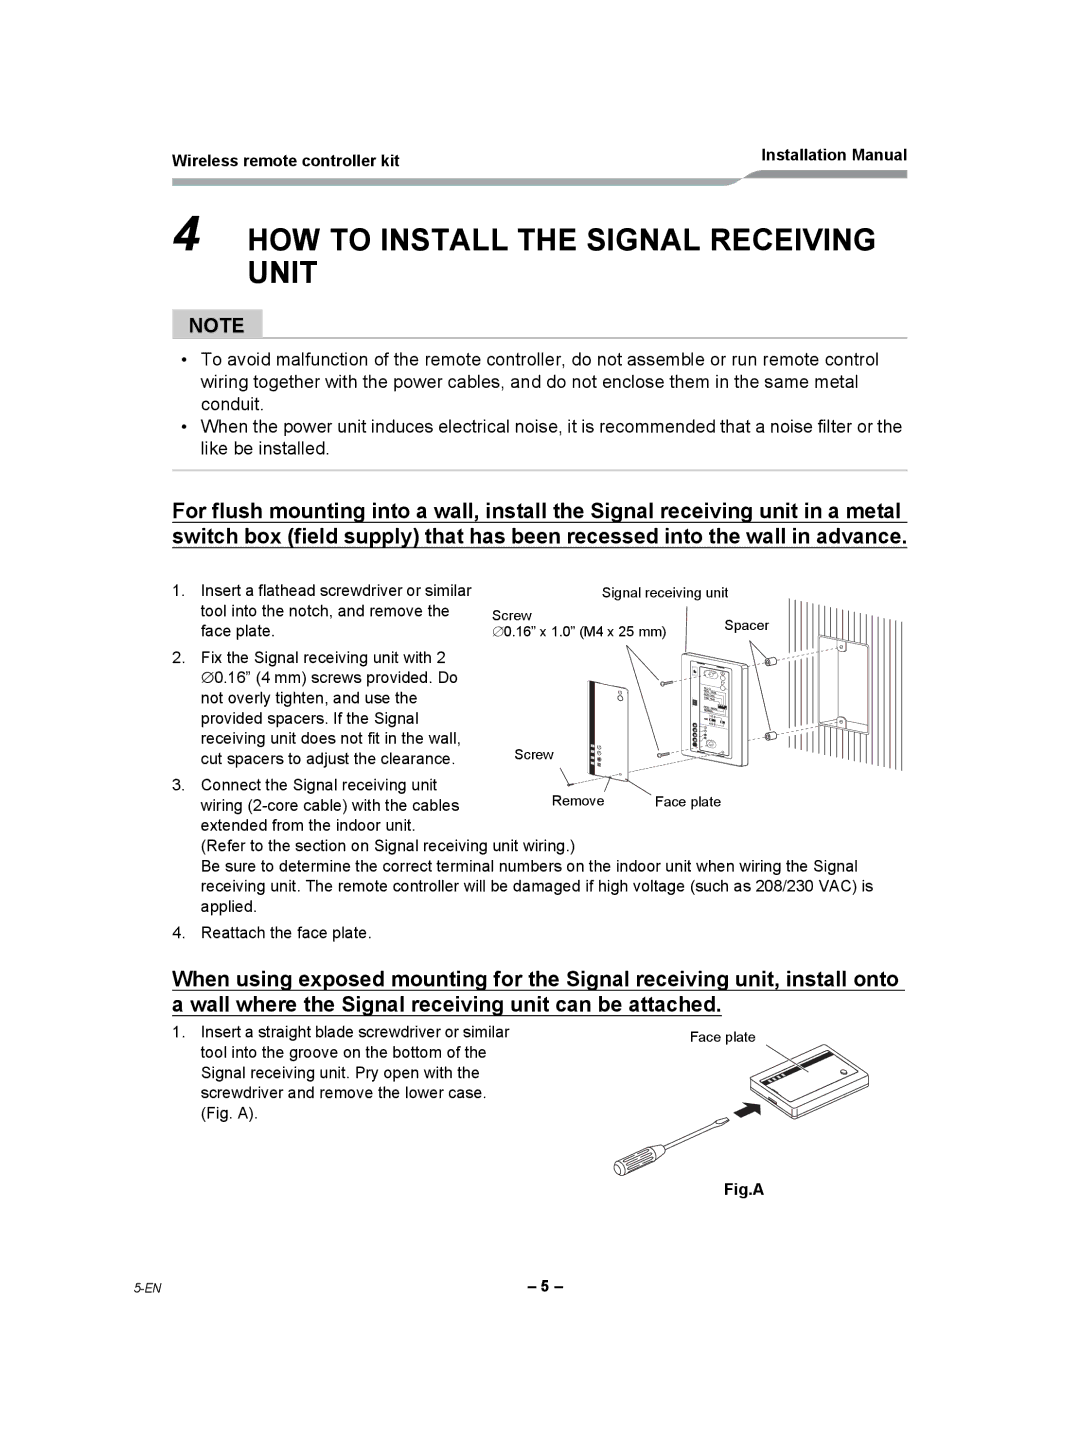
1.Insert a flathead screwdriver or similar tool into the notch, and remove the face plate.
2.Fix the Signal receiving unit with 2 ∅0.16” (4 mm) screws provided. Do not overly tighten, and use the provided spacers. If the Signal receiving unit does not fit in the wall, cut spacers to adjust the clearance.
Signal receiving unit
Screw | Spacer | |
∅0.16” x 1.0” (M4 x 25 mm) | ||
|
1 | 2 | 3 |
4 | 5 | 6 |
Screw
3. Connect the Signal receiving unit | Remove | Face plate |
wiring | ||
extended from the indoor unit. |
|
|
(Refer to the section on Signal receiving unit wiring.)
Be sure to determine the correct terminal numbers on the indoor unit when wiring the Signal receiving unit. The remote controller will be damaged if high voltage (such as 208/230 VAC) is applied.
4. Reattach the face plate.
When using exposed mounting for the Signal receiving unit, install onto a wall where the Signal receiving unit can be attached.
1. Insert a straight blade screwdriver or similar | Face plate |
tool into the groove on the bottom of the |
|
Signal receiving unit. Pry open with the |
|
screwdriver and remove the lower case. |
|
(Fig. A). |
|
| Fig.A |
– 5 – |